
The name name servers (DNS) that we set up in a previous part redirect a domain name to an IP address. For the mail server to work, we need the exact opposite: to redirect an IP address to a domain name. That is called reverse DNS.
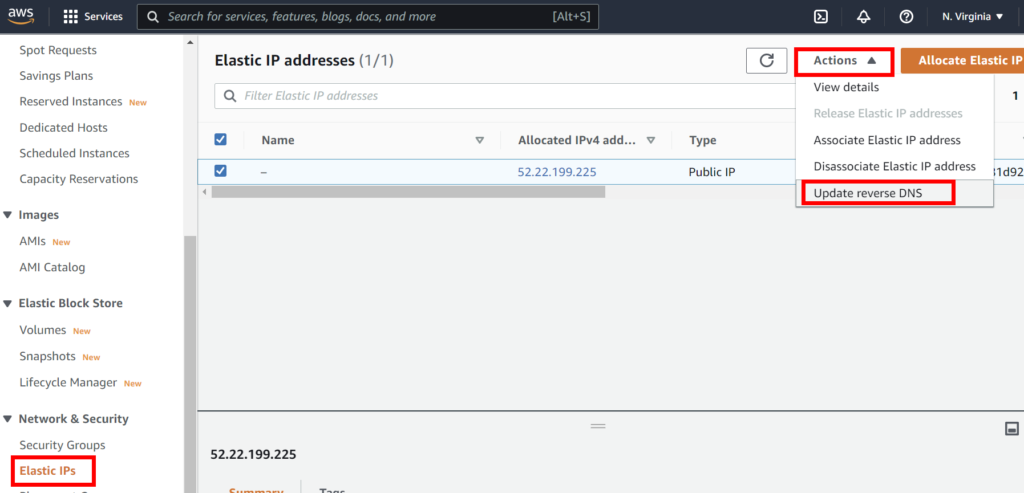
In AWS, go the Elastic IPs page and select the configured IP. In the “Actions” menu, click on “Update reverse DNS”.
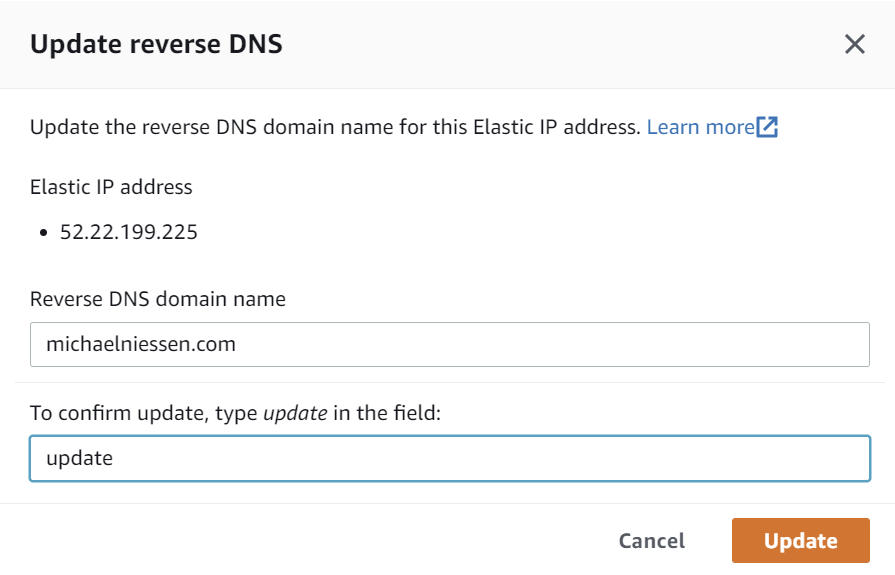
Type your domain name in top field and “update” in the bottom field, then click on “Update”.
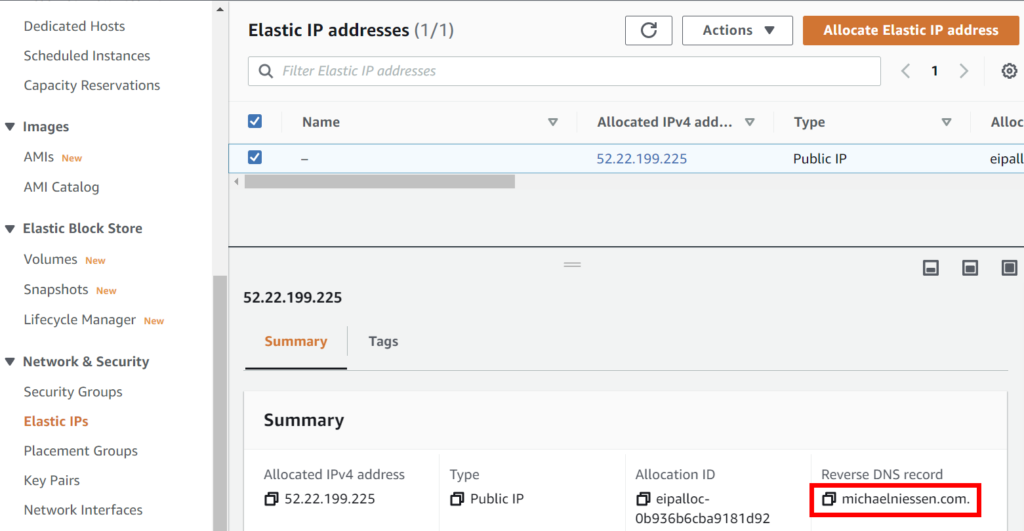
You’ll see the reverse DNS record is shown in the details at the bottom of the screen.
Ask Amazon for permission to send e-mails
The purpose of AWS is not mainly to send e-mails and its flexibility and low cost made it quite popular to spammers. As a consequences, the use of an EC2 instance as a mail server is heavily restricted.
Everything is already configured in AWS, but now you will have to contact Amazon and ask them to allow your instance to send e-mails.
This can be done through the form at https://console.aws.amazon.com/support/contacts?#/rdns-limits
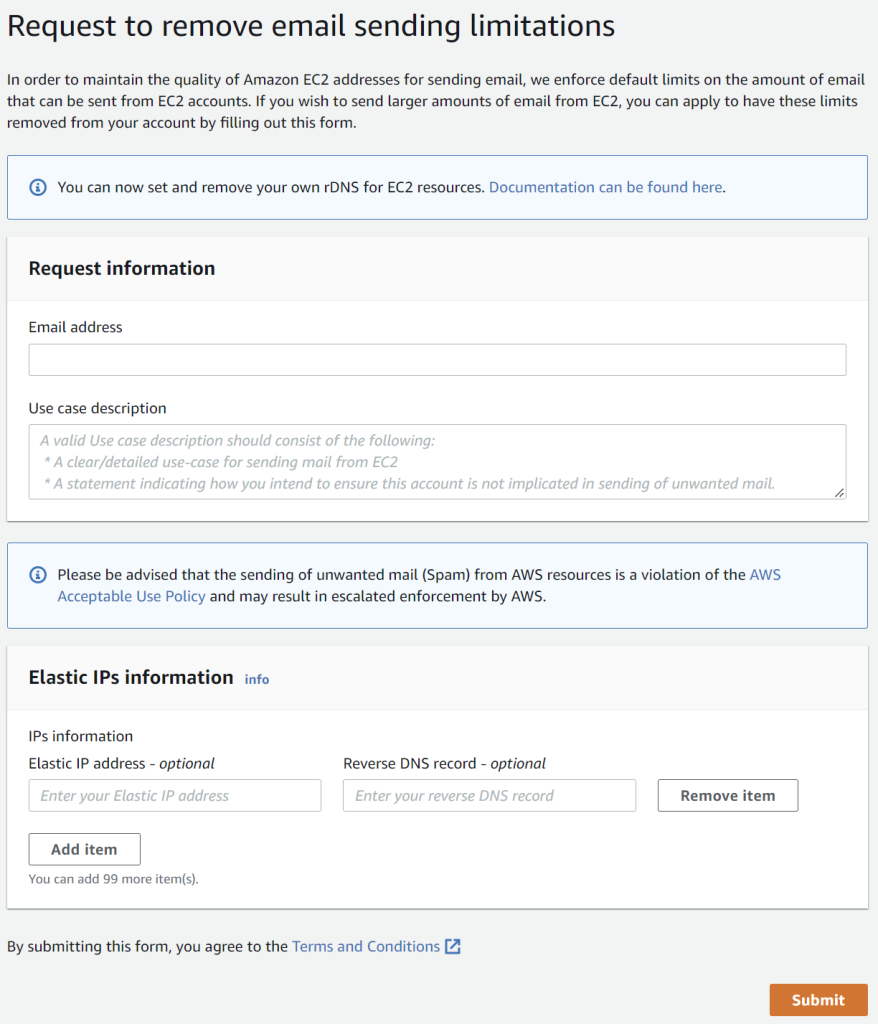
In the “Use case description” field, write something similar to this:
Hi,
I have create an EC2 instance on which I installed a web server to host my [personal/small business] [website/blog].
I'd like to have it act as a small mail server as well for me. I will not use it to send spam or other undesired e-mails and rarely send more than [10/100/...] e-mails per week. In addition, my server control panel has a built-in anti-spam plugin as well as configurable limits to the number of mails that can be sent.
Please allow me to use the ports 25 and 465 (SSL) for outbound connections.
Thanks!
It will probably take at least a few hours before they answer, depending on the time of day and the number of requests they have.
FYI, this sample message combines the initial message I sent and a follow up e-mail after they asked for more details, the first time I requested such access. It should be enough, but it’s possible they will ask for more details about your intended use before accepting your request. If you are not sure how to respond, answer what you can and ask if there are any specific details you can provide. Just answer truthfully and there will be no reason for your request to be rejected.
Follow up e-mails are answered quite fast, so don’t worry, it won’t take days of e-mailing back and forth before you have a final answer.
(FYI, the above sample combines the initial message I sent and a follow up e-mail after they asked for more details, the first time I requested such access.)
Just keep in mind that if you do send an abnormal amount of e-mails, it can be considered spamming and as a result your account can be closed without warning. And I mean not just the ability to send e-mails, but your full AWS account.
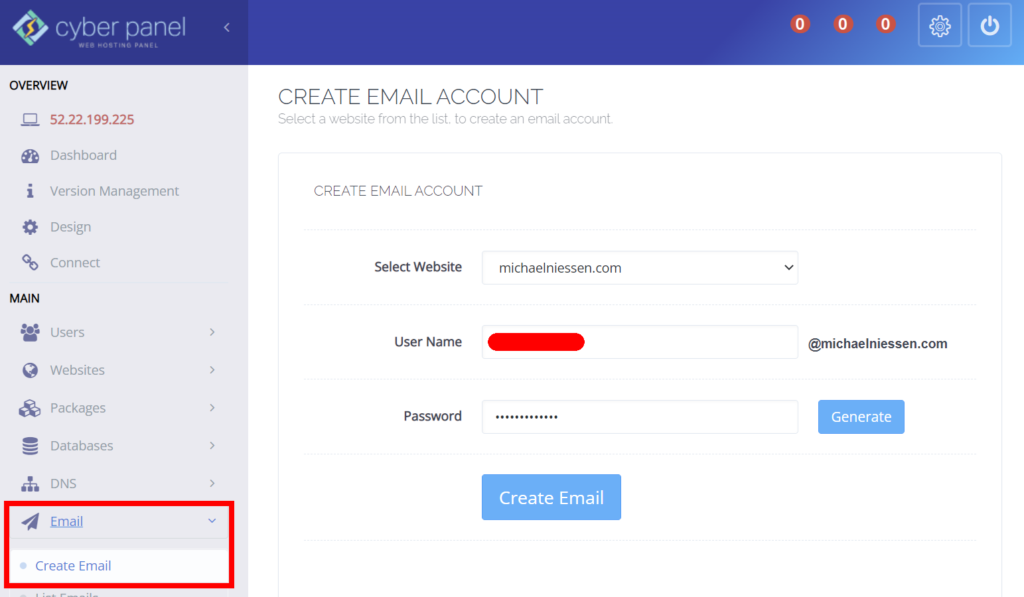
Create e-mail accounts in CyberPanel
Like everything we’ve done in CyberPanel, creating e-mail accounts is very easy. Just go to the “Create Email” page, select the website and type the username and password.
If you see a warning in the “List Emails” page, just click on “Fix now” to resolve the issue. The details to configure e-mail clients such as Outlook as listed on that page.

For the outgoing SMTP server, ports 587 and 465 are listed for SSL. However, in my experience 587 does not work; thus, use 465 when configuring your e-mail client with SSL.
Also, if you configure the e-mail address in a client such as Outlook, set the “Root folder path” to “Inbox” (without the quotes). Otherwise, you might get an error message similar to this one when sending e-mails:
error (0x80040119) The message cannot be saved to your IMAP e-mail account Sent Items folder, because Outlook is offline or the email server doesn’t allow items to be saved to the sent items folder’.
Confirm that the e-mail are not recognized as spam
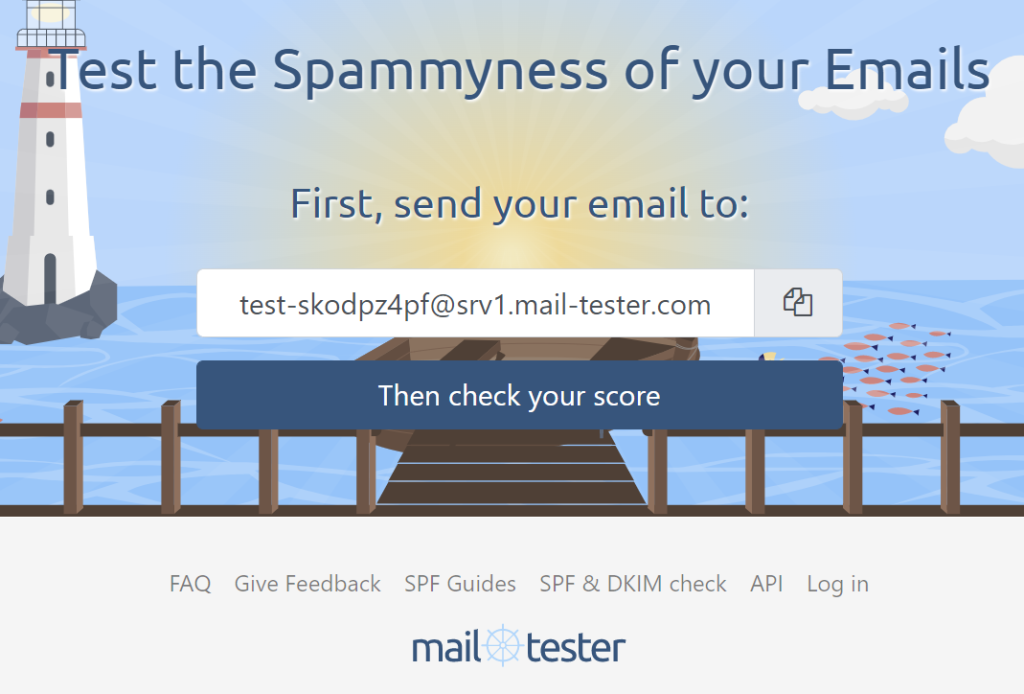
If you’ve followed all the instructions in the tutorial series, your e-mails should be recognized as legit, but it never hurts to test their “spammyness” on the following website:
Simply send an e-mail to the given address, using either an e-mail client such as Outlook or the webmail interface included in CyberPanel, and click on the “Check your score” button.
You will be given an overall score along with information about the different factors that are taken into account.

You can expand each section to see details on how to improve your e-mails and reduce the likelihood they’ll be considered spam.
E-mail addresses for more than one website
Just as with the name servers to redirect domain names to the correct IP, a single mail server hostname is used no matter how many websites you have.
For instance, if you create websites for domain1.com, domain2.com and domain3.com, you have to set up the reverse DNS for only one of them (say, domain1.com) and configure your mail client with mail.domain1.com as SMTP/IMAP server for all e-mail addresses associated to those 3 domains.
Next step: A few tips
Now everything is finally ready and you can install WordPress or build a custom website!
In the next and last article of this series, I’ll give you a few more tips on how to tweak some things in CyberPanel, such as forcing the use of the secure HTTPS instead of HTTP, or redirecting https://www.domain.com to https://domain.com.