In this series of articles, you’ll learn how to set up a Free Tier server on AWS. In short, free for 1 year, very cheap after that (a few dollars/months; more details in a following article).
The purpose of these articles is to allow you to do everything without the need to comb through documentation or search the web to complete certain actions, or resolve issues that might arise.
I know how it is, because I’ve been there. The first time I had to set up a server on AWS, I ran into some issues, and also had to research quite a few things such as which control panel to install, how to use the command line to install server packages (something I had managed to avoid for 20+ years working in IT), or how to request permission to send mail from Amazon’s servers.
Bottom line, it took me days, a lot of head scratching and guesses to finally get my server completely functional.
Unfortunately, all of the tutorials I’ve seen on the subject leave me unimpressed and barely explain the easiest and most obvious aspects of AWS, conveniently leaving out the really tricky stuff, such as how to set up e-mails (fine if you’re happy with a Gmail or Hotmail account, but not at all if you want e-mail addresses with your domain name), or how to host multiple websites on a single server.
You probably don’t want to spend more time than strictly necessary to set up your free server, so follow my step-by-step instructions and you’ll get it done as quickly as possible, from setting up an AWS account (and why?) to having functional web and mail servers with a panel control.
Specifically, this tutorial explains how to:
Sign up for a Free Tier AWS account.
Set up a virtual server (EC2).
Install software for the web server, mail server and control panel.
Create a name server (DNS), configure domain name(s) and create SSL certificates.
Set up e-mail access.
All software used is open source.
By the end of this tutorial, you’ll have a fully functional server and will be ready to create your actual website, either adding custom pages, or installing WordPress or other blog platform.
Everything is explained as clearly as possible, with dozens of screenshots, so you don’t need deep knowledge to follow this tutorial, and it should take at most 2-3 hours to complete (including reading these articles), plus some waiting time (it’ll be explained when you get to that point).
Basically, if you can complete a task like installing a WordPress plugin, you should sail through this tutorial!
That said, if you’d like to have your server on AWS but are still not comfortable setting it up yourself, don’t hesitate to contact me. I could do it for you for a small fee.
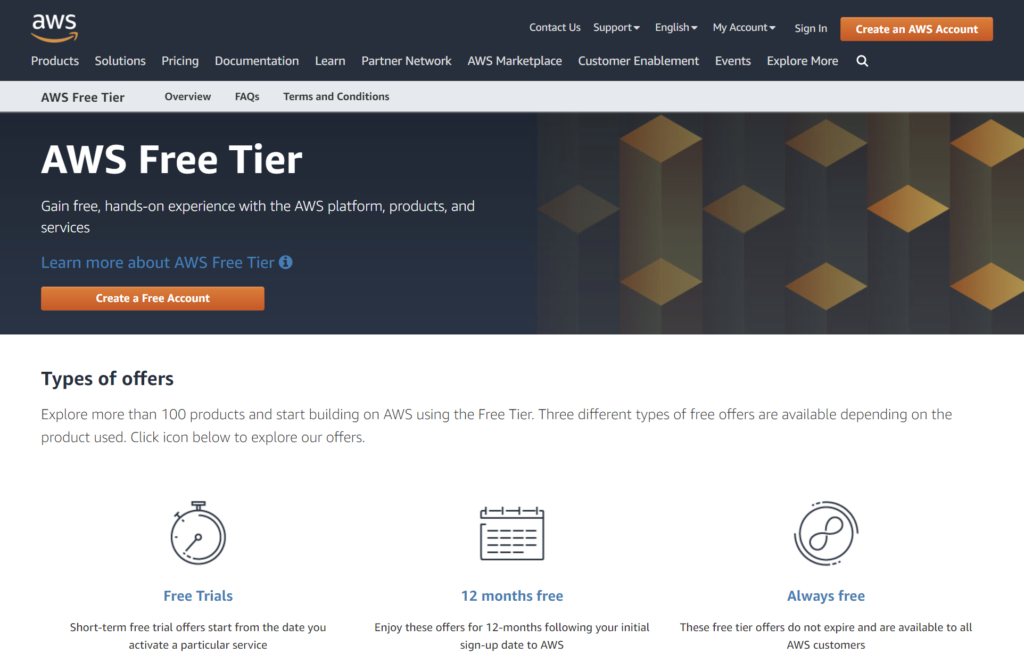
1. Intro to the Amazon Web Services Free Tier and sign up
After you click on “Create a Free Account”, you’ll go through a series of forms. You will have to confirm your e-mail address, enter your credit card info (you will be charged only for services that are not covered in the Free Tier), password, etc.. and multiple security checks. A bit tedious, but easy.
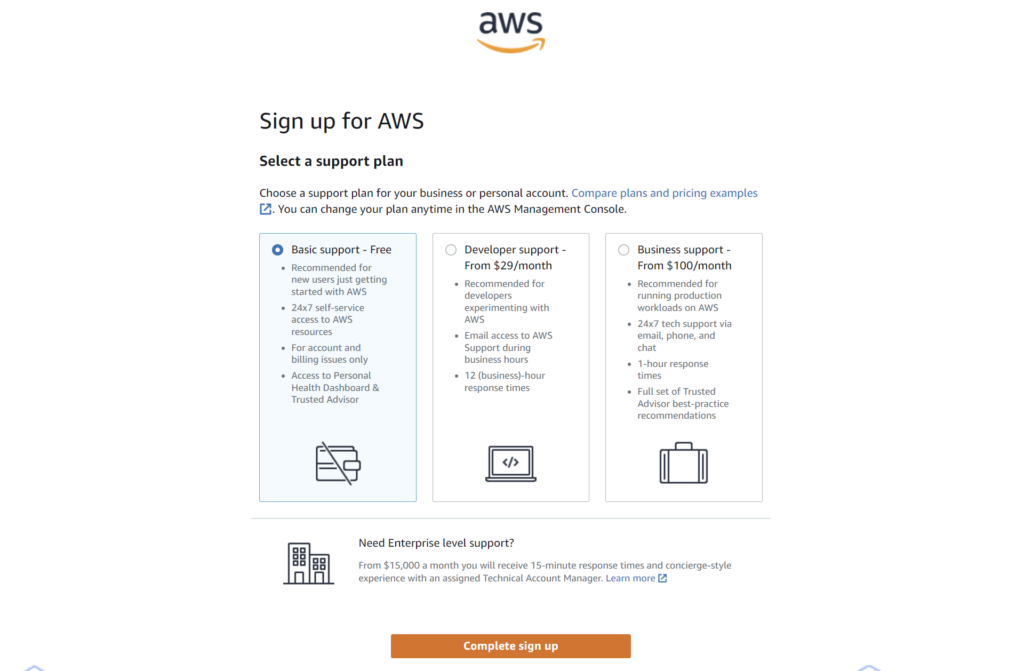
When asked to choose a support plan, make sure you opt for the free one, which should be selected by default.
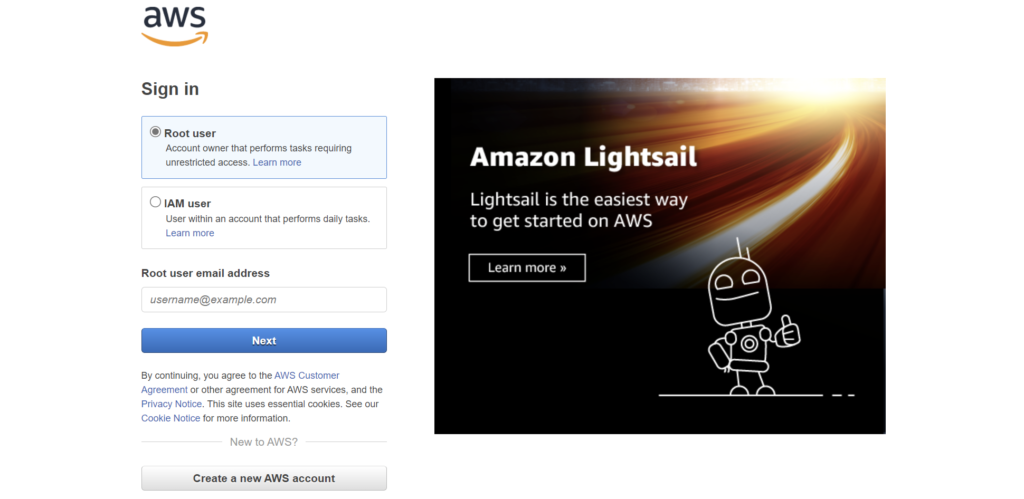
It might take some time (up to 1 or 2 hours) before you receive an e-mail confirming that your AWS account request has been approved, but you don’t need to wait for it to sign in to AWS and start setting up your server.
Log in as “Root user” with the e-mail address/password given during the account set up.
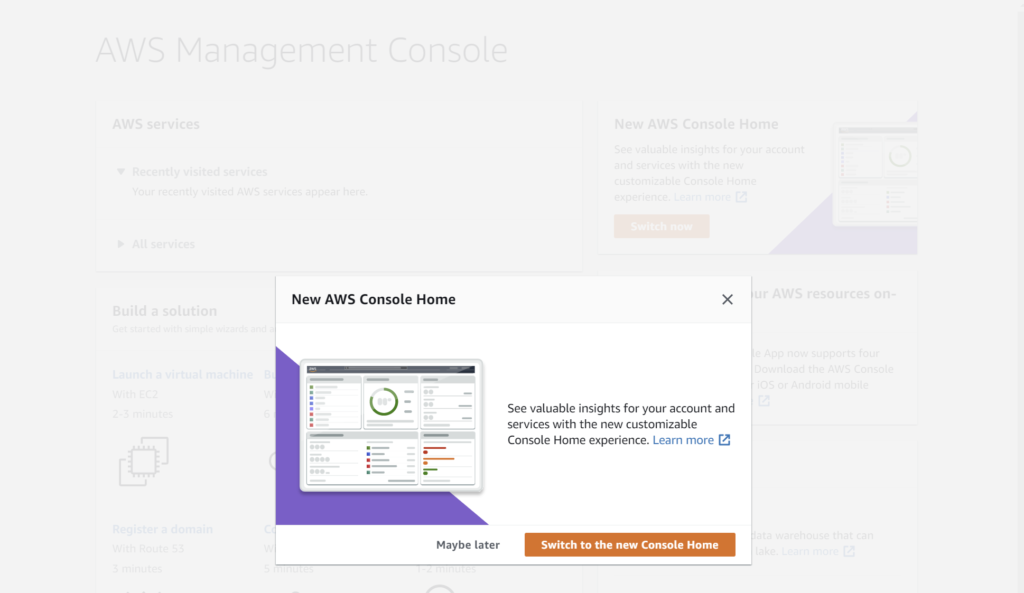
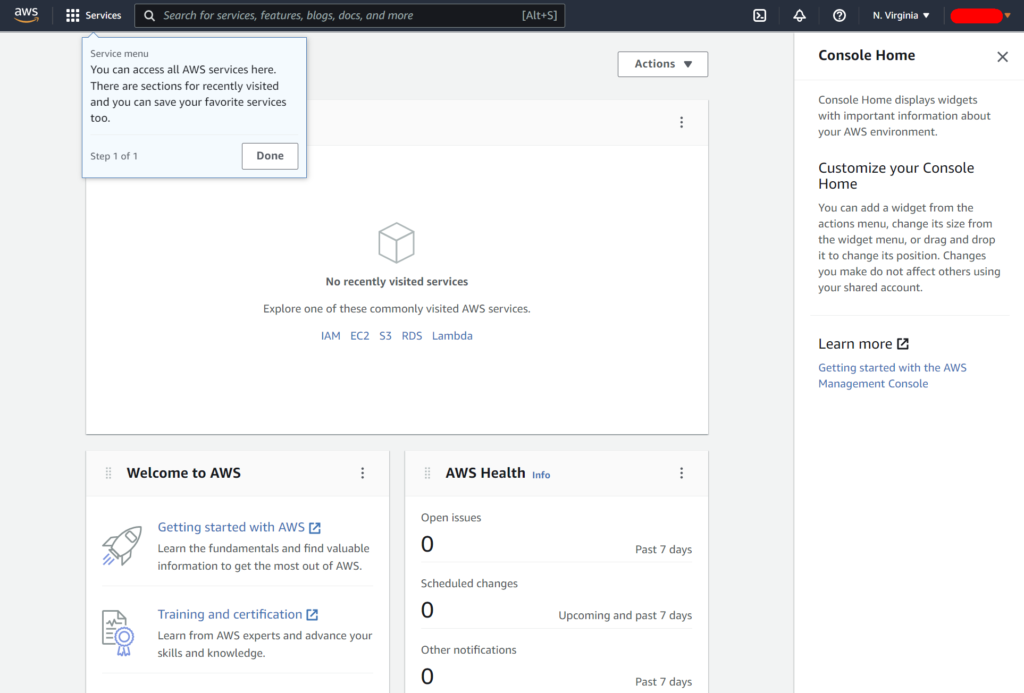
Click on “Switch to the new Console Home” and you’ll be taken to the following screen.
As explained in the little pop-up window, all AWS services can be accessed on the top left (click done to close the pop-up).
Many help links will open in a panel to the right of the screen. You can safely close it to have some more screen real-estate.
Just so you know, your account name on the top-right is where you can access you AWS account details, billing info, and log out.
The AWS account is now completely set up. The next step is to configure the service(s) you need.
Next: Setting up and configuring a free EC2 server
In the following part, we’ll create a virtual server using the EC2 service, which offers a Free Tier option for 12 months.
In this article, you will learn how to create and set up a virtual server in the EC2 service. It will be the cloud equivalent of buying a computer, installing an operating system and configuring its network access. (Installing the web server software will be explained in the next part)
Two advantages of EC2 is that it has a 12-month Free Tier option and, being basically a barebones server, you can install pretty much anything you want on it, just as you could if you bought an actual computer, as long as the hardware specifications are sufficient.
The EC2 Free Tier includes one type of hardware (CPU/RAM), up to 30 GB of storage space and 100 GB of bandwidth per month for outgoing transfers (unless you offer downloads or large files, it’s a lot; above that, the charge is 0.09 USD/GB, at the time of writing).
Setting up the EC2 service
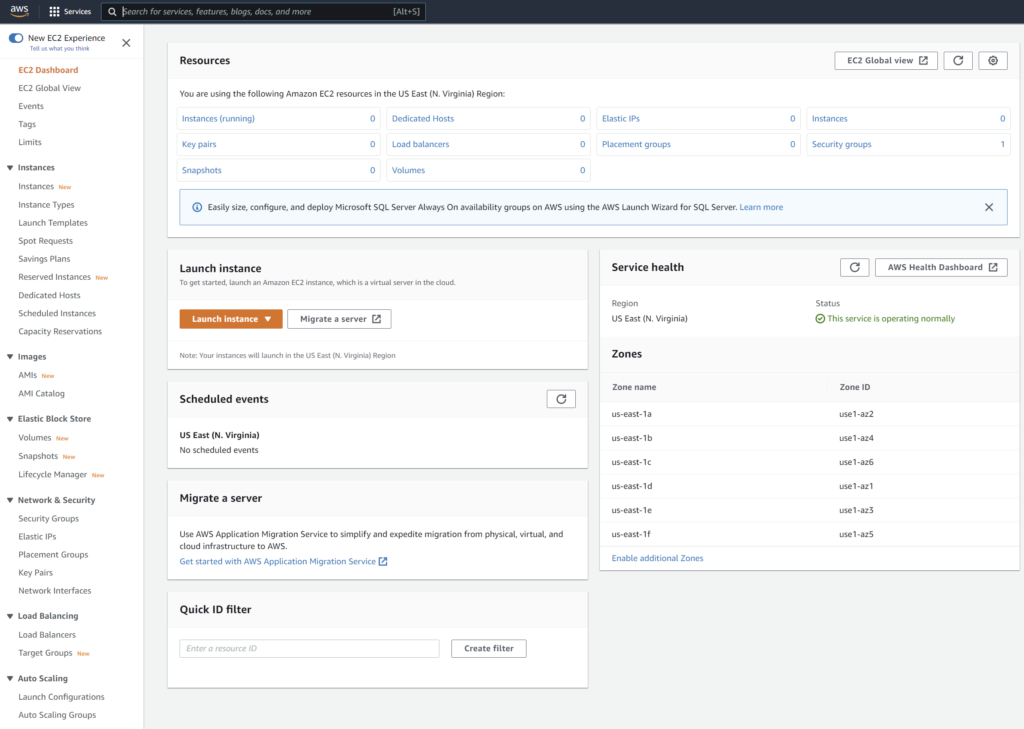
Whether you’ve followed the previous part on how to create an AWS account or just logged into an existing account, the Console Home should look like this:
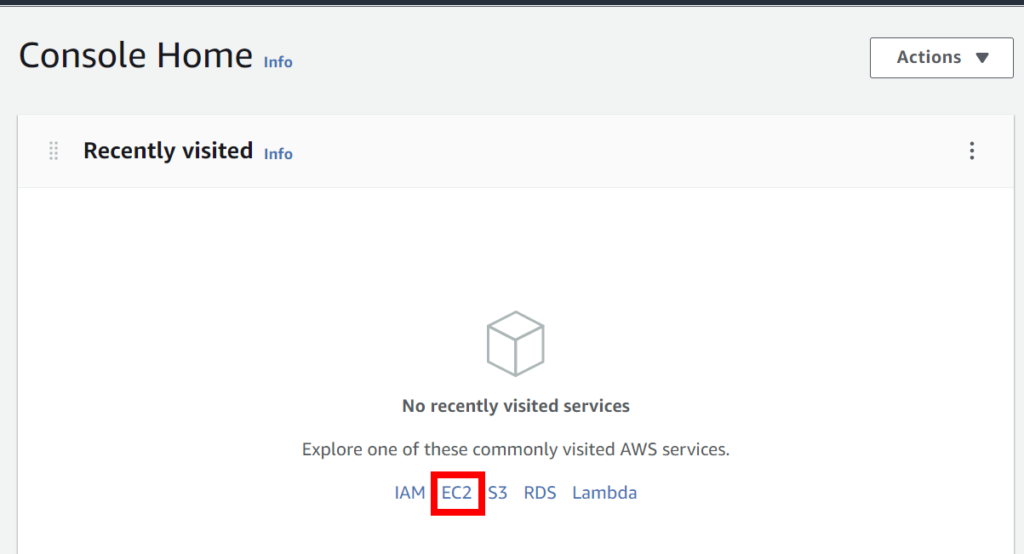
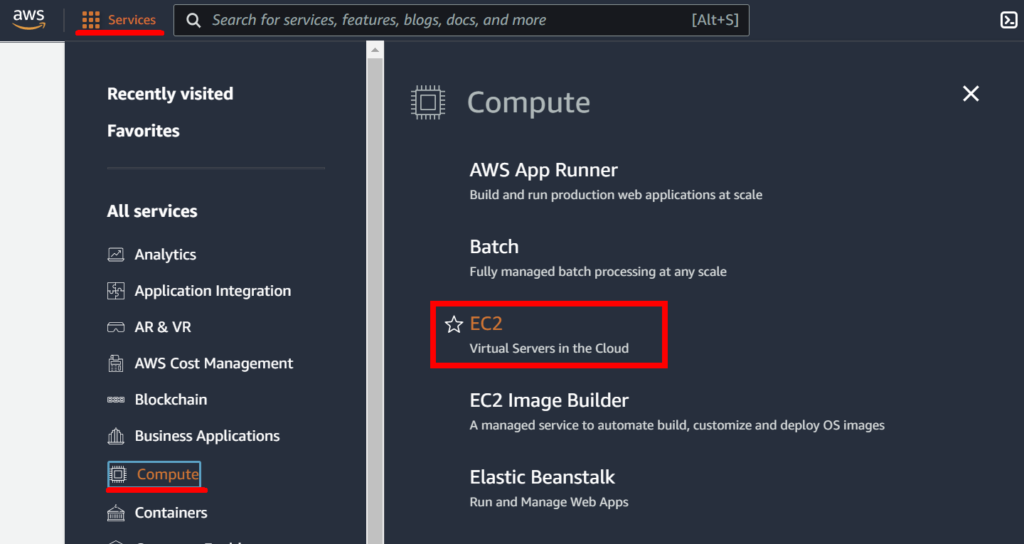
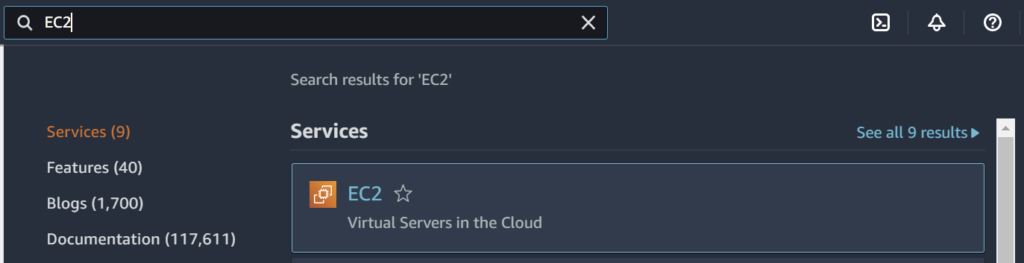
There are a few different ways to create an EC2 service, as shown in the following 3 screenshots.
Click on EC2 in the suggested services.Open EC2 from the Services menu, in Compute.Type EC2 in the search field at the top.
Whatever way you choose to open EC2, right after you click on it, the EC2 dashboard is displayed and you are presented with an overload of options, but fear not.
We only need to set up a few things, which will cover all our basic needs:
An instance (virtual server)
A security key, used to connect to our server through SFTP and SSH command-line
A fixed IP address, to link a domain name to the instance
Open HTTP ports to allow web traffic to your future website.
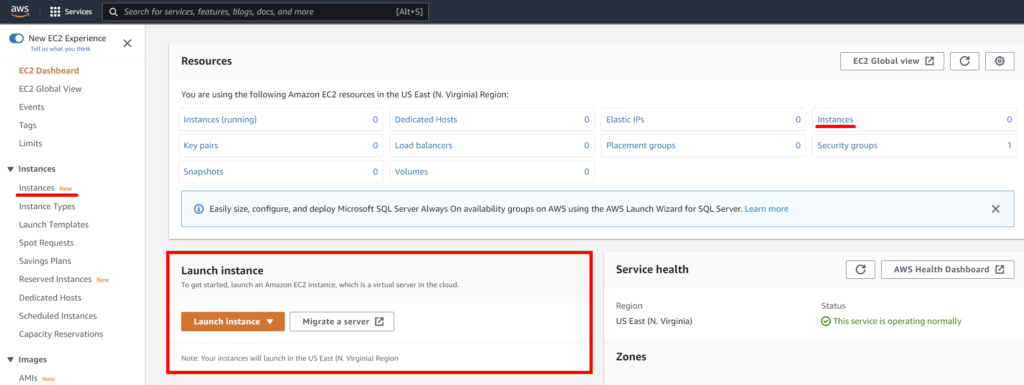
Creating an EC2 instance (virtual server)
Click on the orange “Launch Instance” button to create an instance. You can also find that button in the top-right corner of the Instances page if you click on one of the two links.
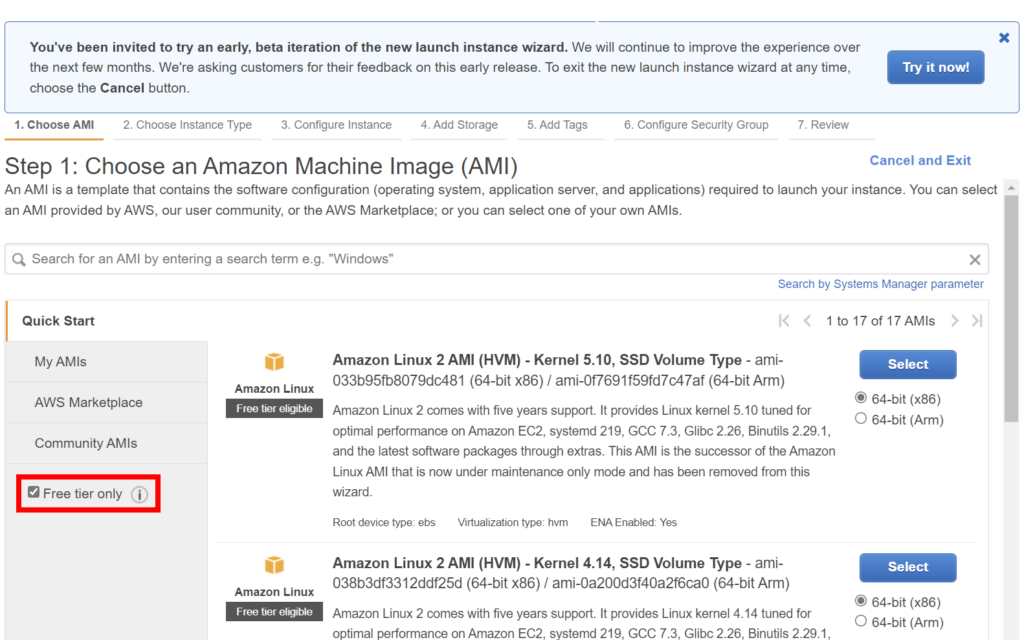
The first step is to select an Amazon Machine Image (AMI), which a template that contains the software configuration (operating system, application server, and applications). Only some AMIs are included in the Free Tier program, so you can check the option to show only those.
Note: As you can see in the message at the top of the screenshot above, there is an early beta of a new Launch Instance wizard, so if you choose to try it, the screens will look different. When it becomes the default, I’ll update this tutorial, but for now I’ll stick to the classic view.
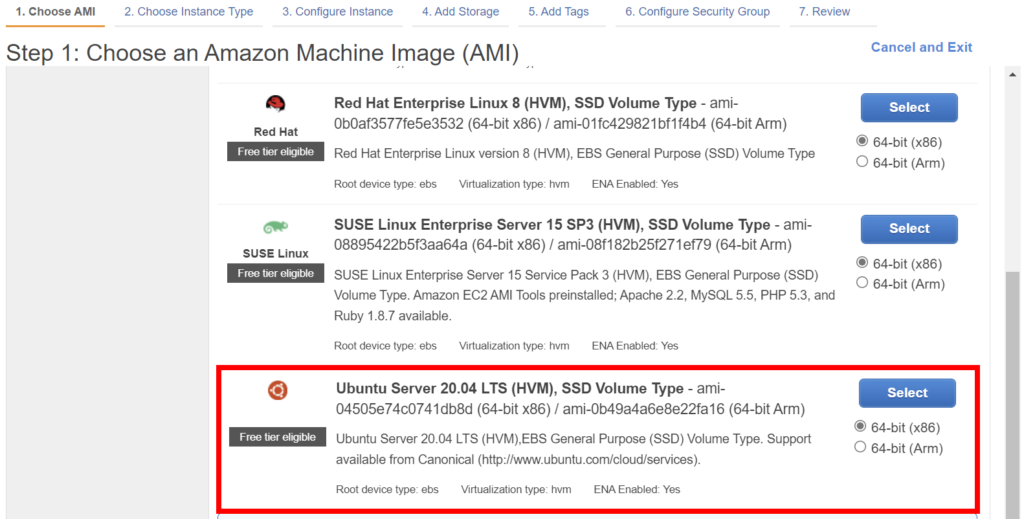
For the purpose of this tutorial series, we’ll use Ubuntu Server 20.4 LTS, which is a good barebones server OS. Leave the default 64-bit (x86) option checked and click on the blue Select button.
Note: If you have specific needs, choose an AMI accordingly. But if that’s the case, you’re probably not reading this tutorial anyway (Why am I even writing this, then?).
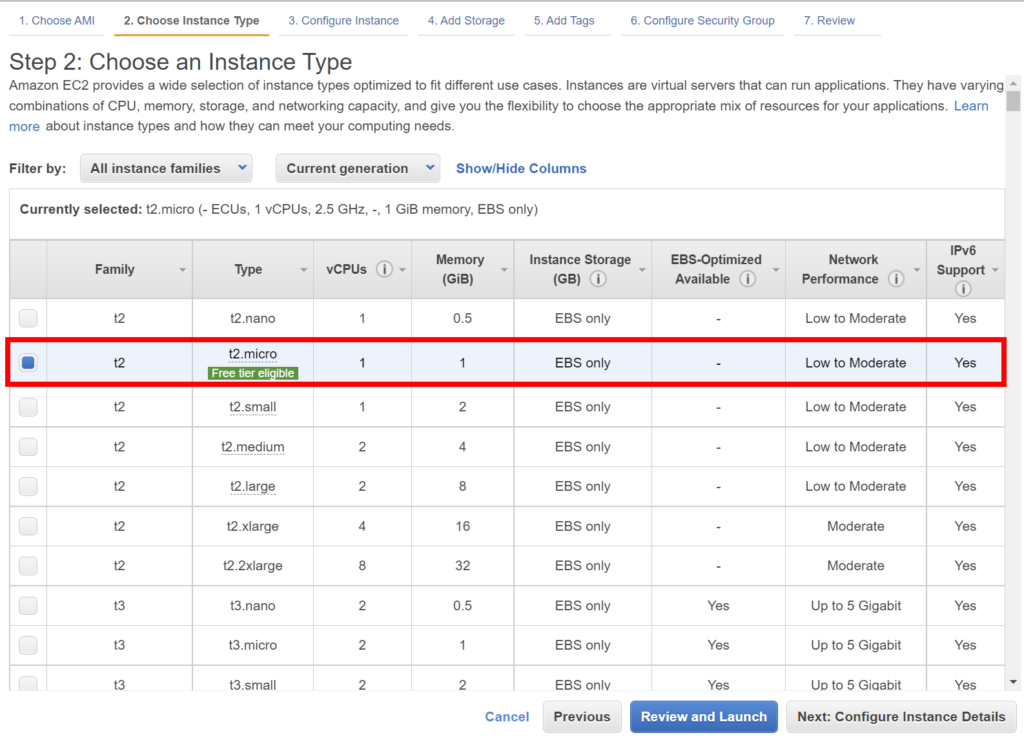
The next step is to choose an instance type (hardware specifications). The only one available in the Free Tier program is the t2.micro. It’s not super powerful, but more than enough for most users.
By default, it will assign you 8 GB of disk space. If that’s enough for you, click on Review and Launch.
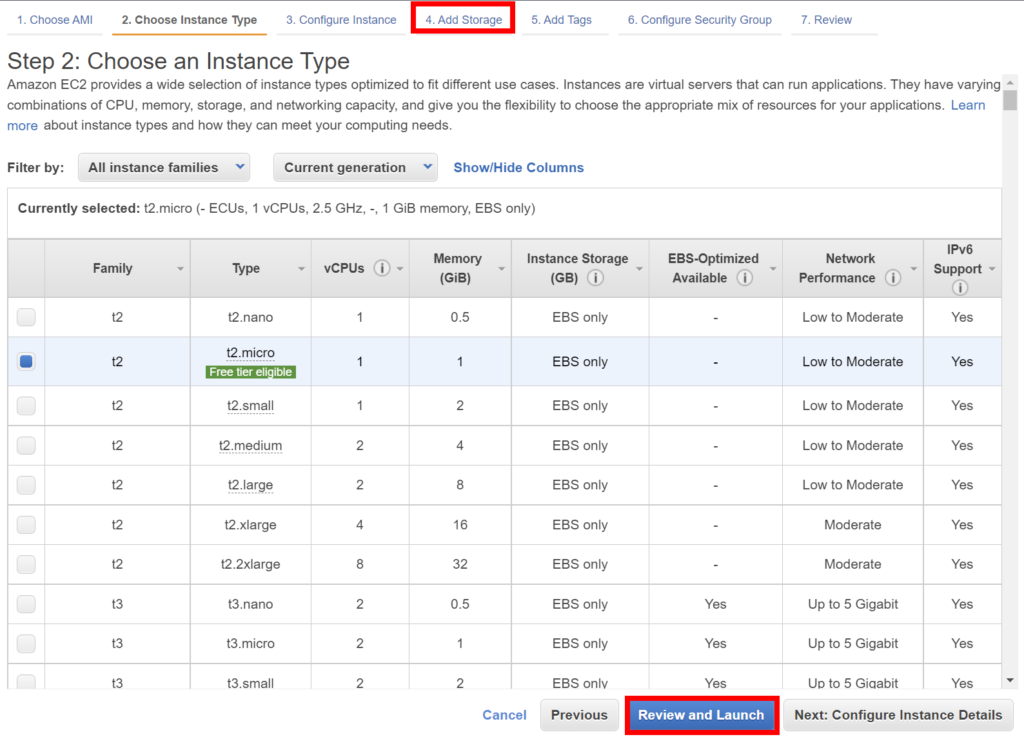
If you intend to follow this full series of articles and install the same web server as I do, I recommend setting a higher storage value. In that case, click on 4. Add Storage at the top.
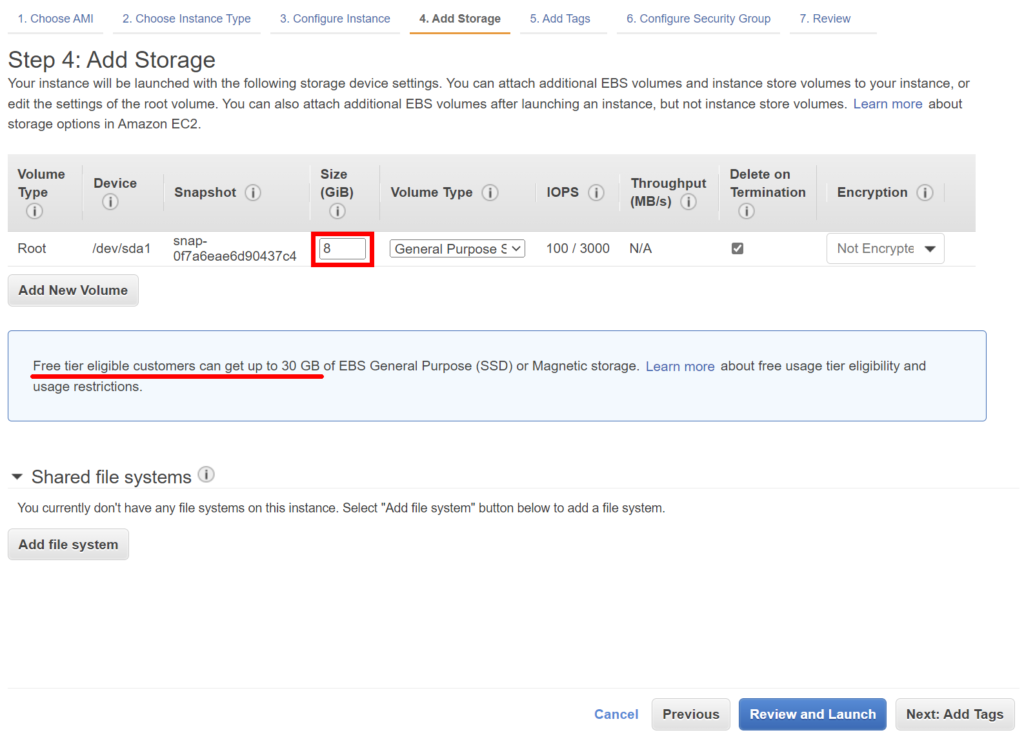
Here you can easily change the disk size.
If you are not sure what size you should choose but already have one or more websites that you would like to move to this AWS server, check the disk usage in your current hosting’s control panel to get an idea of the used space (all stored files + e-mails) and set a higher value to account for future storage needs.
Two things to keep in mind:
It’s (a little bit) easier to decrease the storage space later than to increase it, so try to estimate how much you’ll need in the foreseeable future.
You could set it to 30 GB, which is included in the Free Tier, but don’t forget to decrease it (if necessary) in 12 months, when you’ll start paying for space. It’s not super expensive (US$ 0.10/GB/month), but in any case it’s a waste of money if you don’t use it.
Personally, since I intend to use the server for a few existing websites that have a few GB of existing content, and taking into account the space required for the web/mail server software, control panel, plus some room to grow, I’ll set it at a comfortable 20 GB.
[Note: the web/mail server and control panel installed later in this series take almost 6 GB of disk space in total, and require 10 GB of free space for the installation. You should thus set the storage space to at least 10 GB, even if you plan to reduce it later.]
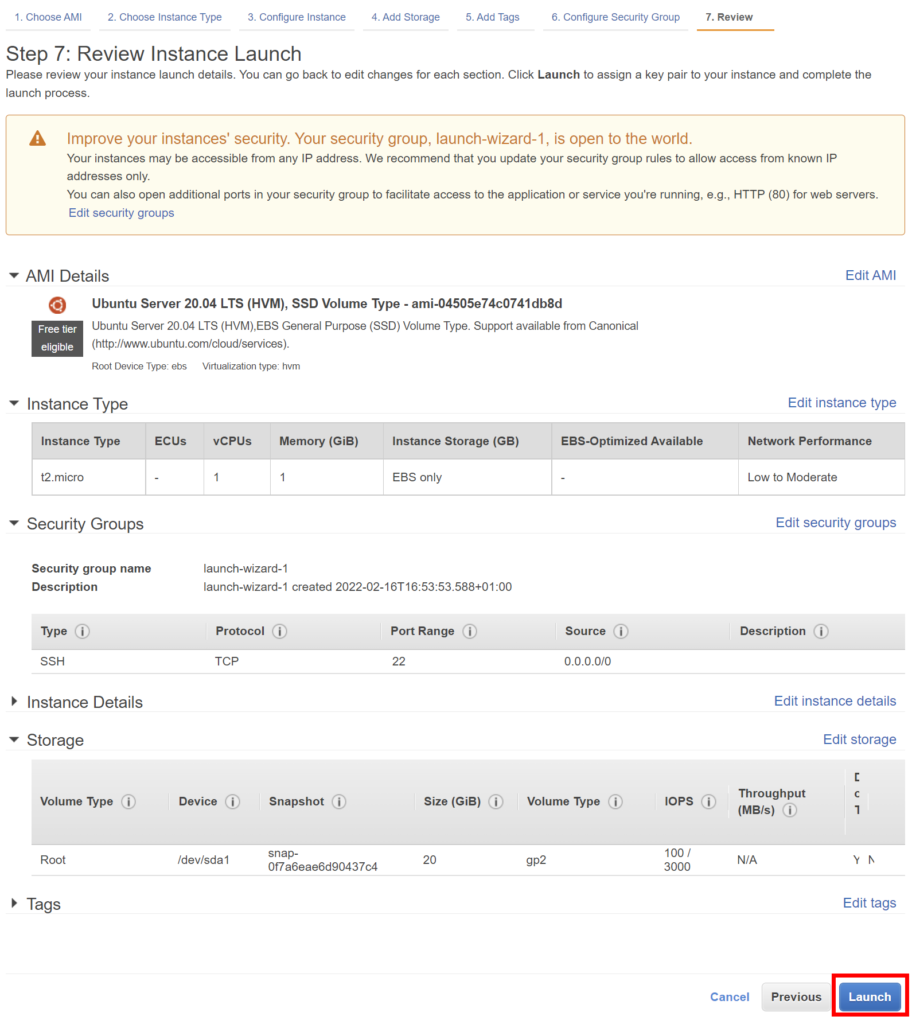
Once that is done, you can click on the blue Review and Launch button and check everything is ok. If you have made any mistakes, go back and adjust your settings. If all is fine, click on the blue Launch button.
A window will open with one final step before the instance is created.
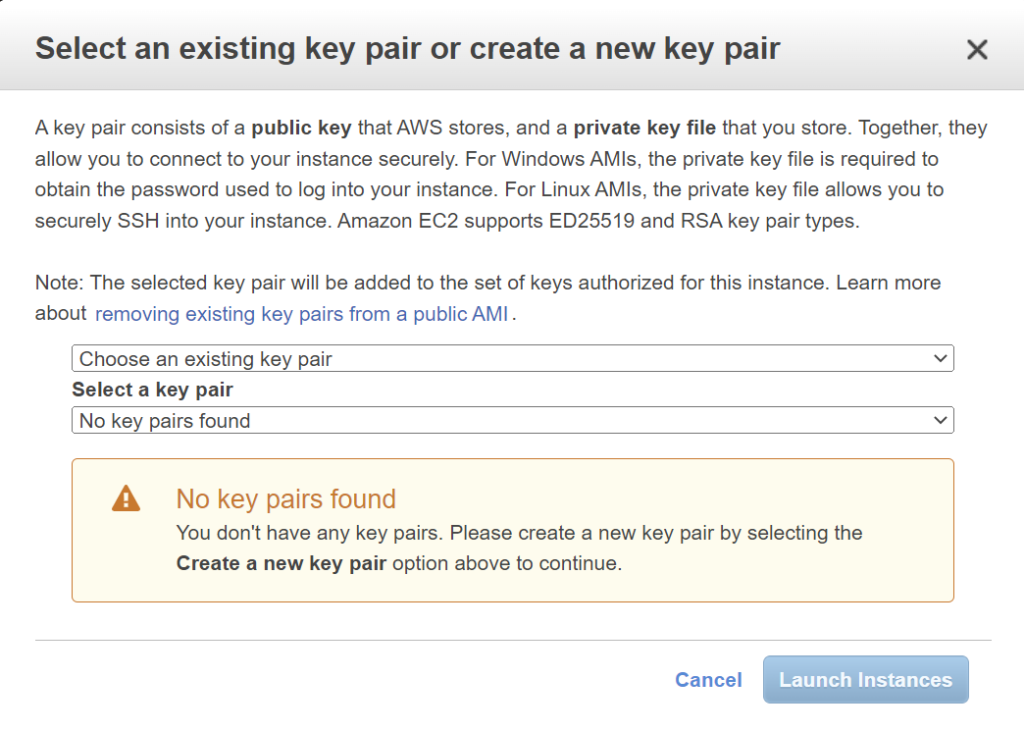
Creating a security key pair
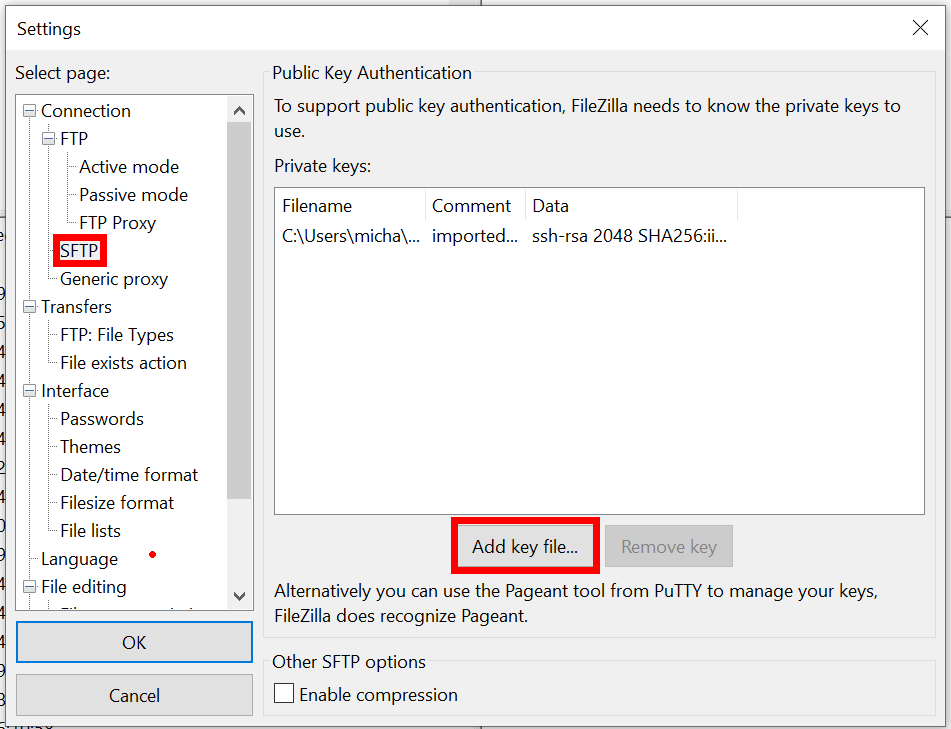
For security purposes, we need a public/private key pair, which will be used to access the server from SSH (command-line) and SFTP (FileZilla).
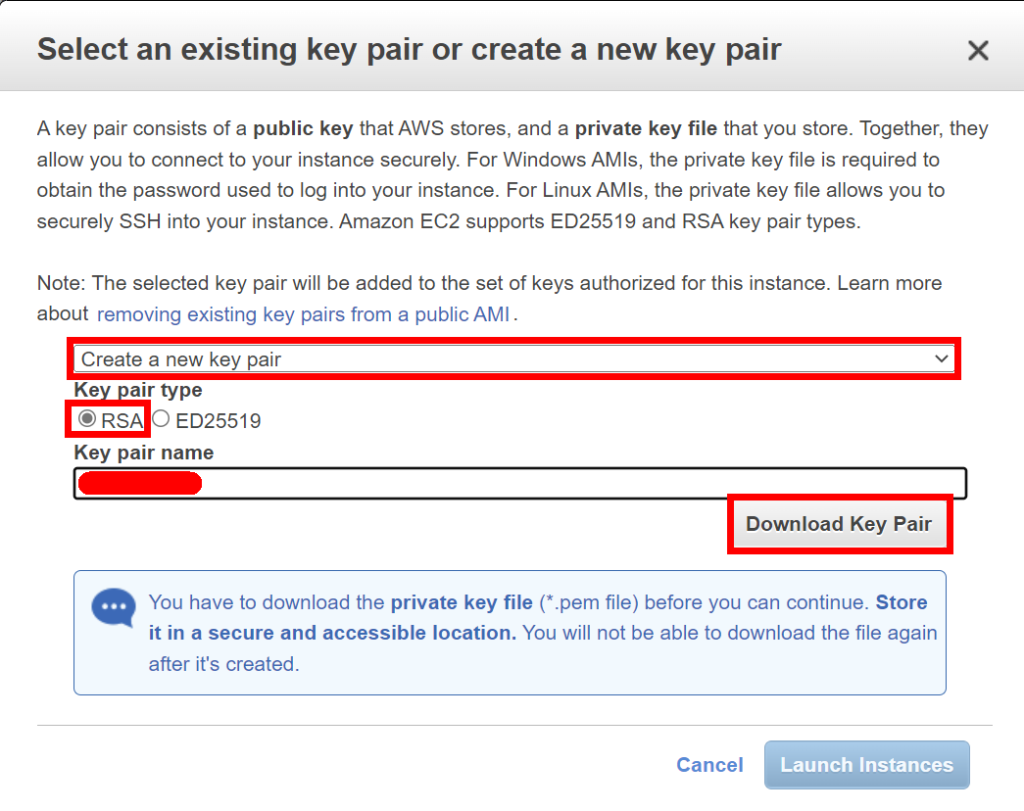
Since you don’t have a key pair yet, select “Create a new key pair” from the dropdown list, leave the default “RSA” pair type and type a name, then click on “Download Key Pair”.
As mentioned in the window, keep that file in a secure and accessible location.
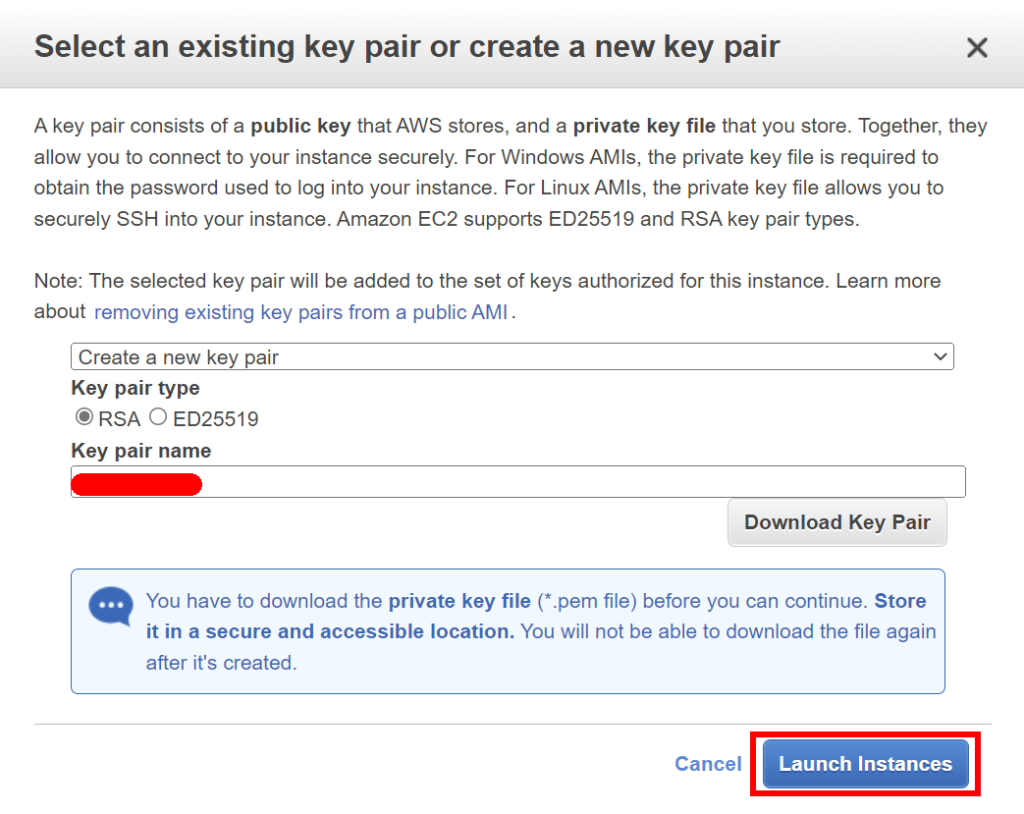
Now you can click on “Launch Instances”.
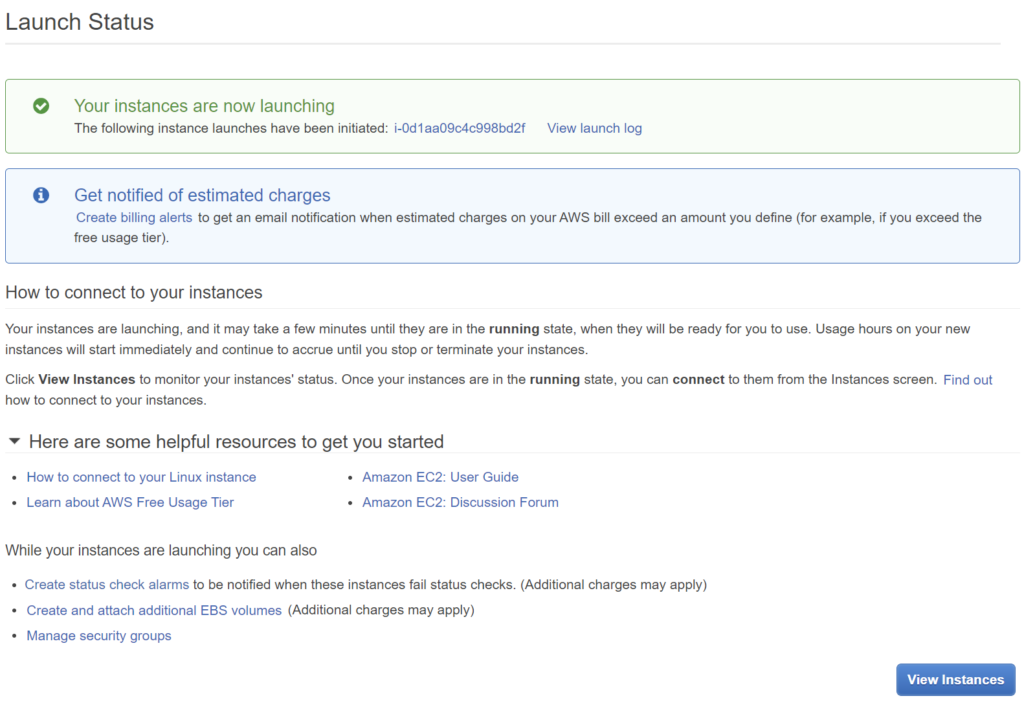
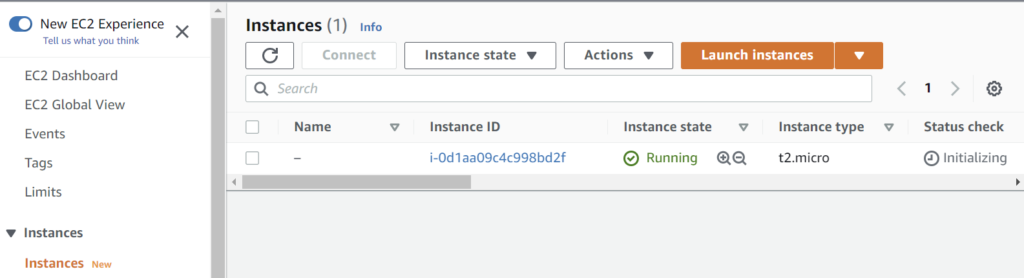
After a few seconds, you’ll see the following screen. You now (finally) have an AWS virtual server. Congratulations!
The “View Instances” button in the bottom right will take you directly to the Instances page (otherwise accessible from the left menu).
Adding a fixed IP to the EC2 instance
We are almost done, but still have to add a fixed IP, so domain names, which we’ll setup soon, will always correctly point to your server.
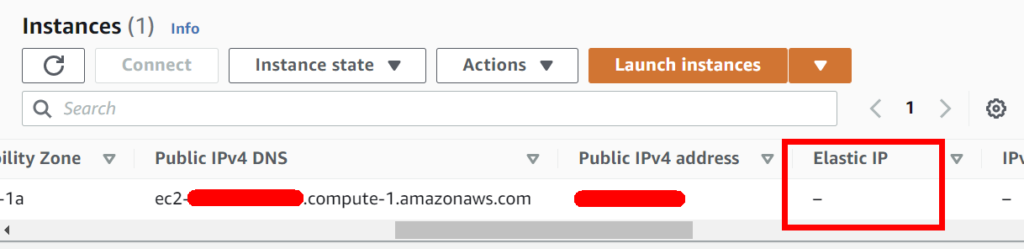
If you scroll to the right to see all columns, you’ll notice a series of IP addresses.
The public IPv4 DNS and address (IP) can both be used to access your server, but are not fixed (they will change if the instance is restarted). A fixed IP, on the other hand, will never change (unless you modify it, obviously).
AWS’s name for fixed IP is Elastic IP. The term “Elastic” is used because while it is fixed to the outside world, you can point it to a different instance (with a distinct internal IP address) anytime you want, so in that sense it’s flexible.
Usually, fixed IPs are costly, but Elastic IPs are free (up to 5) as long as they are linked to active instances. As far as I know, it’s the only AWS service for which you have to pay if you do not use it.
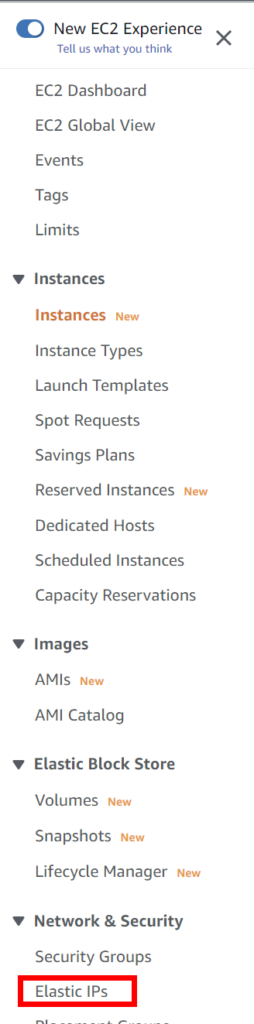
So, let’s get to it… In the left menu, click on Elastic IPs.
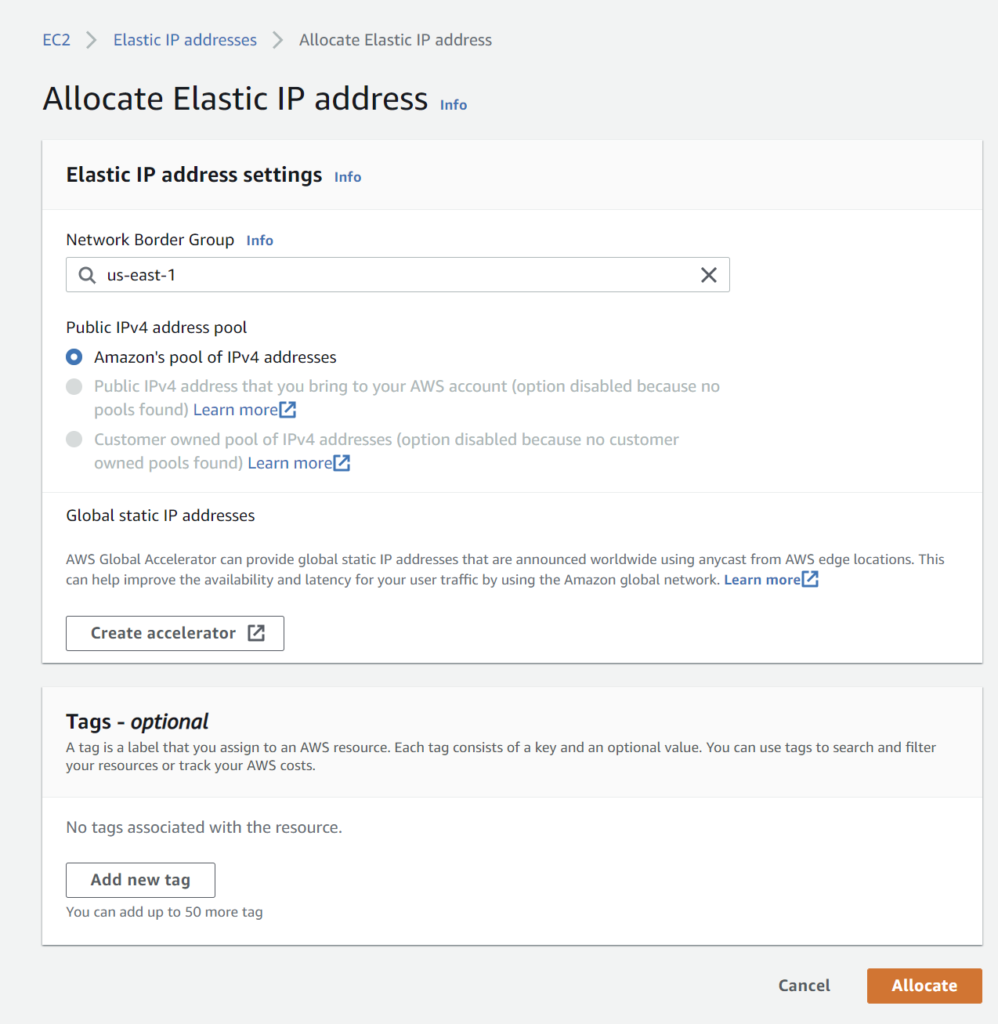
Then click on the “Allocate Elastic IP address” button (top left)
Leave all the default settings and click on the “Allocate” button.
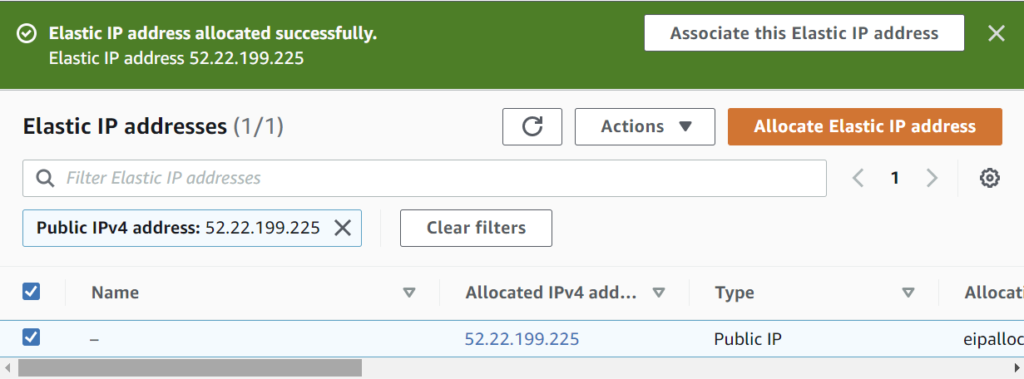
You will see a confirmation message that the Elastic IP has been created.
Select the IP, click on the “Actions” button and select “Associate Elastic IP address”.
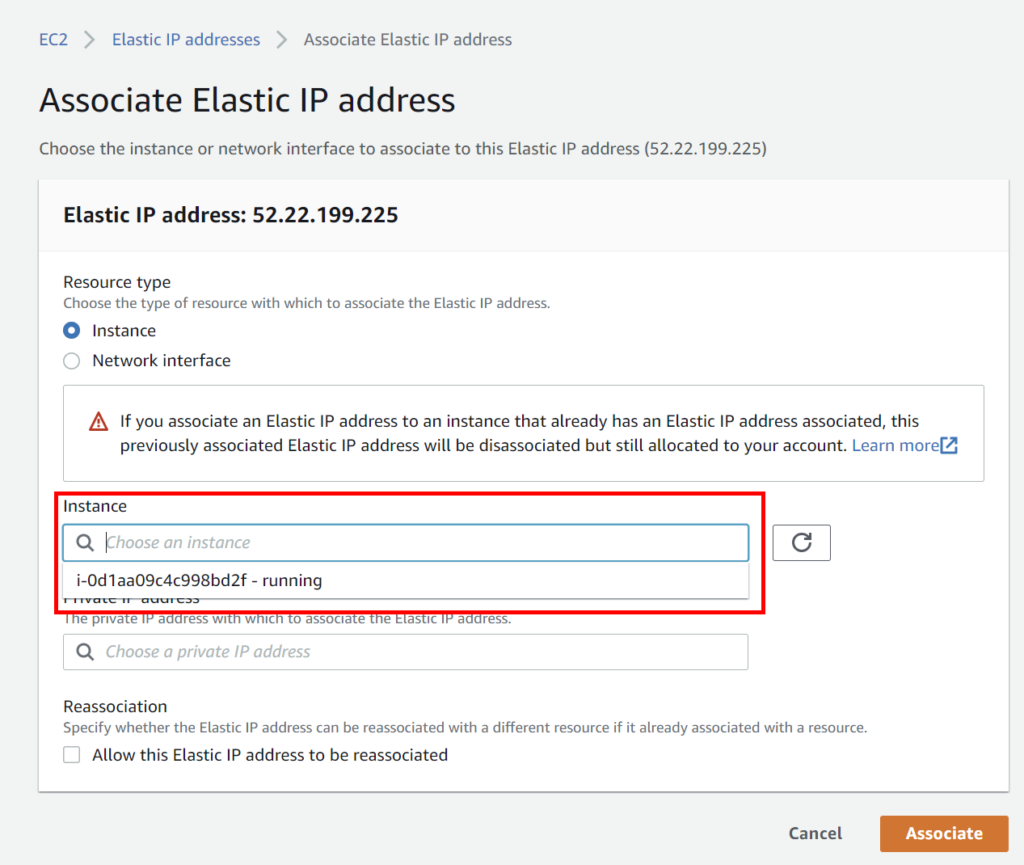
Click in the “Instance” field and select the only displayed entry (i.e. your only server). Then, click on the “Associate” button.
Once again, a confirmation message is displayed and the instance name is shown in the “Associate instance ID” column for that Elastic IP.
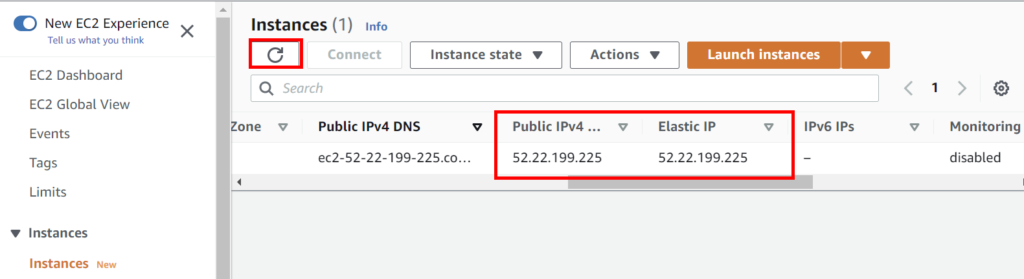
Back in the Instances page, refresh the list and then you’ll see the new Elastic IP that is associated with your instance. The Public IPv4 address now matches it.
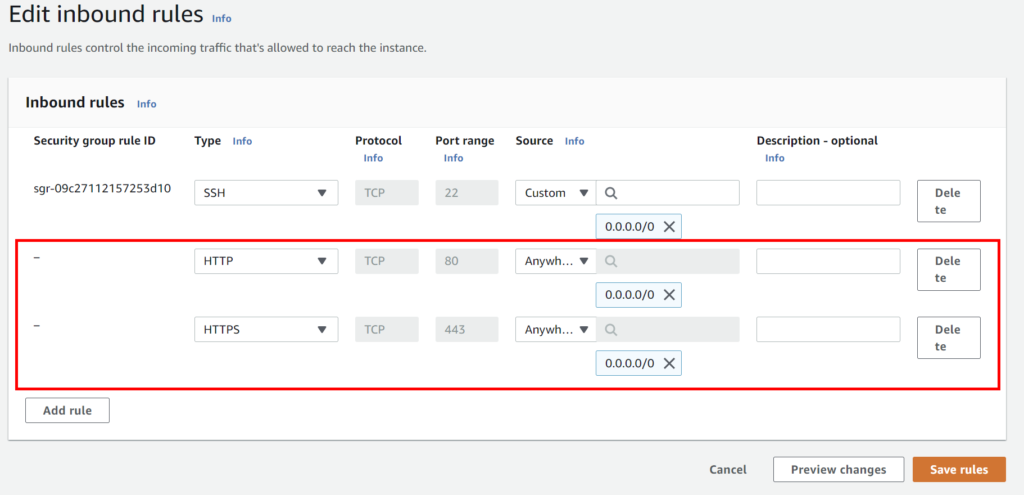
Opening the HTTP(S) ports for web access
To allow web traffic to your website, you need to open the HTTP and HTTPS ports (for secure connections using an SSL certificate).
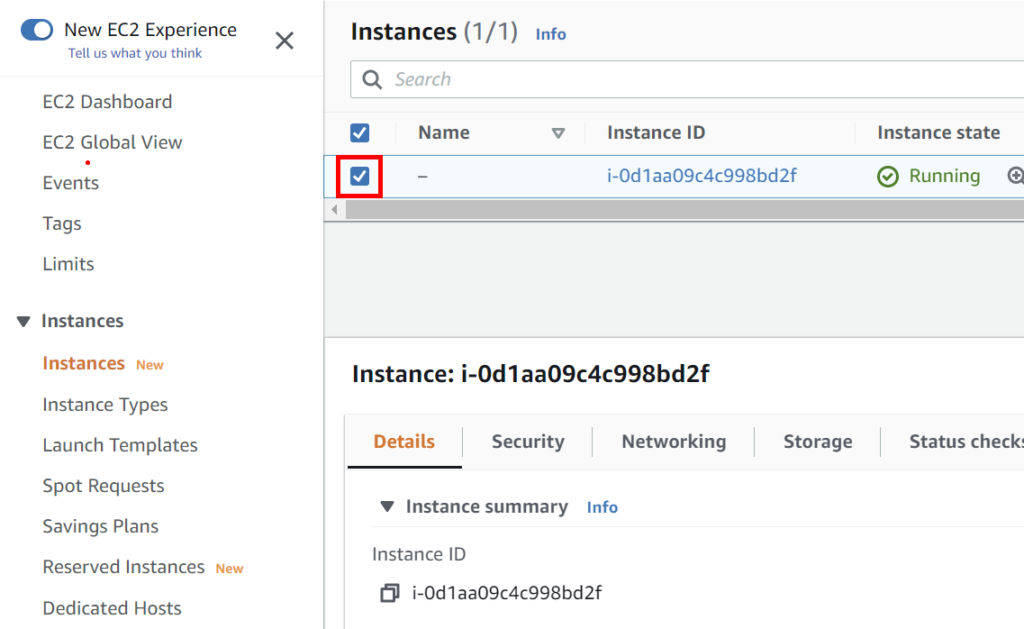
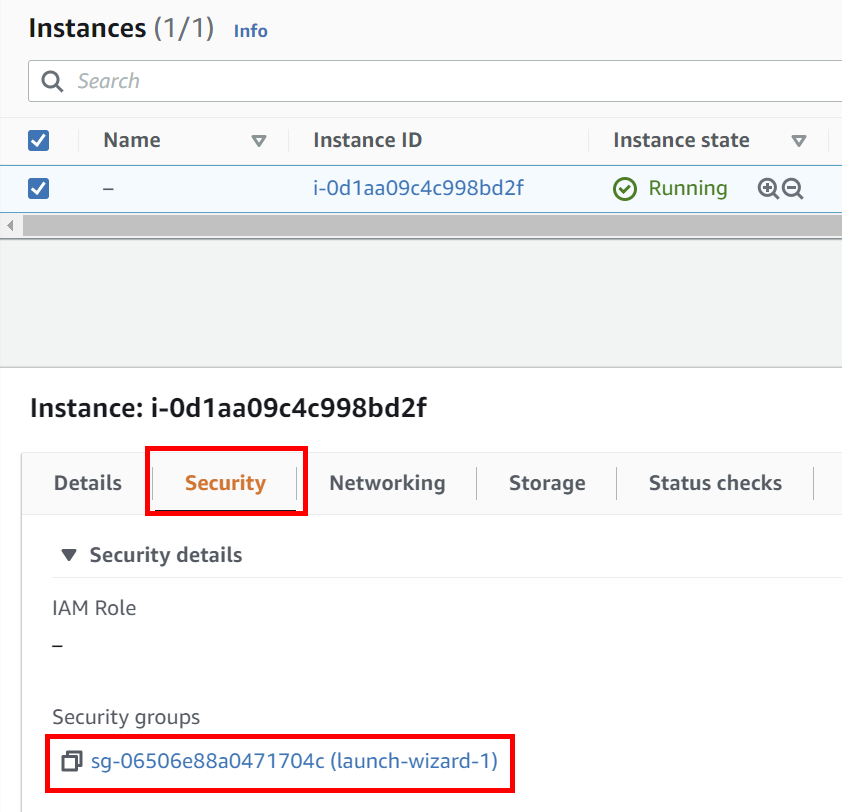
Select your instance to display its detailed information below.
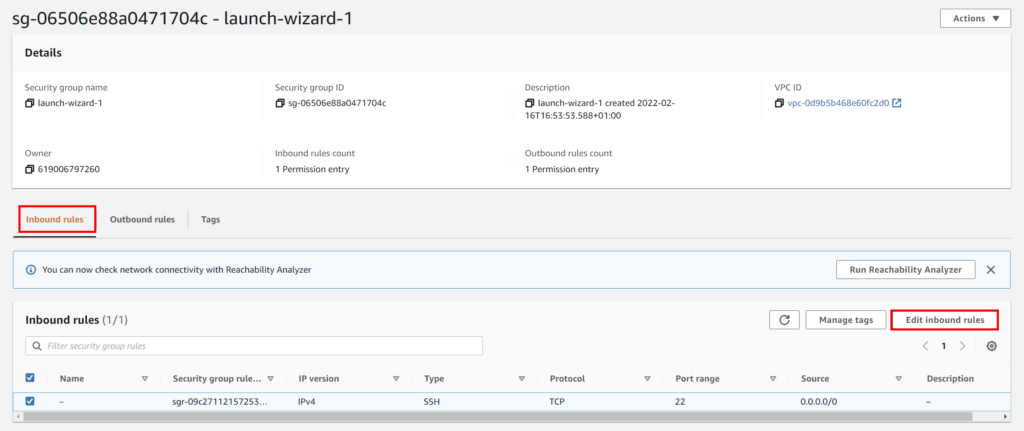
In the Security tab, click on the security group’s name.
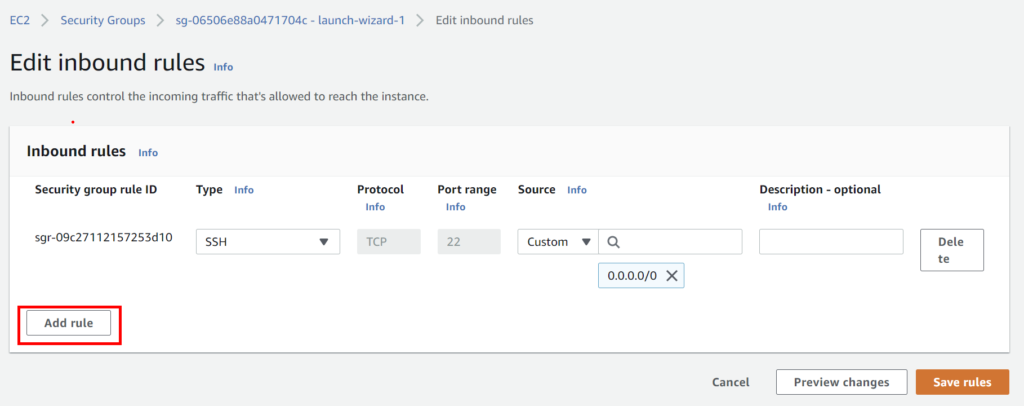
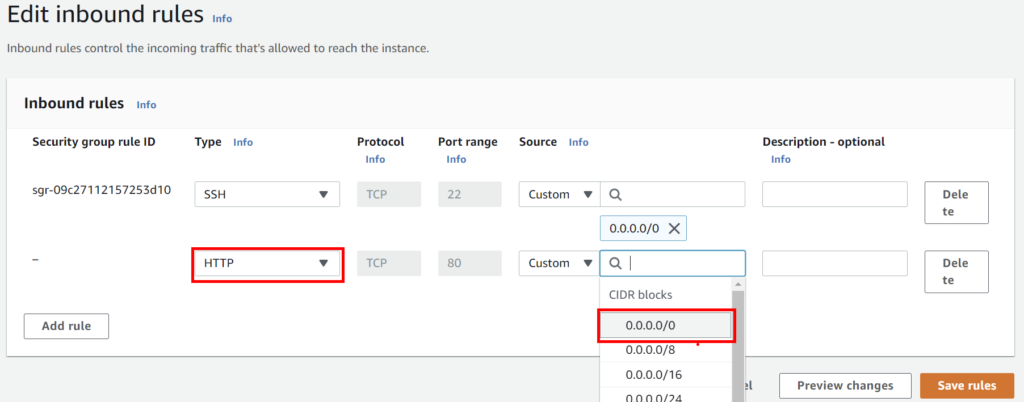
Repeat but this time with HTTPS. When both lines are added, click on the “Save rules” button.
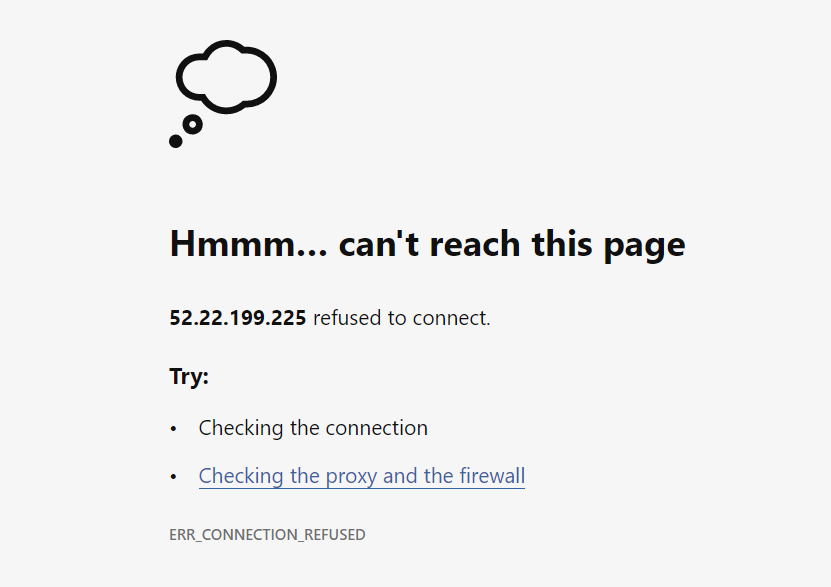
Now you could in theory reach your server’s IP address in a web browser, except for the fact that you haven’t installed a webserver yet, that is!
At this point, if you’re impatient and type the instance’s Elastic IP into a browser, you’ll see something like this:
This is perfectly normal because there is nothing to see here.
Next step: Installing the web server software
In the following part, we’ll install a web/mail server and control panel.
To do so, it is necessary to connect to EC2 through SSH (command line). To learn how to do that, read this first.
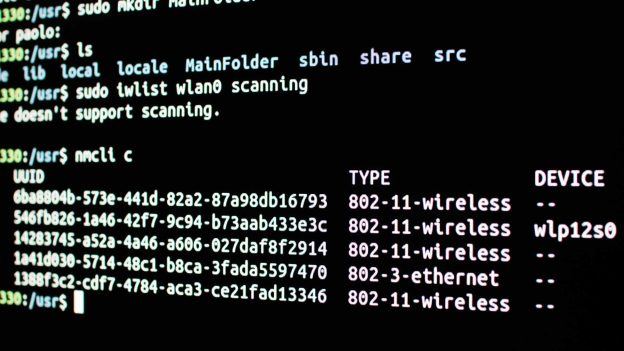
Running commands from an SSH client might be a little intimidating at first, but it is necessary for tasks such as installing a web server on EC2.
By far the easiest way is to connect through AWS directly in the browser, but you can also use a standalone SSH client. See instructions below for PuTTY (open source, Windows).
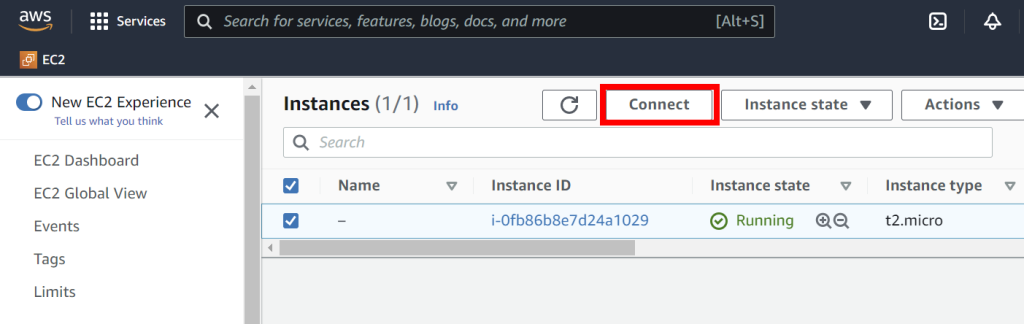
Connection to EC2 server through SSH in a browser
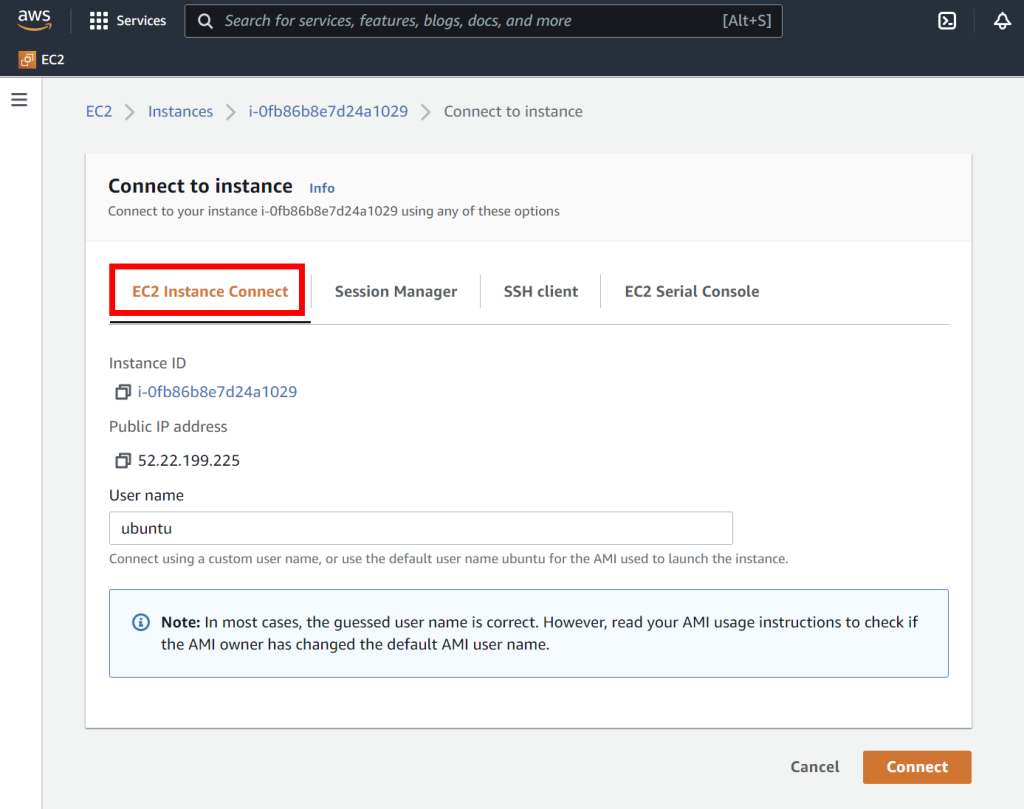
Select your instance and click on Connect button on top, or right-click on the instance and select Connect in the context menu.
The EC2 Instance Connect tab should be selected by default. If not, click on it and then on the Connect button.
A command line window will open in a new browser tab. Once the connection is made, you’ll see some details about the server.
You can download the free, open source PuTTY client (Windows only) from https://www.putty.org
A few entries will be added to the Windows start menu.
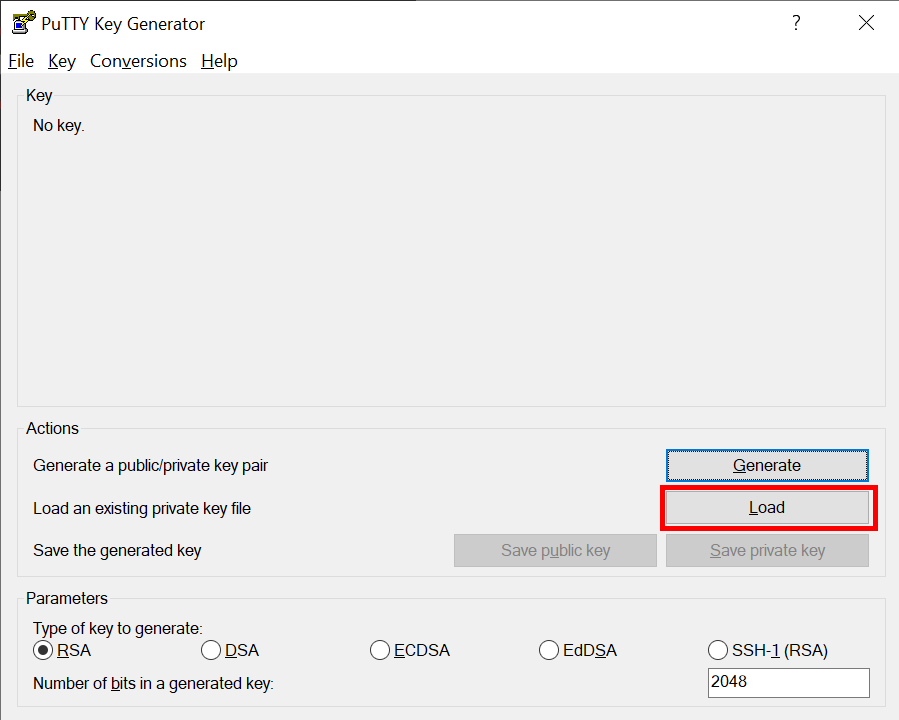
Remember the security key pair file you downloaded from AWS? You will need it now to connect (instead of a password). The only problem is that it is a file with extension .pem and PuTTY needs key pair files in a different format, with the .ppk extension.
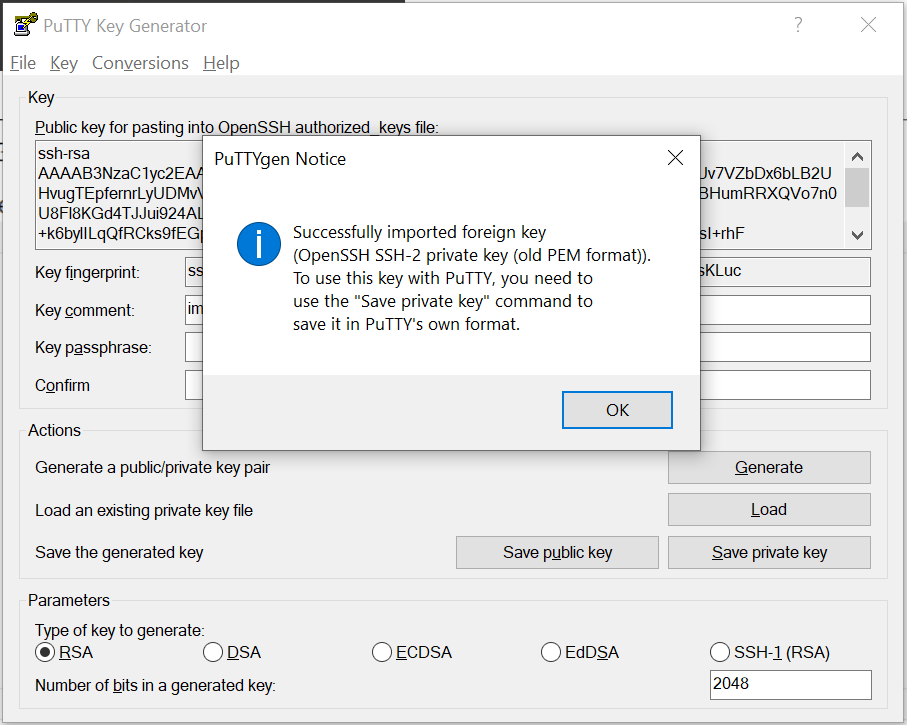
PuTTYgen allows you to convert from one format to the other, so open it and load your .pem file.
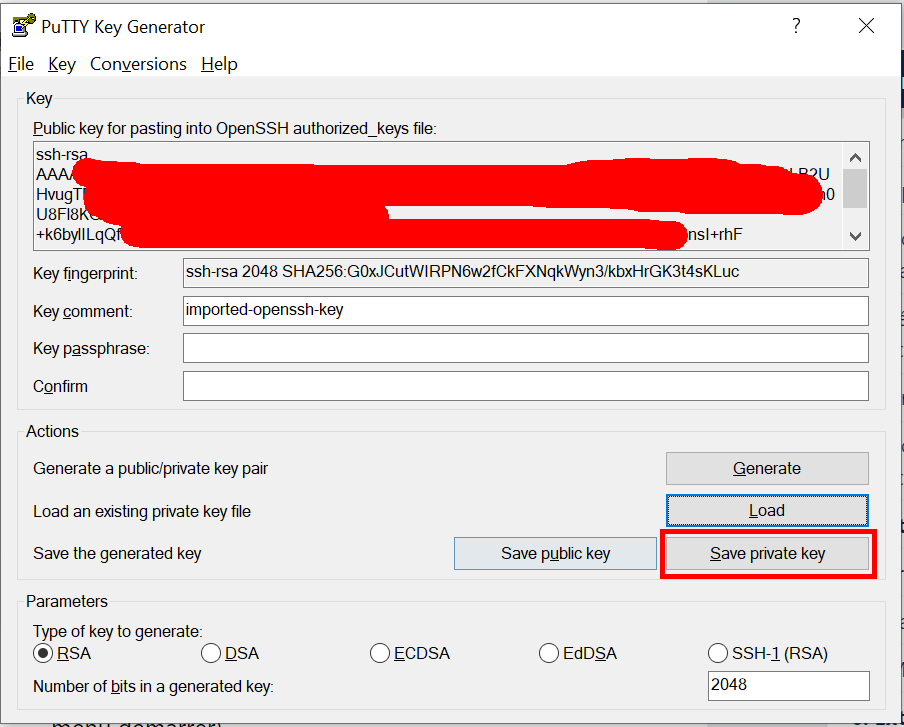
Once loaded, click on the save private key button to save the file as .ppk and close the program.
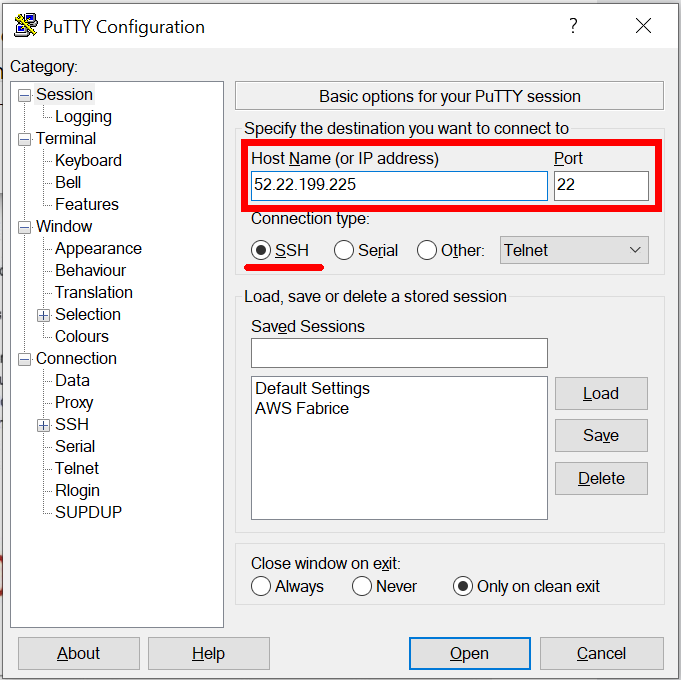
Now open PuTTY (the following configuration window is displayed immediately).
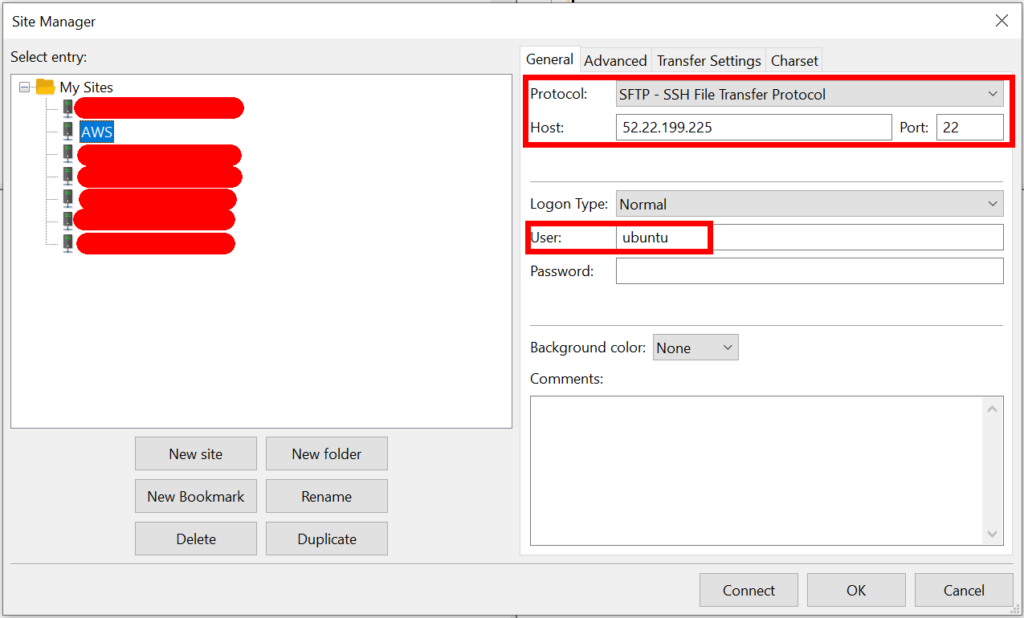
In the Session tab, type your own Elastic IP and set the port to 22. Leave the default SSH connection type.
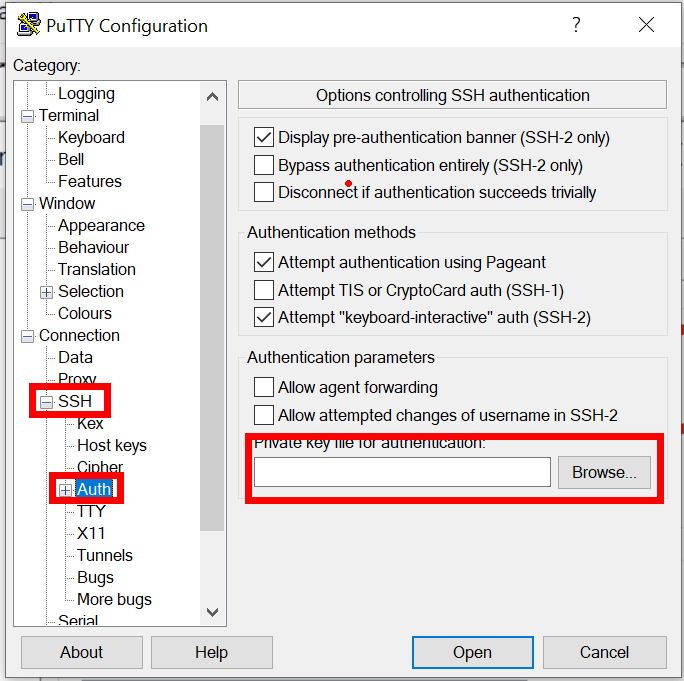
Now, expand the SSH menu and click on Auth, then Browse… to load the .ppk key pair file.
If you want to save your settings, go back to the Session window, type a name in the Saved Sessions field and click Save. The next time you use PuTTY, you can thus simply double click on the name to connect.
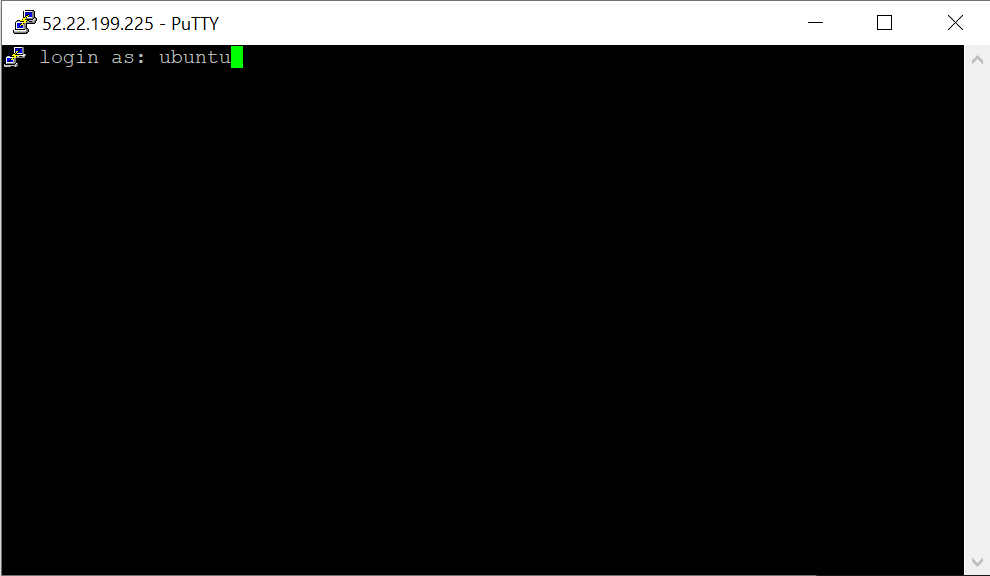
Now click on Open to connect to EC2.
The first time you connect you’ll see a security warning in a pop-up window. Click on Accept if you don’t want this message to appear again during future connections, otherwise Connect Once.
Type ubuntu (the default EC2 user name) and press Enter.
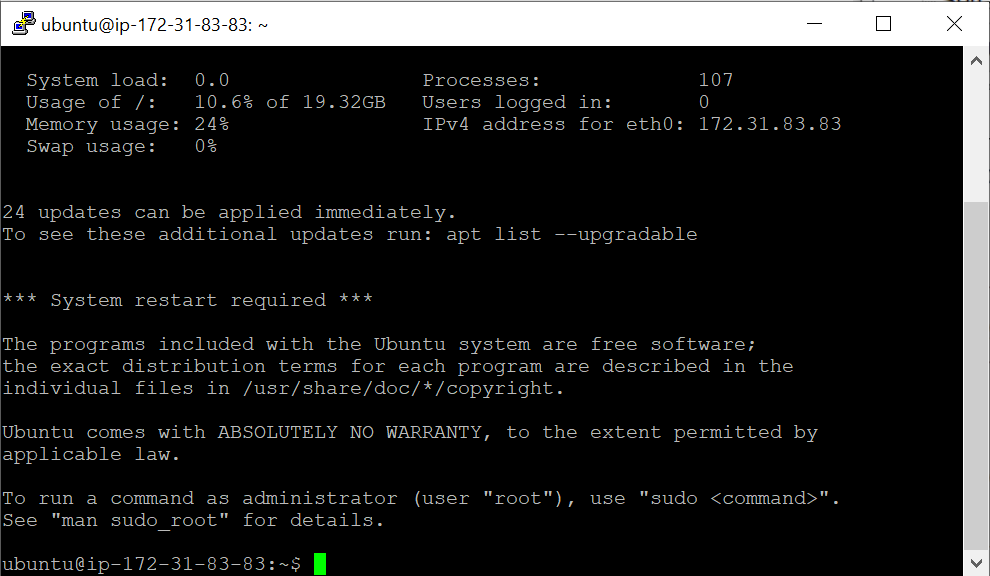
Once the connection is made, you’ll see some details about the server.
Here are a few reasons to install CyberPanel (control panel) + OpenLiteSpeed package instead of the more well-known Apache web server:
While it’s not the best control panel ever, the open source CyberPanel covers all the basics (FTP, e-mail configuration, multiple domains,…) and many advanced options, such as free SSL certificates in one click, all in a nice looking and easy to navigate interface.
OpenLiteSpeed is a very reliable web server and, as its name suggests, lightweight and fast.
This solution includes an e-mail server, which otherwise would be a real pain to install and configure.
Last but not least, all of is installed at once, which is very convenient.
Detailed info and docs can be found on the CyberPanel website. While I recommend you take a look at the documentation, you don’t even need to visit their website to follow along, as I’ll go over everything you need to configure.
Prerequisites
To install CyberPanel and OpenLiteSpeed, you’ll need to connect to your EC2 server with SSH. Learn how to do it here.
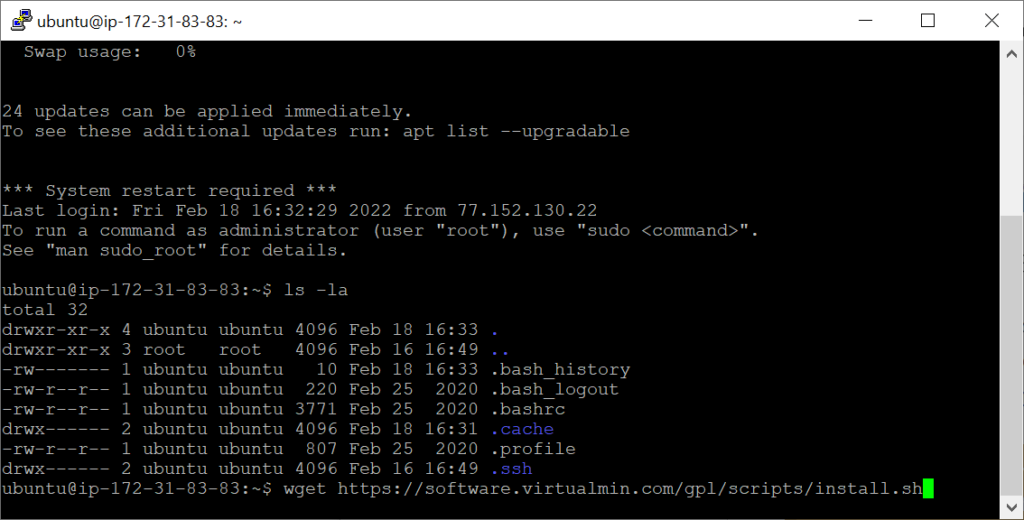
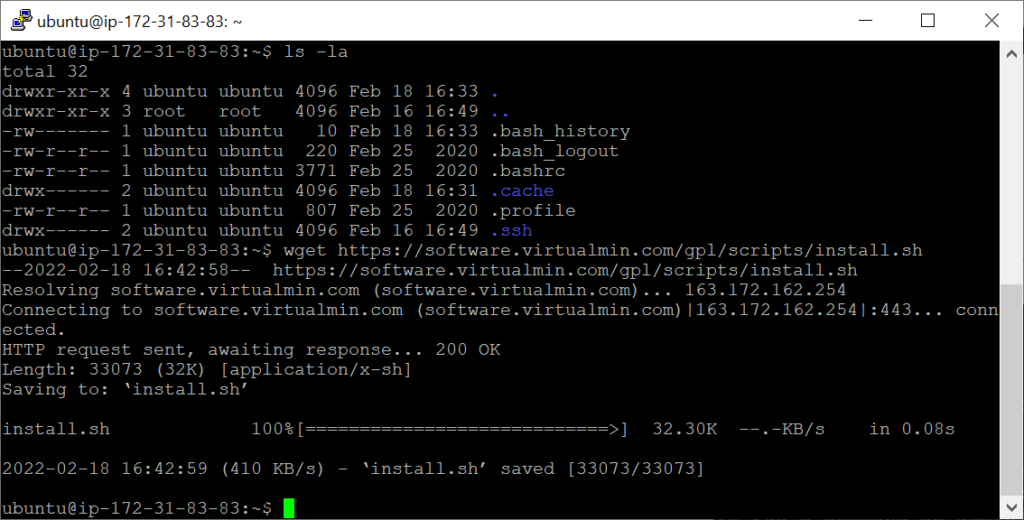
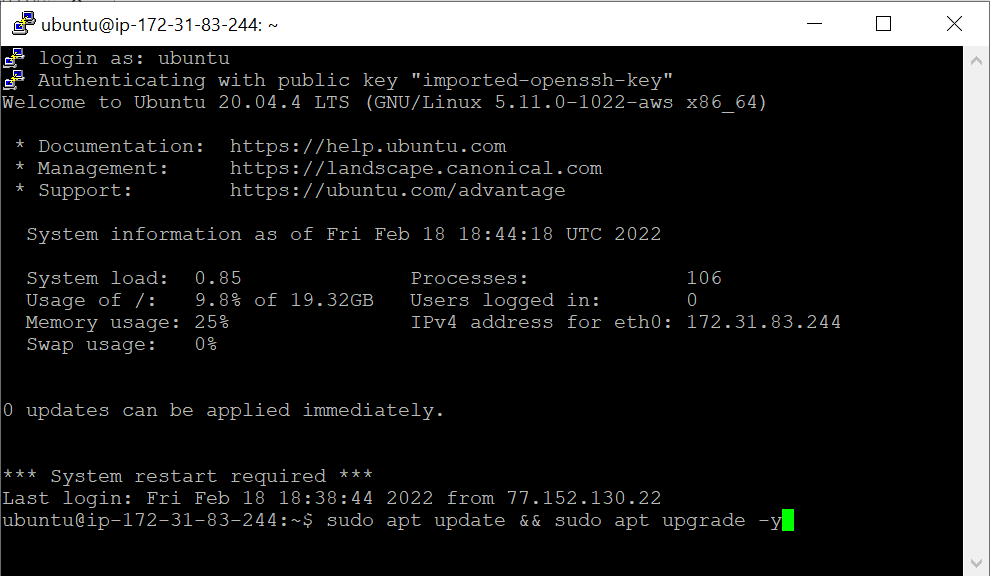
First of all, we can check if there are updates for the Ubuntu operating system and install them automatically. Enter the following and press Enter.
This, and all other commands mentioned, can be copied/pasted instead of typed manually. To paste in the AWS command line browser window, use the shortcut Ctrl + C. To paste in PuTTY, it’s a simple right-click.
sudo apt update && sudo apt upgrade -y
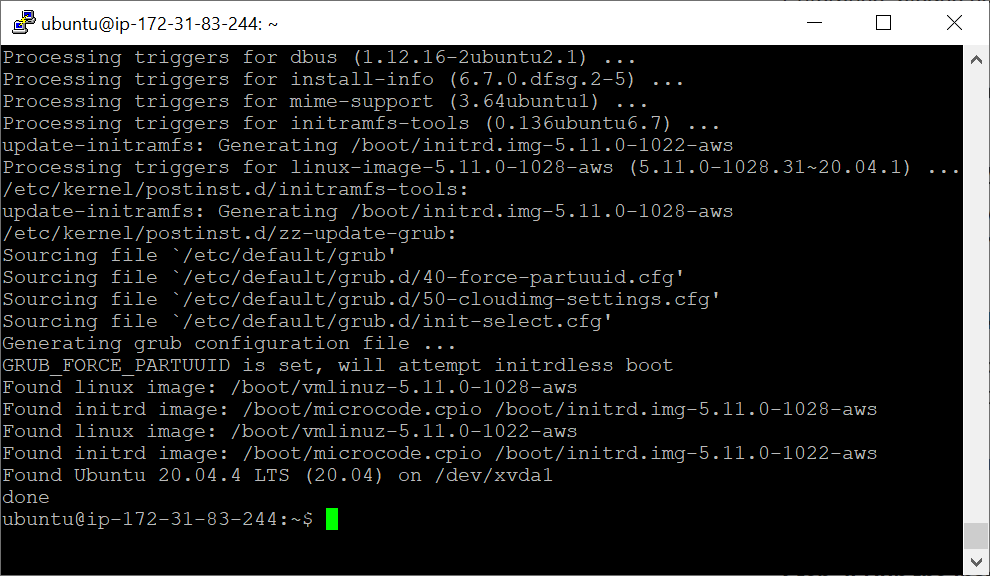
It might take a few minutes to update everything.
To install CyberPanel and OpenLiteSpeed, you first need full, or “superuser”, access to the server. To change the user from ubuntu to root, use the following command.
sudo su -
You will notice the changed username at the beginning of the row.
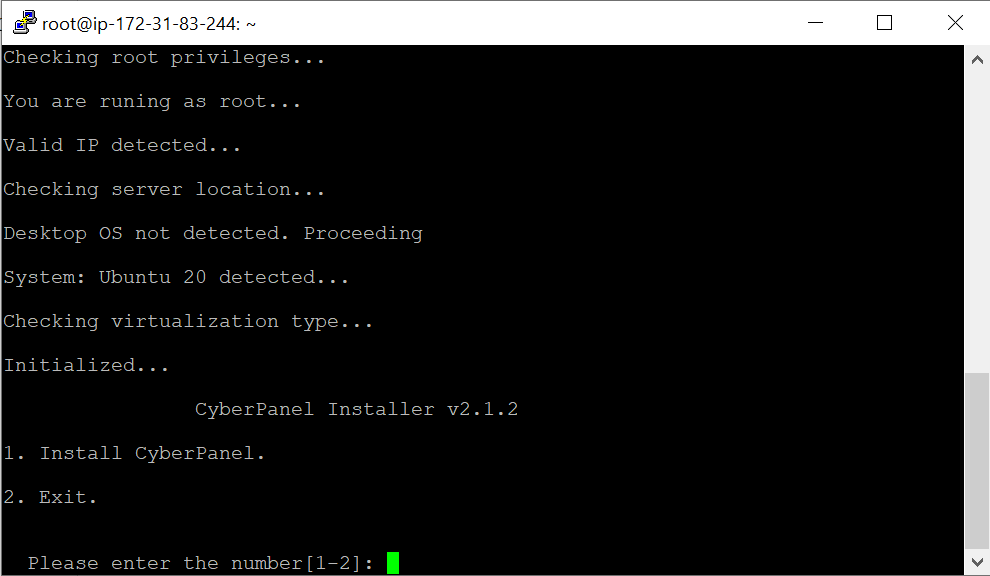
Installing CyberPanel + OpenLiteSpeed
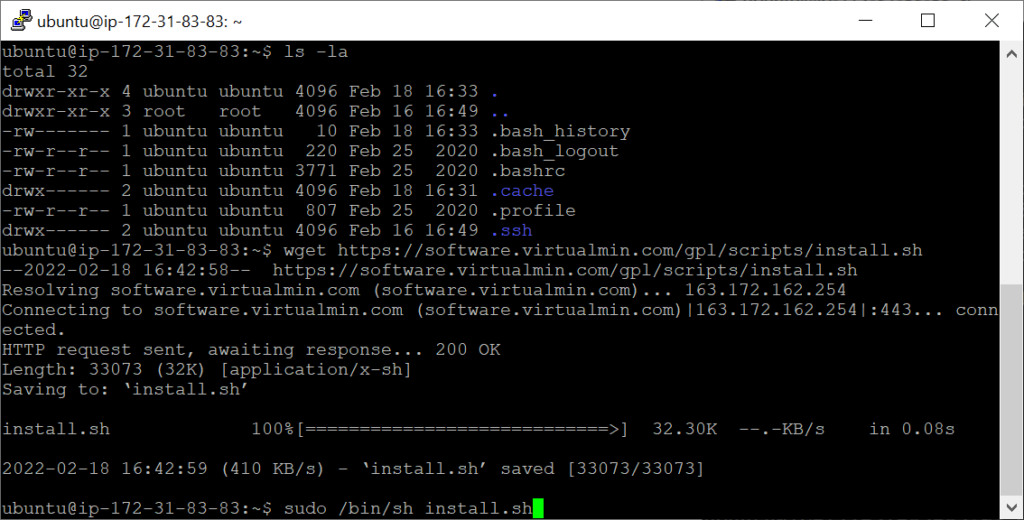
Use the following command to install CyberPanel and OpenLiteSpeed.
sh <(curl https://cyberpanel.net/install.sh || wget -O - https://cyberpanel.net/install.sh)
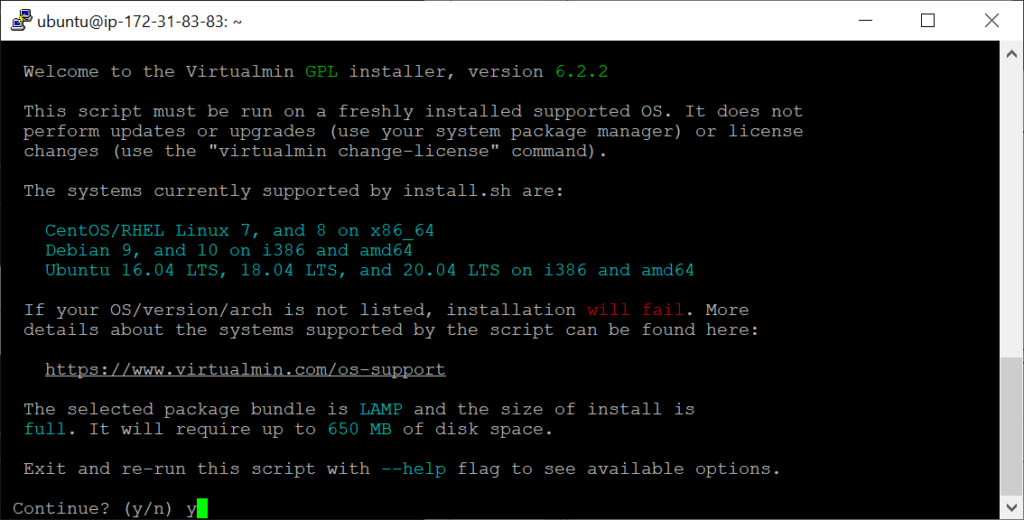
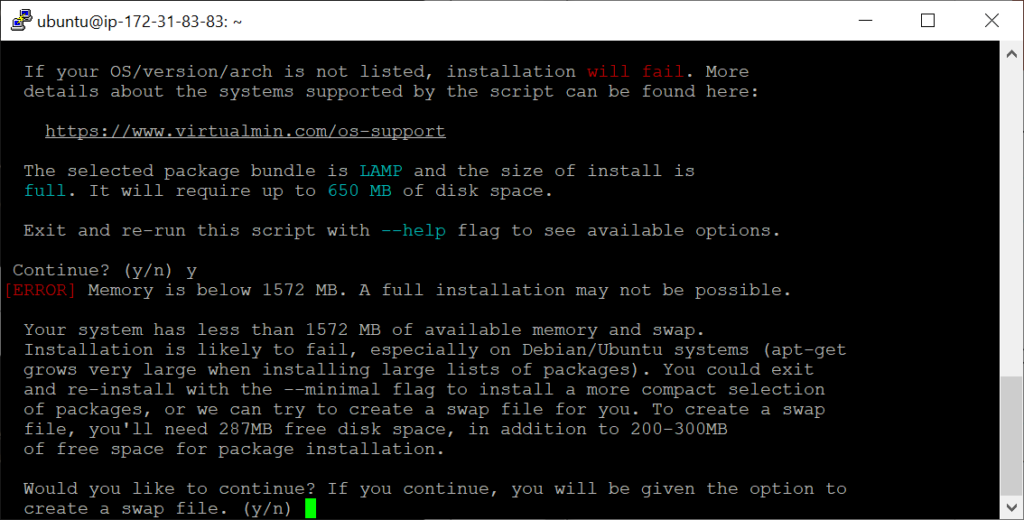
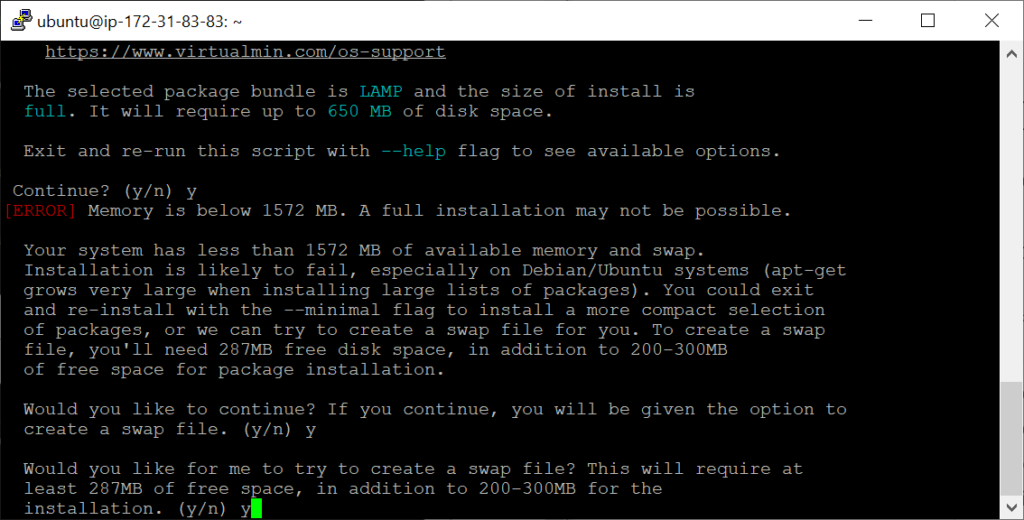
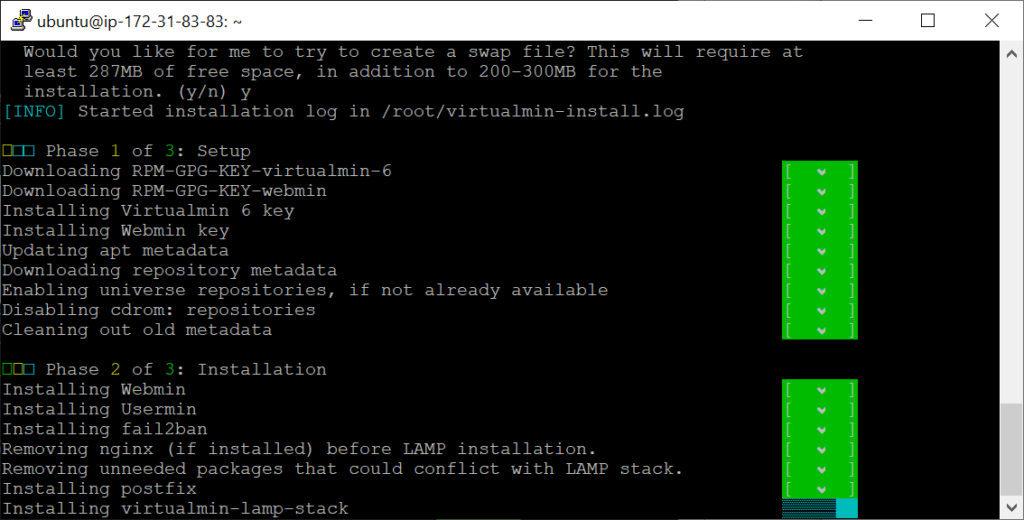
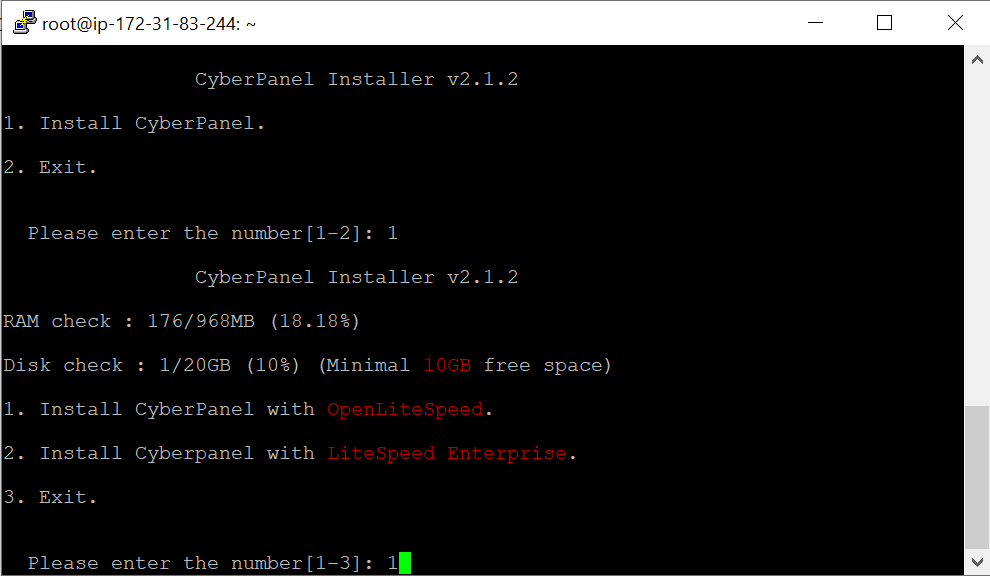
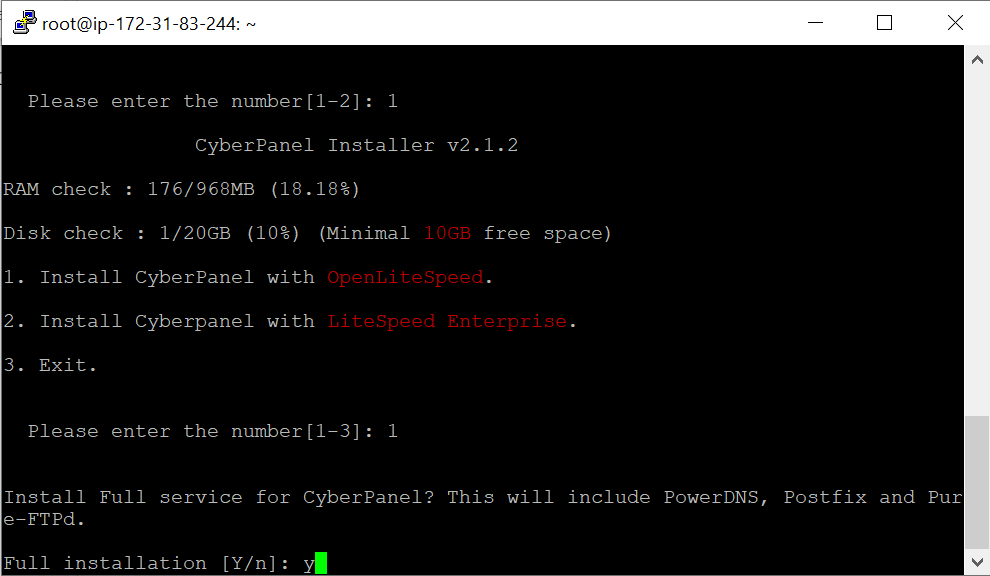
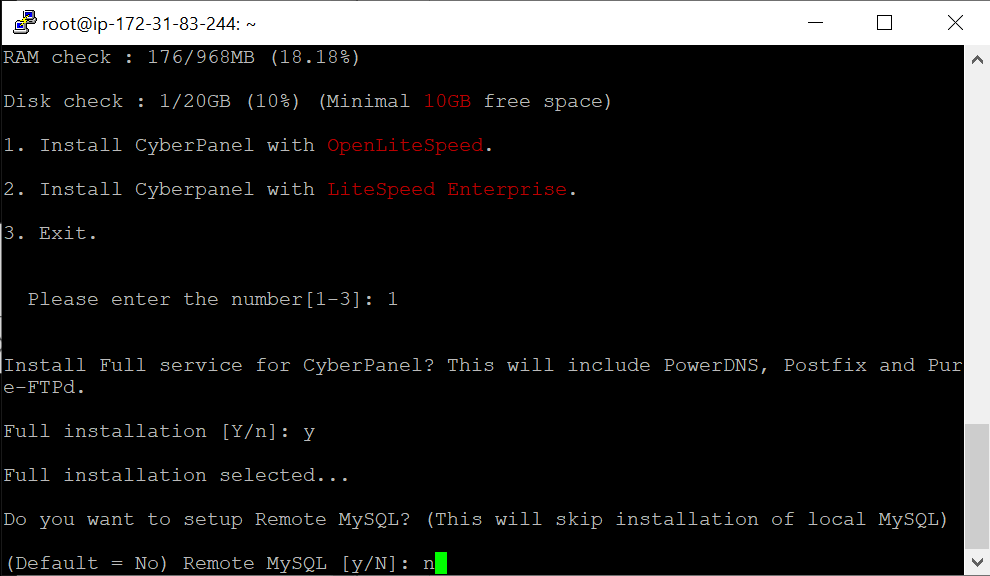
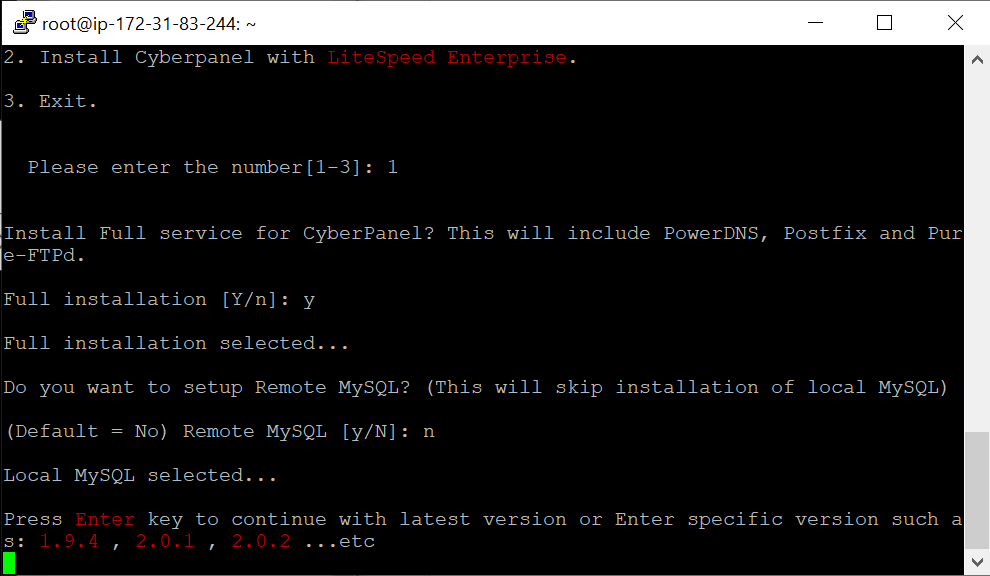
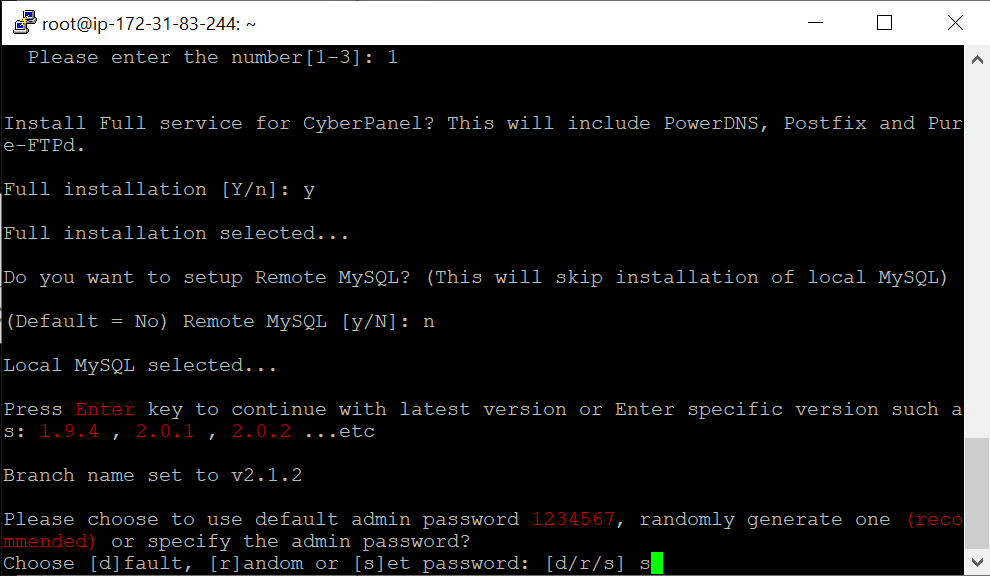
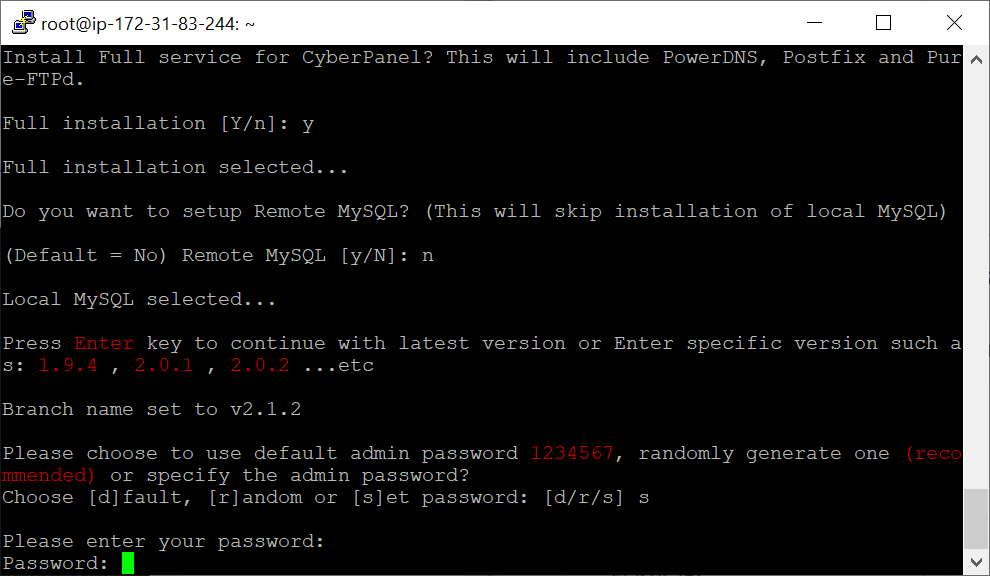
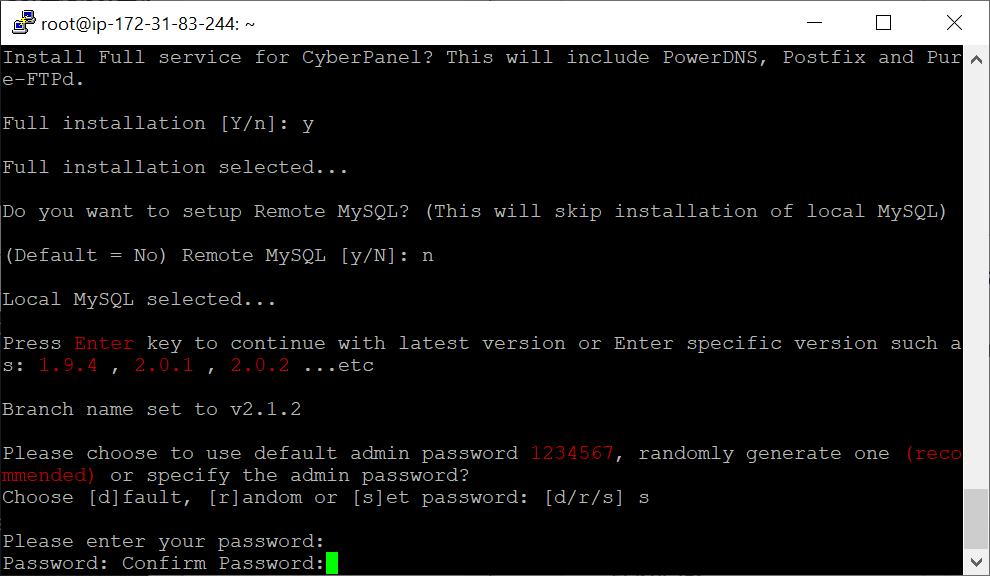
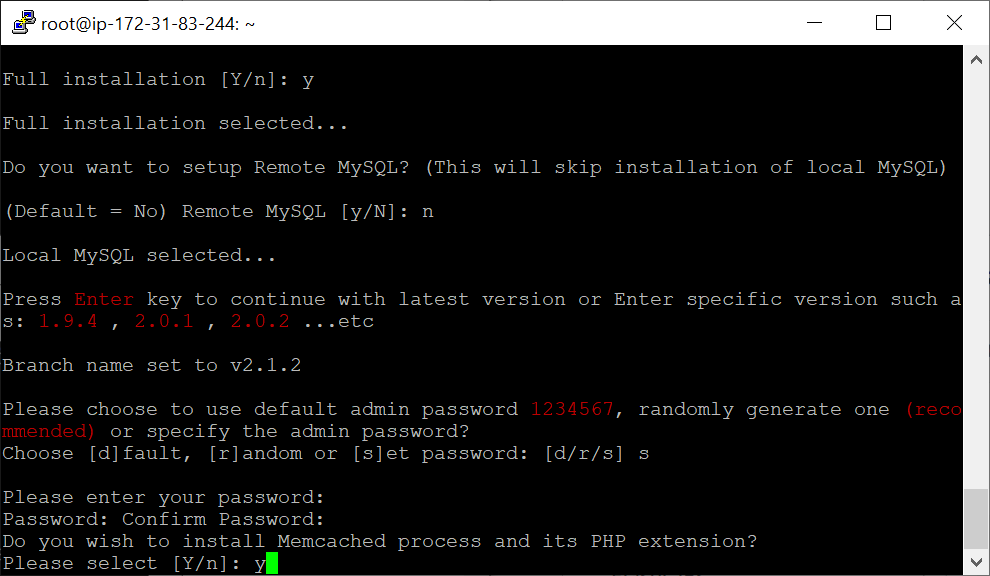
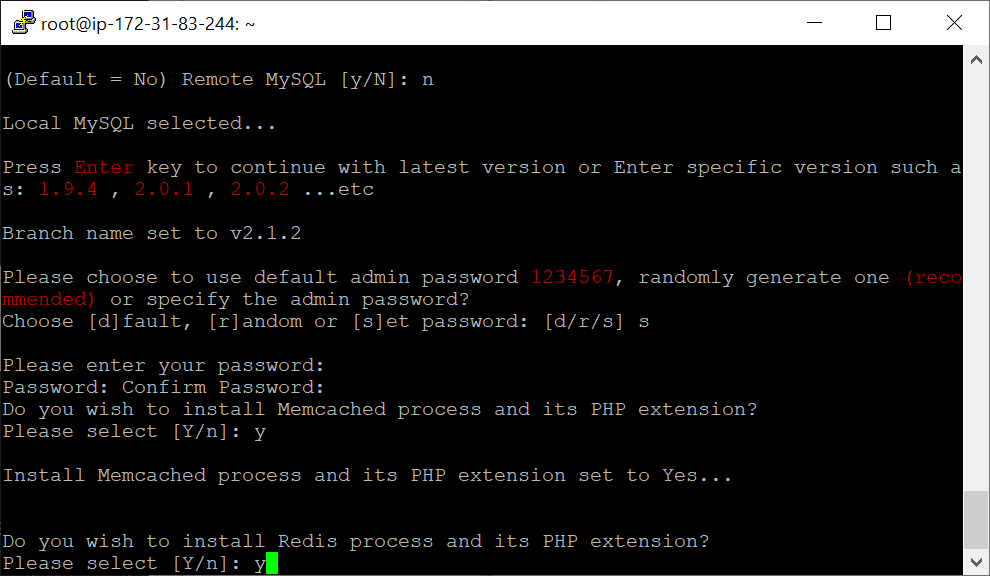
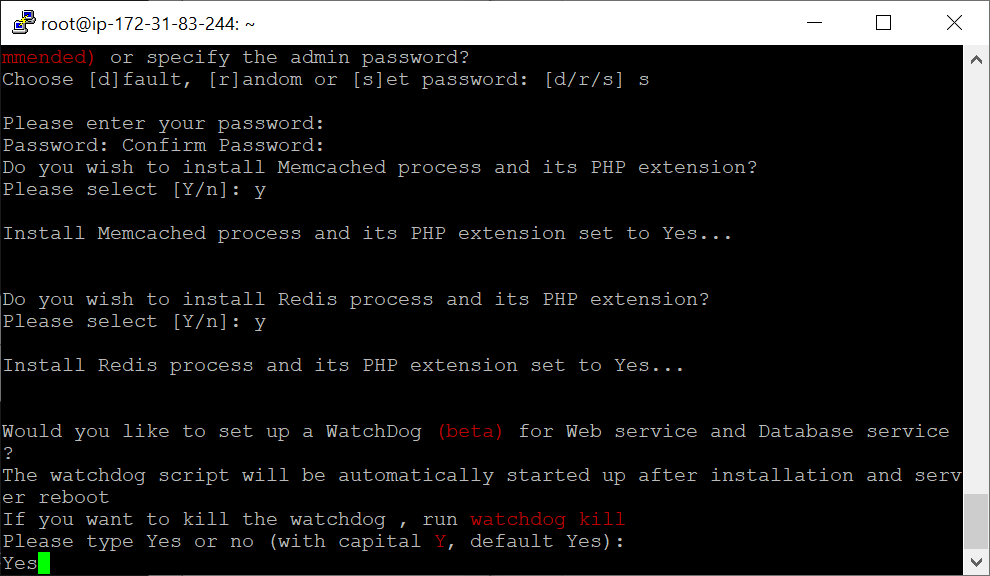
You’ll be asked a few questions during the installation. Just follow the instructions below each one of the following screenshots.
Type “1” to install CyberPanel and press EnterType “1” to install CyberPanel + the basic OpenLiteSpeed, and press EnterType “y” to install everything and press EnterType “n” to skip remote MySQL and press EnterPress Enter to install the latest versionType “s” and press Enter to choose your own passwordType your password and press Enter (note: nothing will be displayed, not even *)Confirm your password and press Enter (note: nothing will be displayed, not even *) Type “y” for the default option and press EnterType “y” for the default option and press EnterType “Yes” for the default option and press Enter
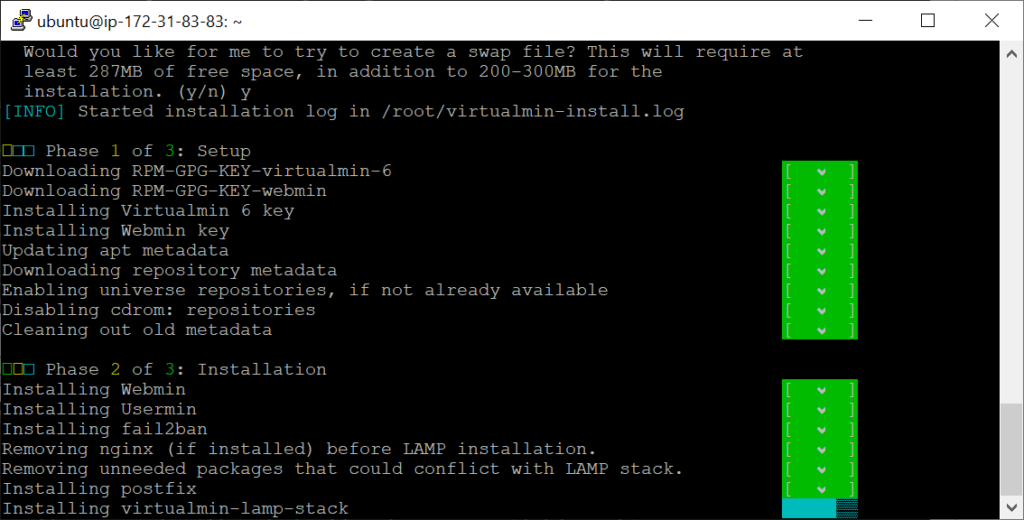
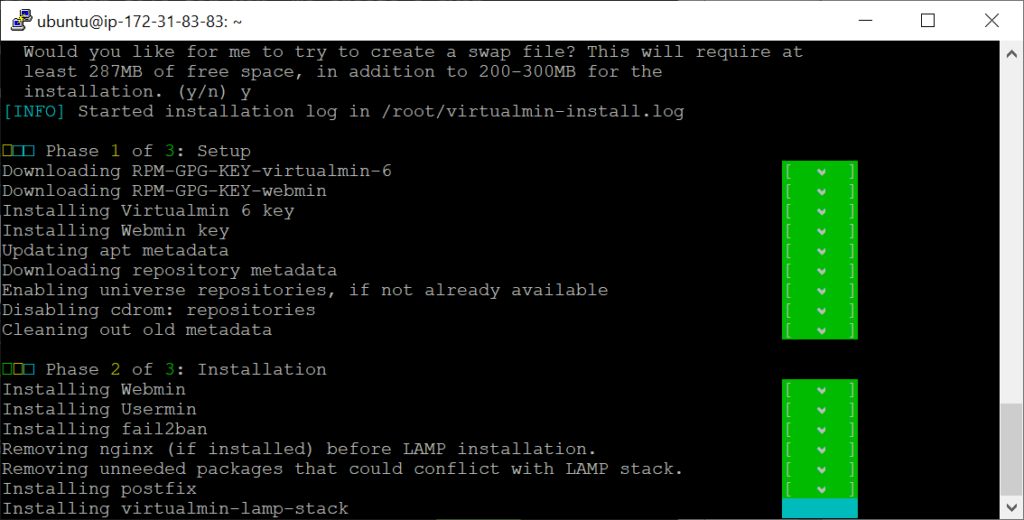
The installation will then start and should take around 10 minutes.
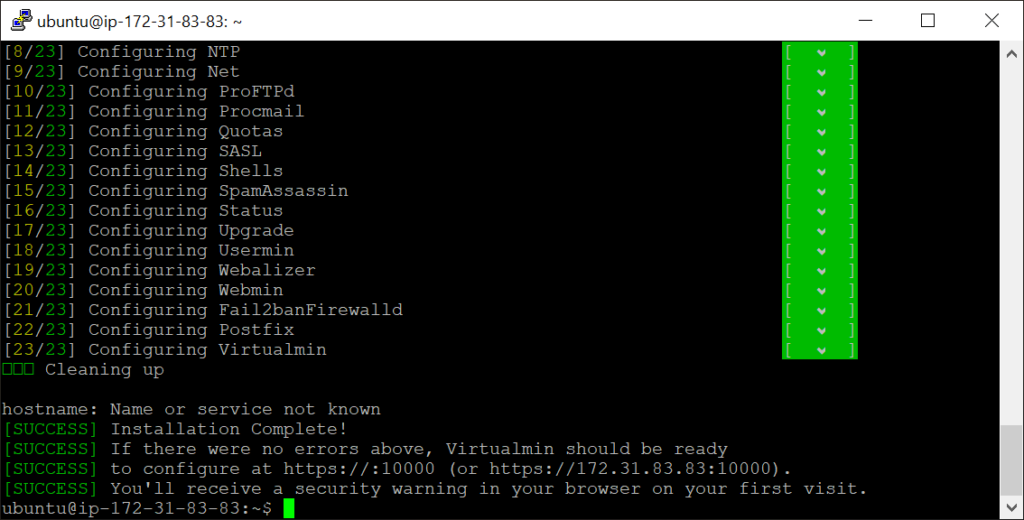
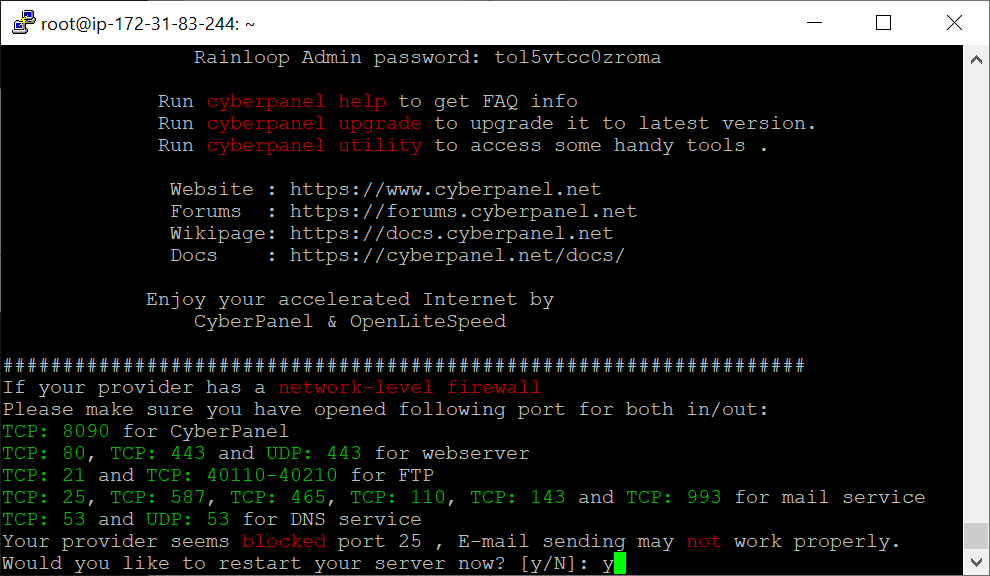
Type “y” to restart the server and press Enter.
At this point, you could lose the SSH connection. The server could also be inaccessible when typing your Elastic IP in a browser, even after a few minutes. If that happens, just go to AWS to stop and then start my EC2 instance (restart might not work, but feel free to try it).
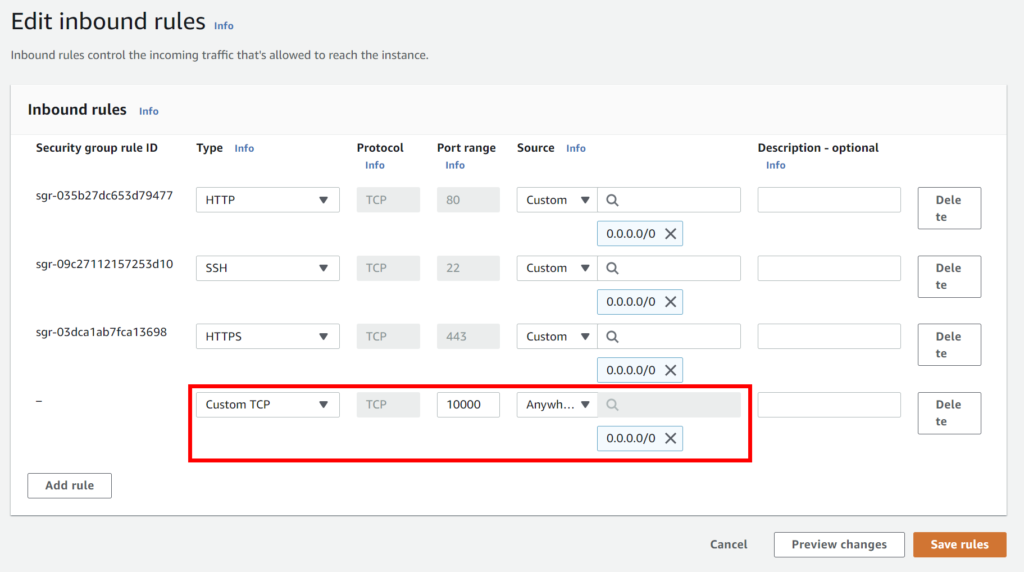
As shown in this last screenshot, there are quite a few ports than need to be opened in your EC2 server for everything to work properly.
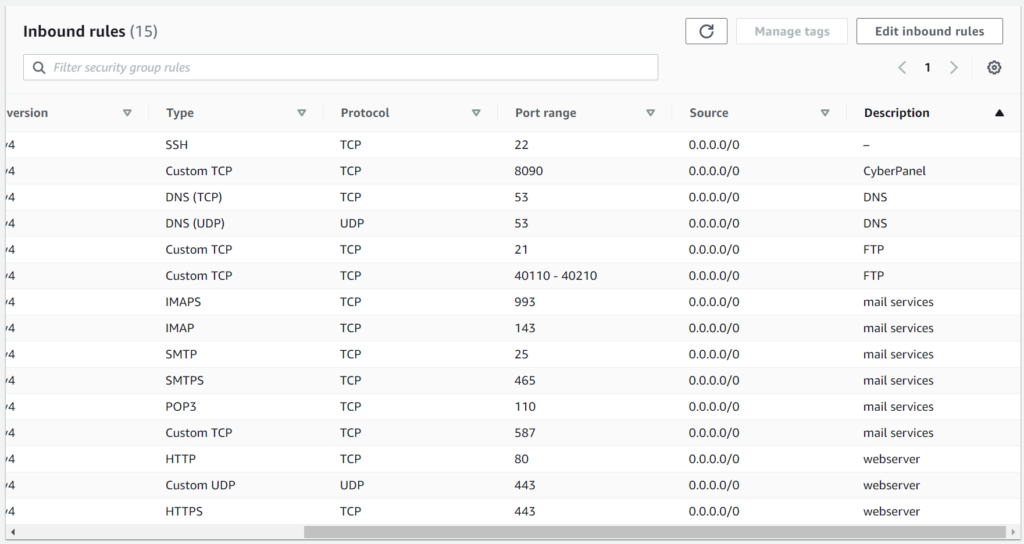
Before you forget (it happened to me the first time I set up CyberPanel on AWS), open all those ports, just as when you opened the HTTP(S) ports (as explained in a previous article).
This is the full list of ports that should be open. The descriptions are optional, but I think it’s good practice to add them, for later reference.
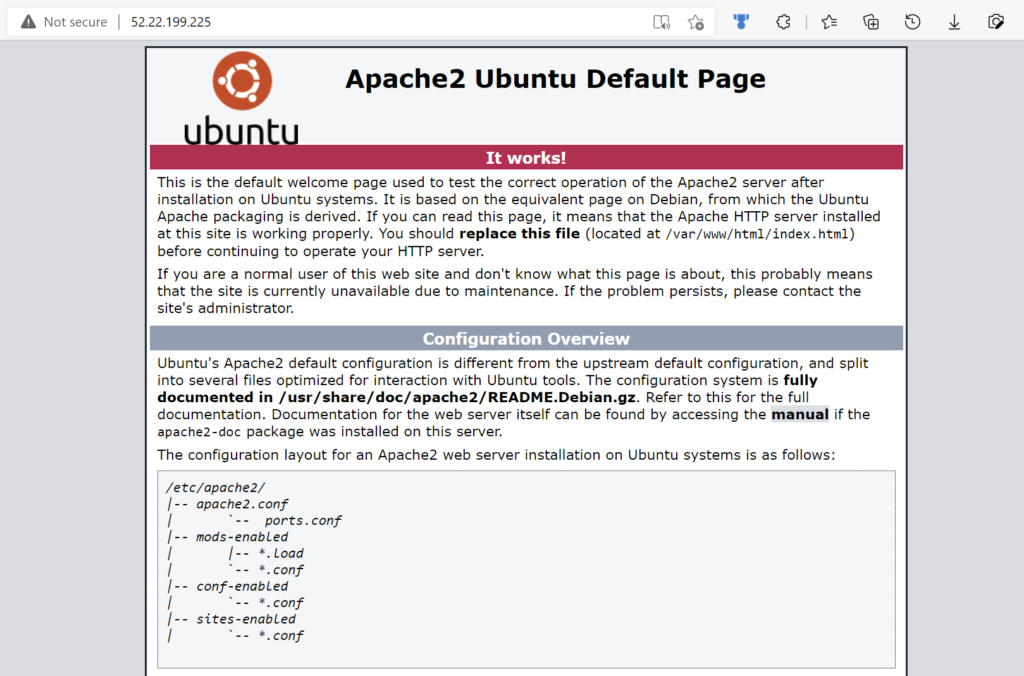
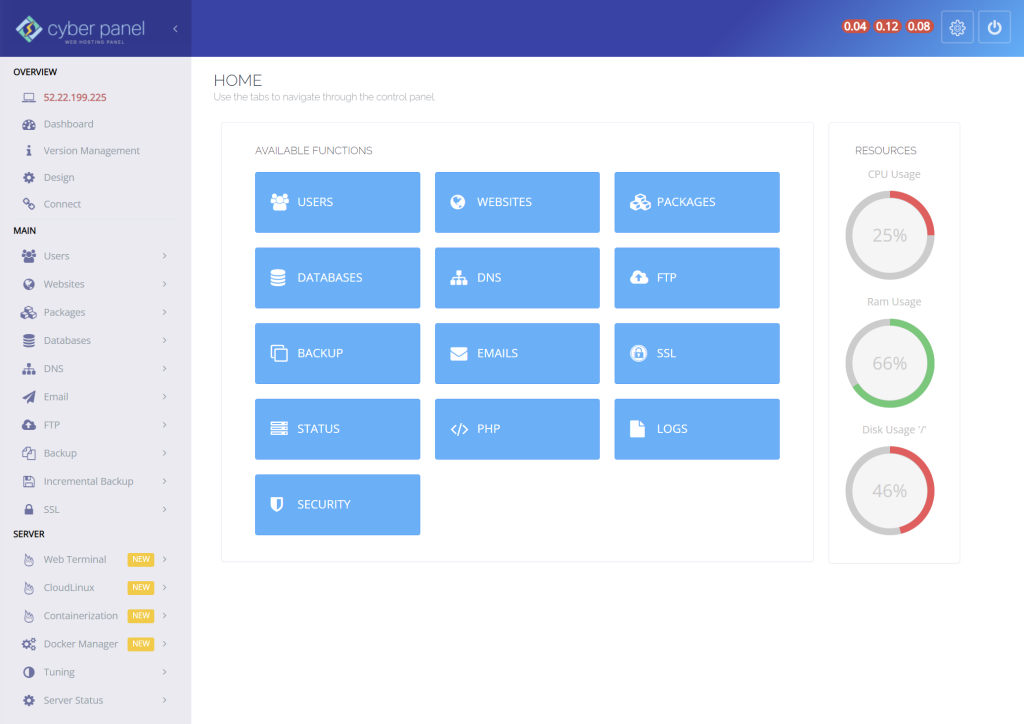
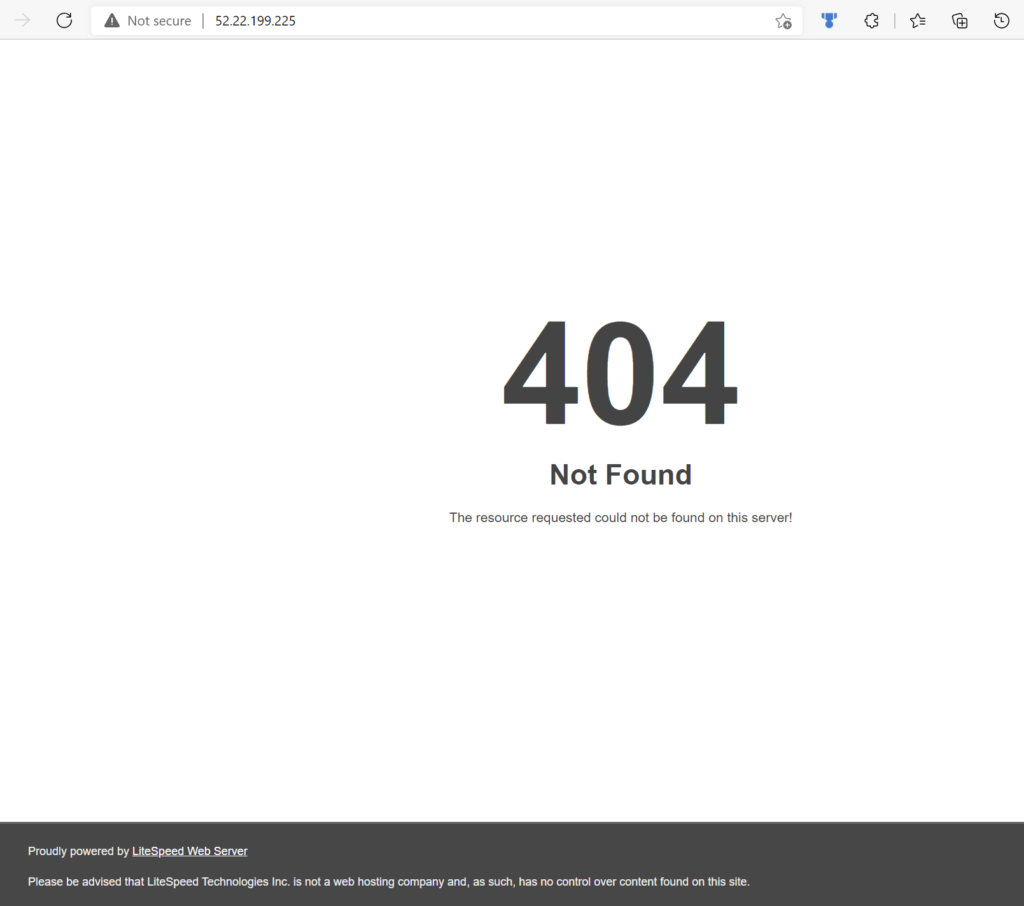
After that, entering the Elastic IP in a browser returns the following page. There is obviously still no content, but it confirms that the server is running.
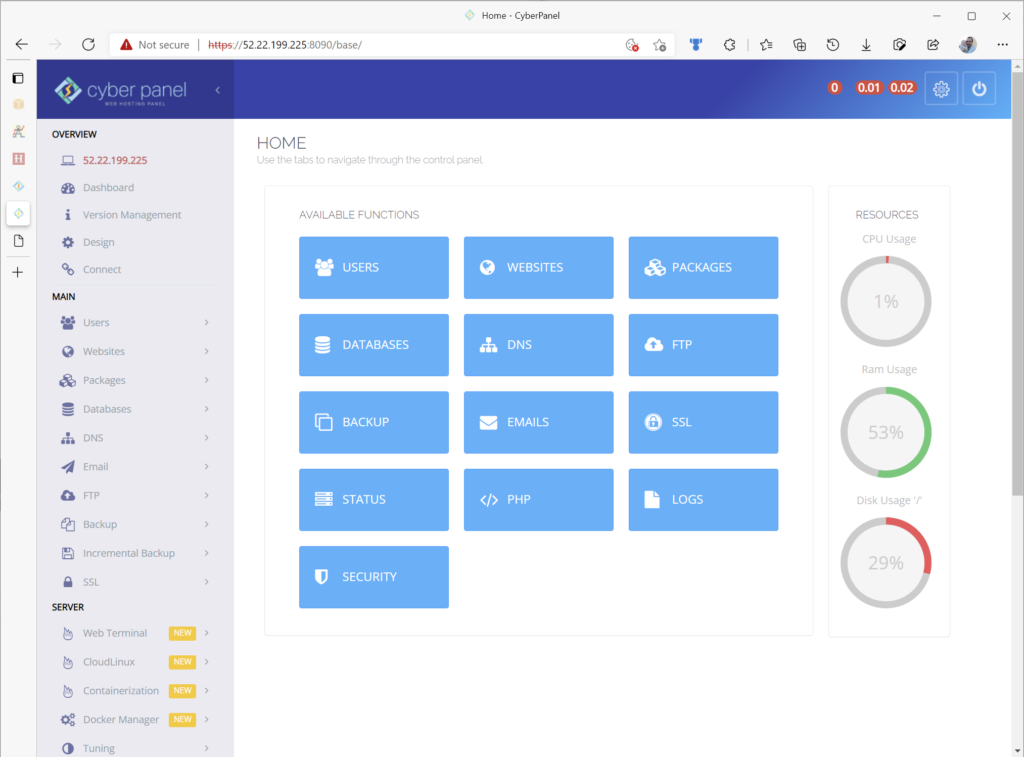
Accessing CyberPanel
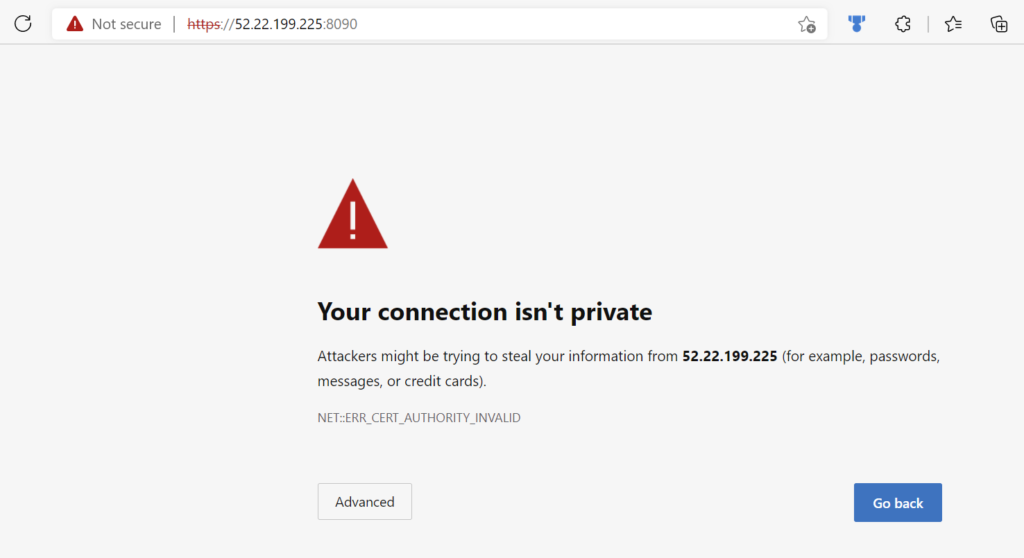
CyberPanel is accessible through the port 8090, which means you have to type either https://yourElasticIP:8090 or https://yourDomainName:8090 to open it.
No domain name is linked to this server yet, so you have to use your Elastic IP.
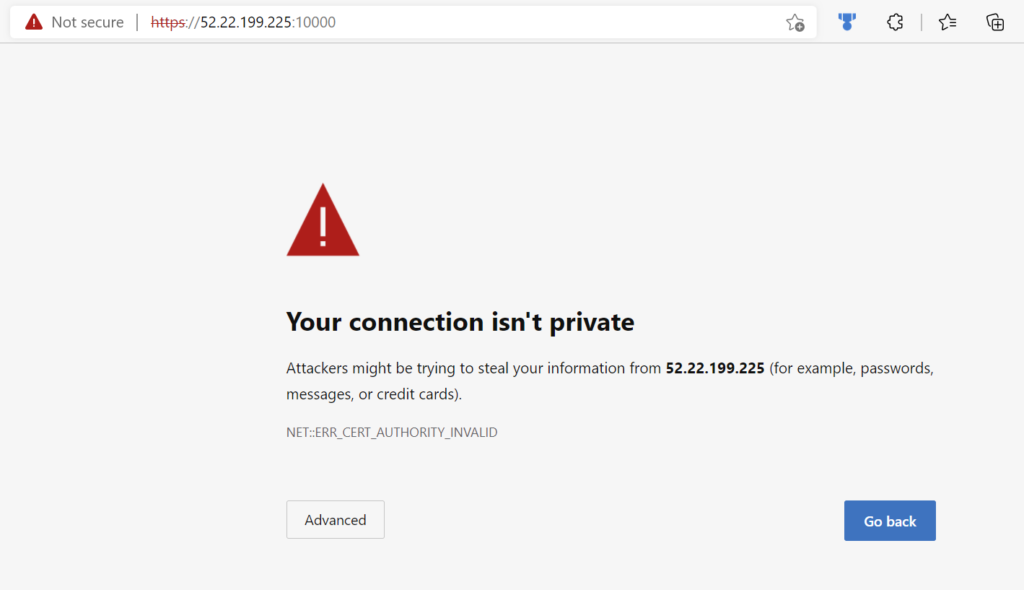
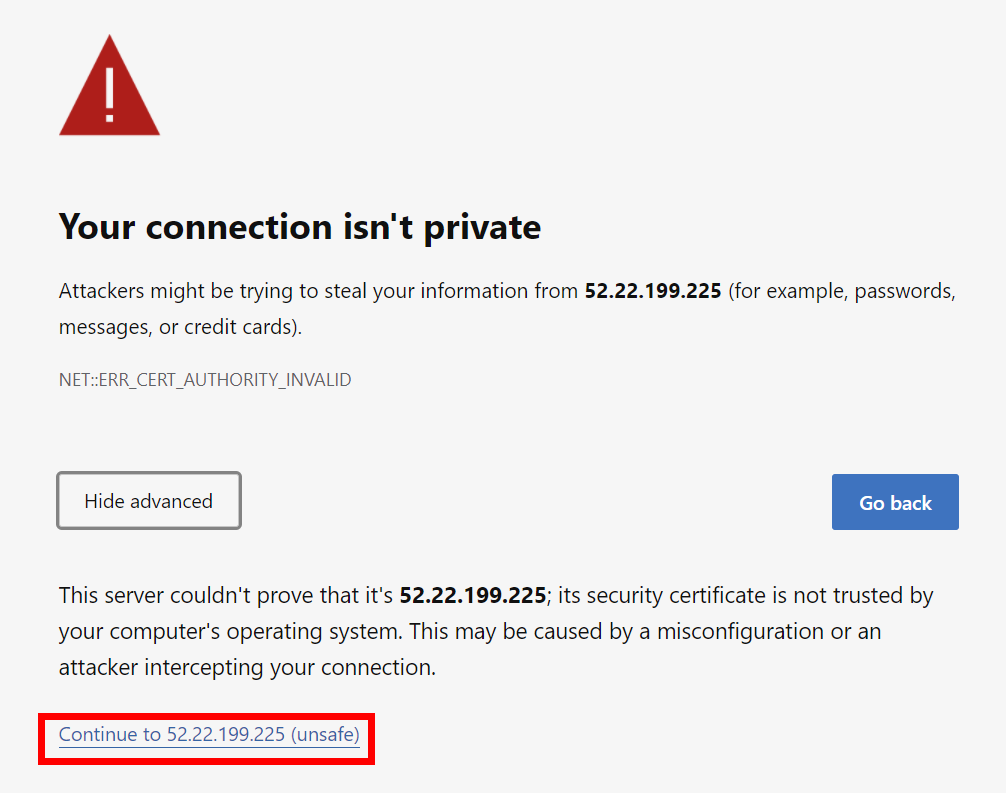
Also, since there is still no SSL certificate, you’ll get a warning when trying to access it through HTTPS.
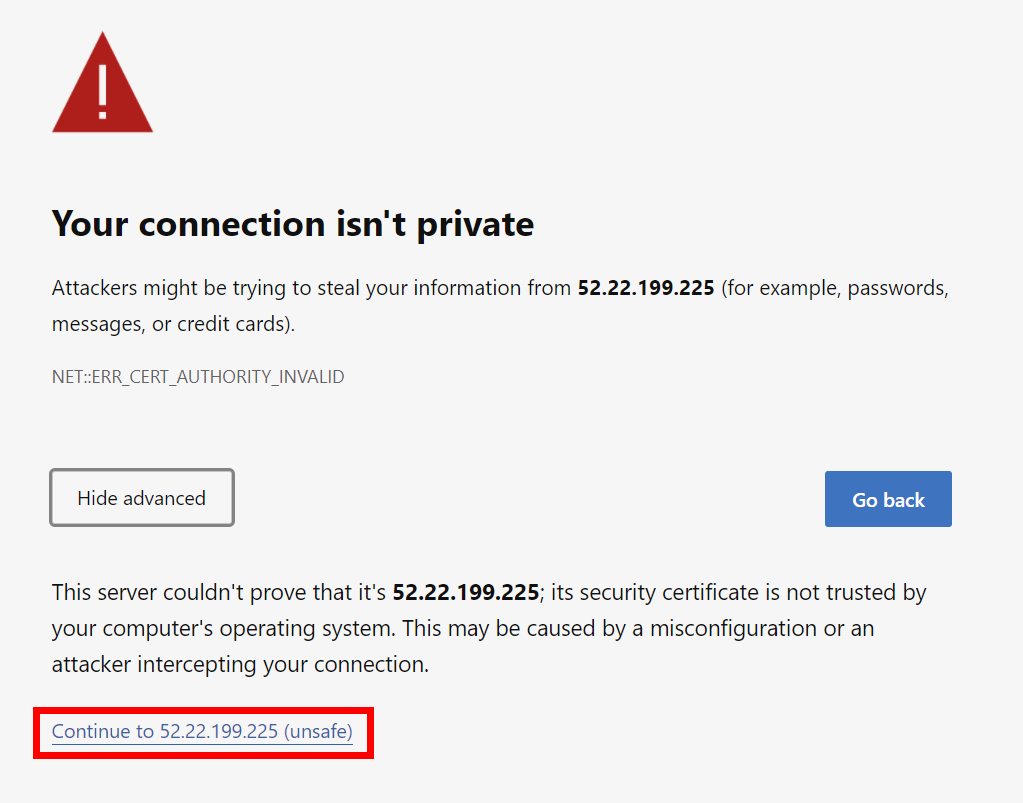
Click on the “Advanced” button and then on the link marked as unsafe. Obviously, you’ll see your own Elastic IP, not the one used in this test server.
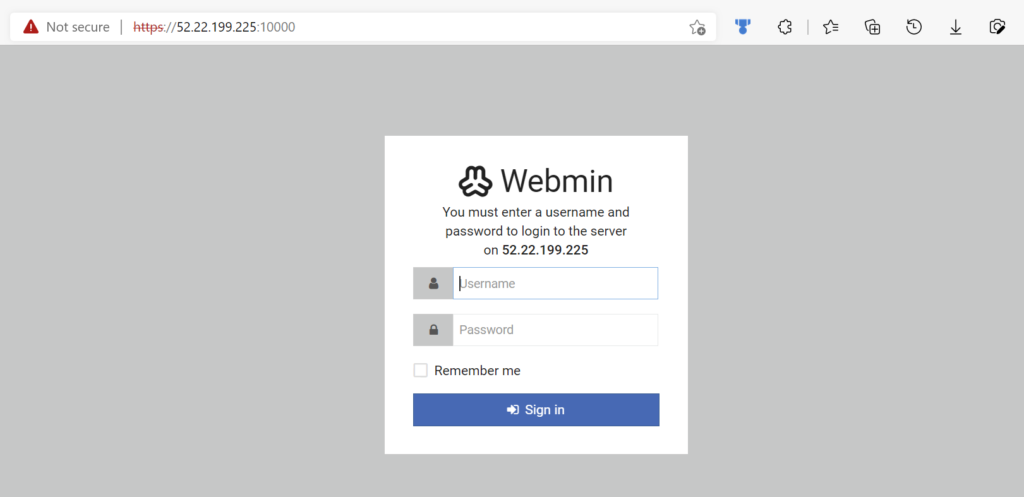
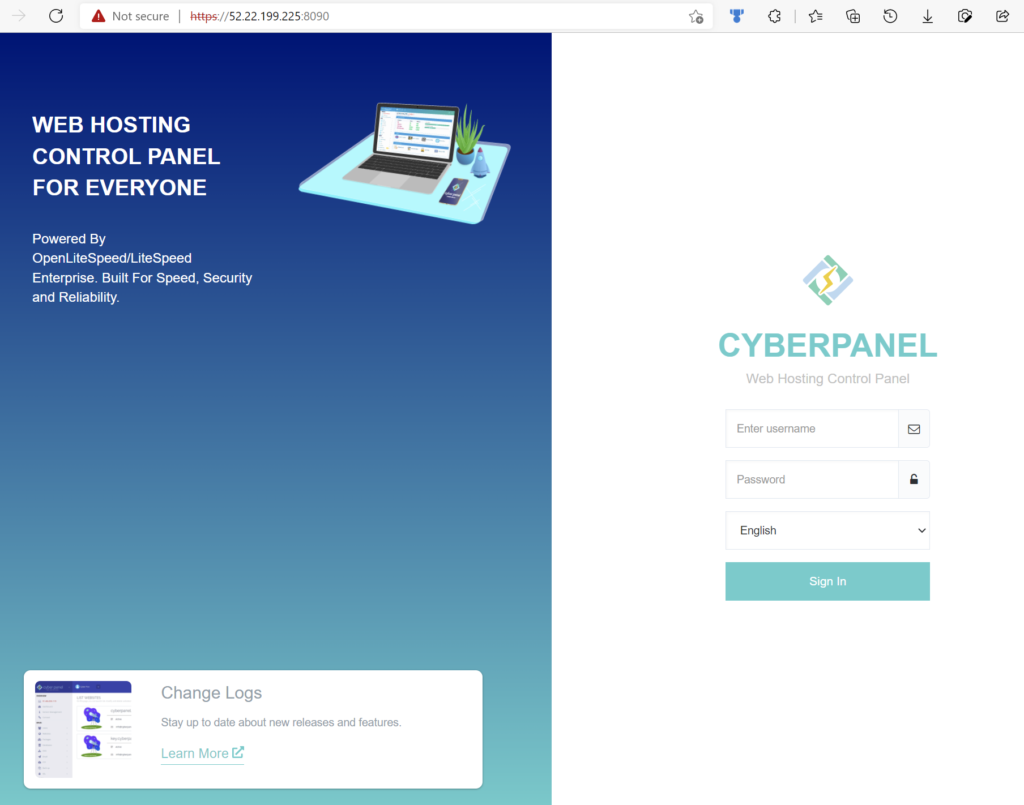
To log in, the username is admin and the password is the one you’ve chosen during the installation.
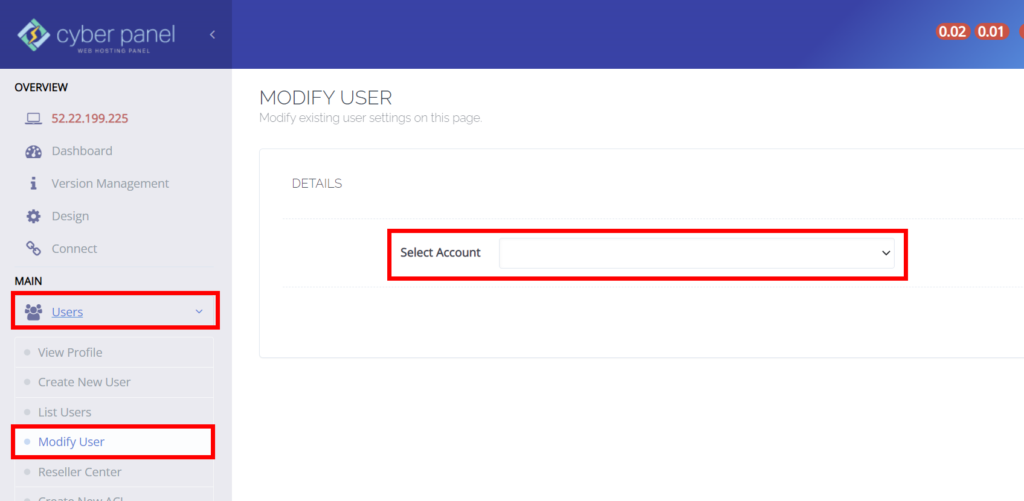
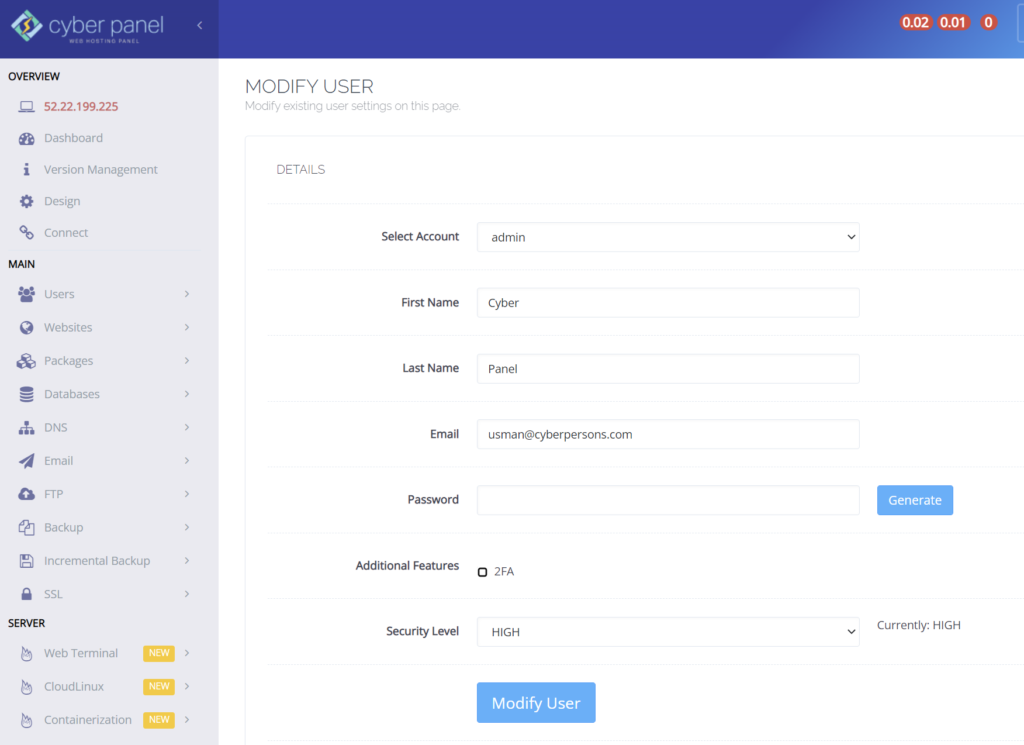
If you want to change your admin password and details, you can do it from the Users menu.
Next step: Linking your domain name
In the next article, you’ll learn how to set up name servers and your DNS records, in order to link your domain name to your server.
Issue an SSL certificate to enable secure web browsing (HTTPS)
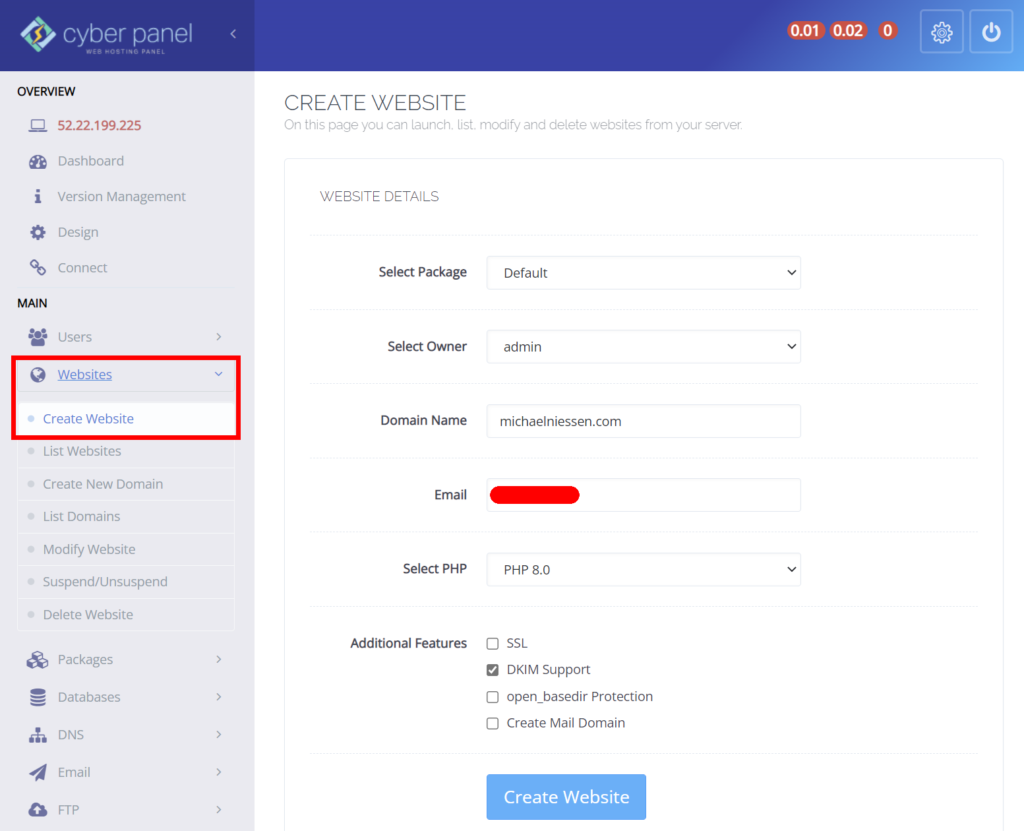
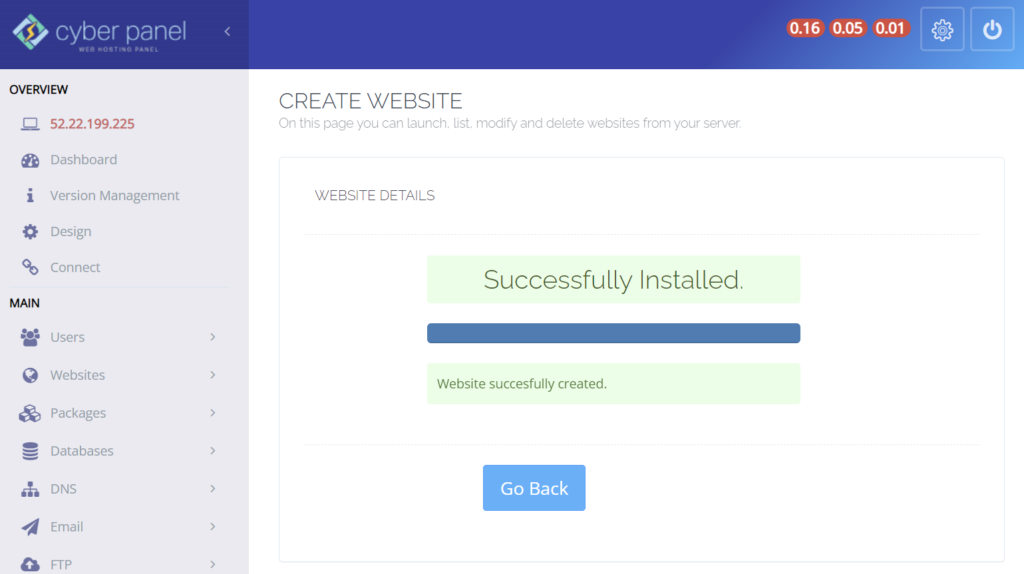
Create a website in CyberPanel
A website in CyberPanel is not the content itself, but rather like a container to which your domain will be linked, and is therefore essential.
It’s pretty straightforward, as there is only a single form to fill in.
I recommend you to check CyberPanel’s documentation for full details, but just so you know, a package is like an account. That allows you to completely segregate groups of websites, users, e-mail addresses,… There only one package by default and there is no need to create another one unless, for instance, you want your server to host someone else’s website(s).
Thus, unless you have specific needs, just select the Default package and Admin user, type your domain name and e-mail address. Leave SSL unchecked (you can’t have a proper SSL certificate until your domain is linked, see below), and check DKIM Support (very important for e-mail so mails are recognized as non-spam).
It will take just a moment after you click on Create website for it to complete.
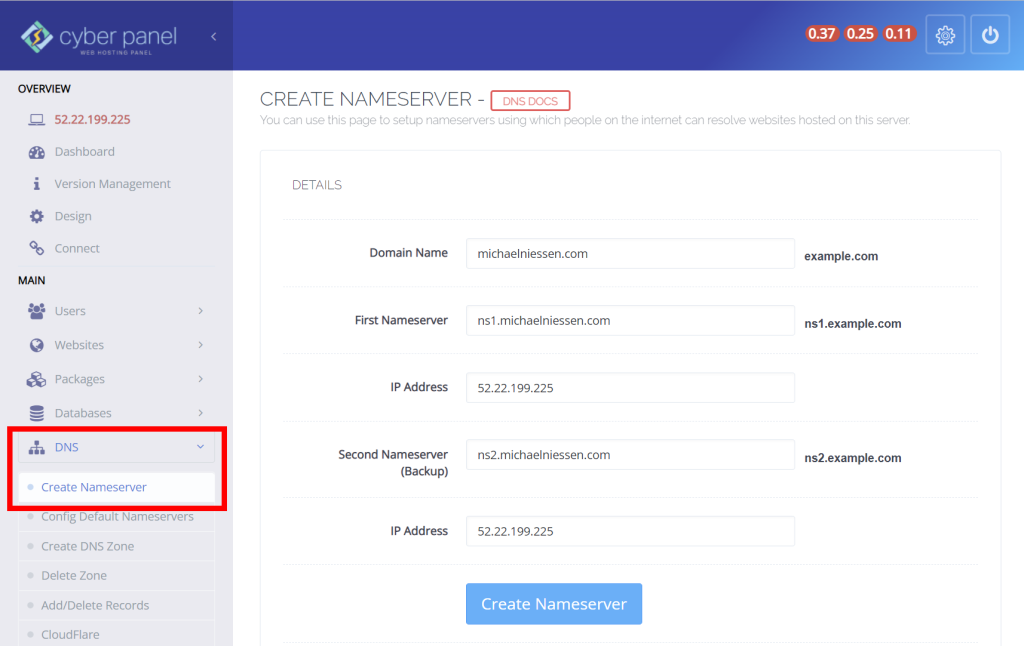
Create name servers in CyberPanel
Name servers are used to direct web traffic from your domain name(s) to your server.
In CyberPanel, go to the DNS menu and click on “Create nameserver” and fill in the form.
The name servers don’t have to be prefixed with ns1 and ns2 (you could choose mickey and minnie, for instance), but those are easy to remember and kind of standard choices. The IP address is the same for both name servers: your Elastic IP.
Change the domain name’s DNS records
This is the only part of this series of articles where you might have to find your own way, because it depends on your domain name registrar. That said, the settings’ names (manage DNS, Host Names,…) are similar no matter what registrar you use, so it shouldn’t be very difficult.
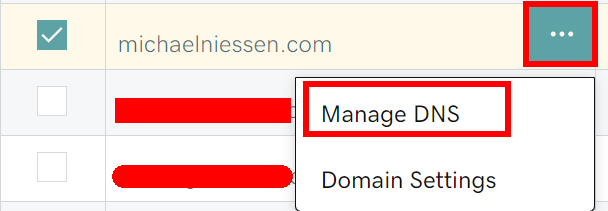
The following screenshots are from GoDaddy, where the domain used in this example is registered.
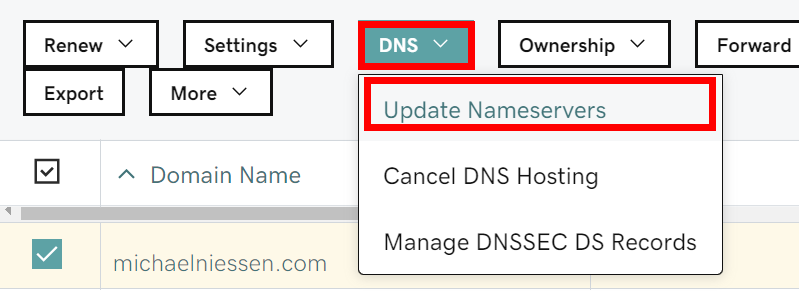
In the My Domains page (https://dcc.godaddy.com/domains), check the domain that you want to edit, open the menu and select “Manage DNS”.
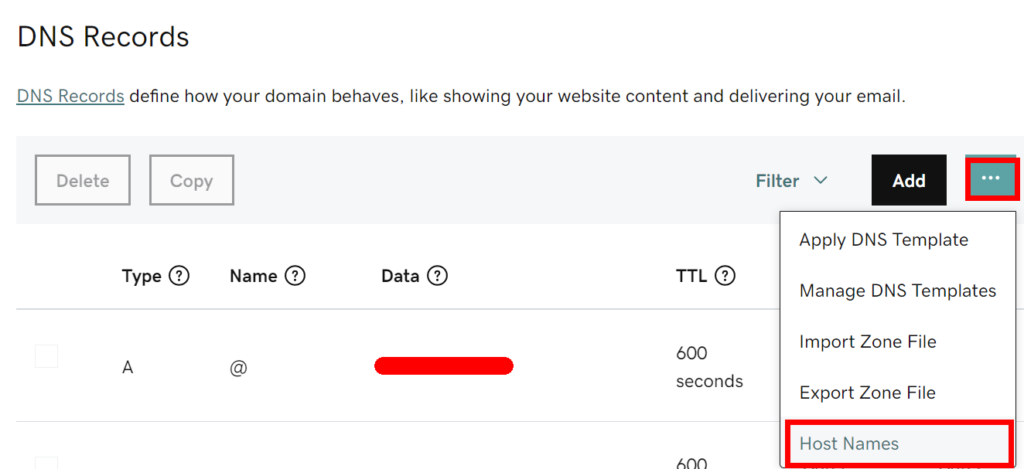
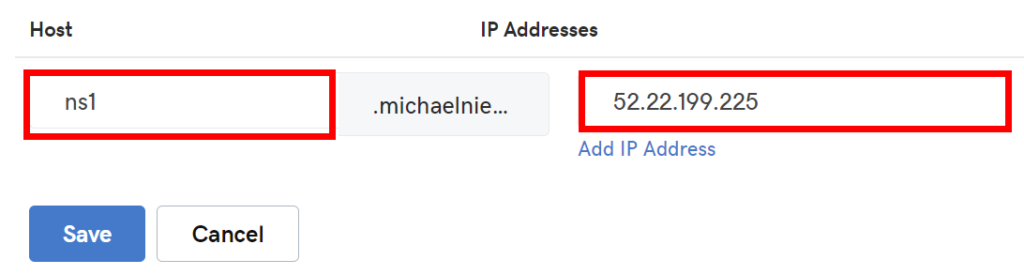
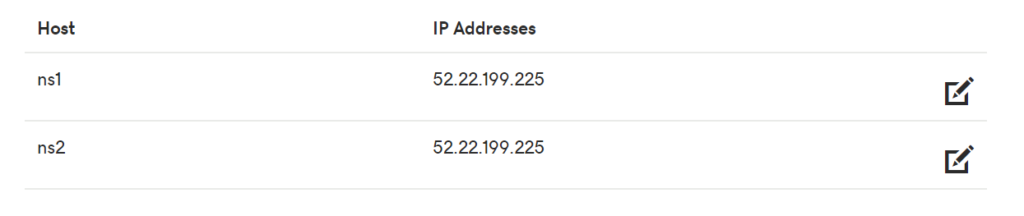
First, you need to add host names (IP addresses for the name servers previously created in CyberPanel).
Add 2 records, one for each of the prefixes of your name servers (ns1 and ns2, or any other names you chose) and, again, the IP address of your server.
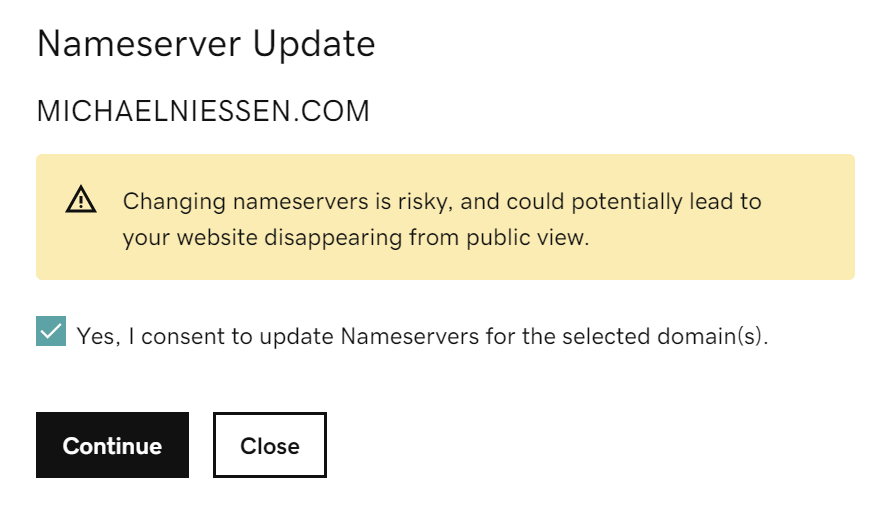
Once both hosts are created, back in the My Domains page, check the domain and update the nameservers.
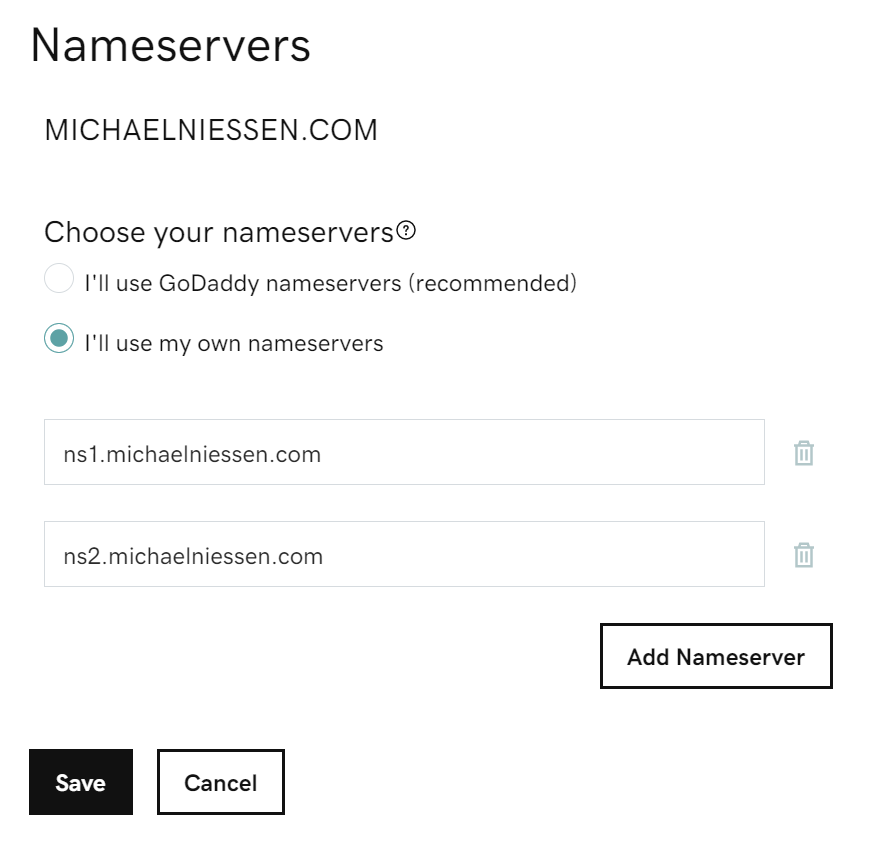
Choose “I’ll use my own servers” and fill in the two fields, then click “Save”.
Confirm the change and click on “Continue”.
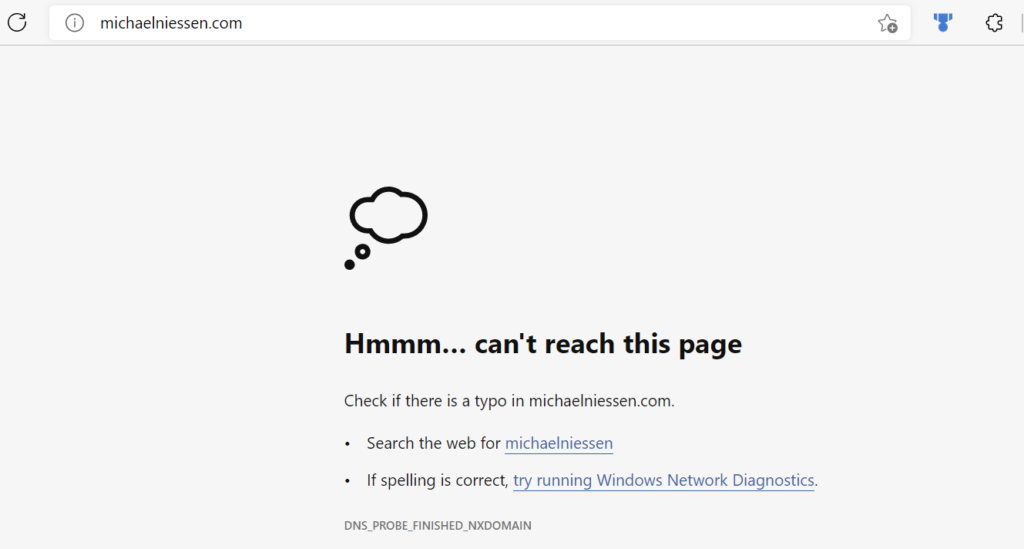
That’s it as the domain registrar is concerned. It take some time for the change to take effect, so if you enter your domain name, you’ll see something like this.
If you just bought your domain name and depending on your registrar, the DNS change might take only a few minutes. If it was previously directed to another server, though, it might take hours before it is properly redirected. From my experience, it usually takes at most 5 or 6 hours, but don’t worry if it takes longer (up to 24h or even 48h in rare cases).
Issue an SSL certificate
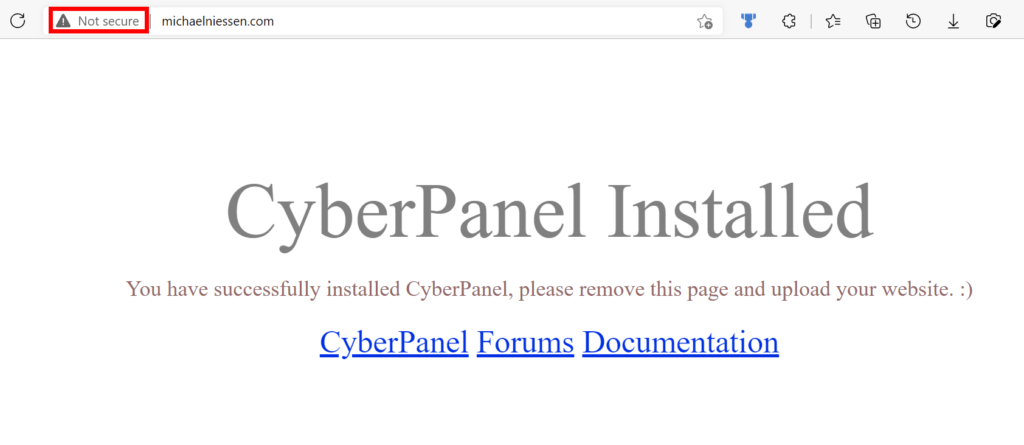
In CyberPanel, the issuance of SSL certificates through Let’s Encrypt is done in one click, but you can’t do it unless your domain name resolves properly (i.e. is recognized and links correctly to your server).
Actually, to be precise, an SSL certificate can be issued before then, but it will be a self-signed certificate, which is not recognized as secure by modern web browsers.
You’ll know that your domain resolve properly when you type your domain name in a browser and see this page.
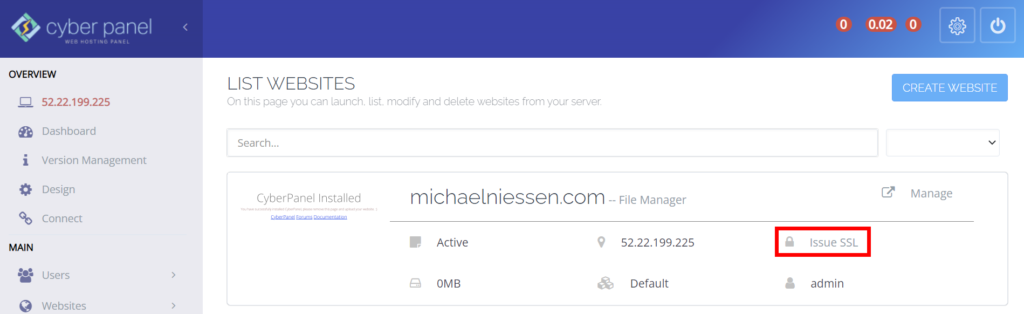
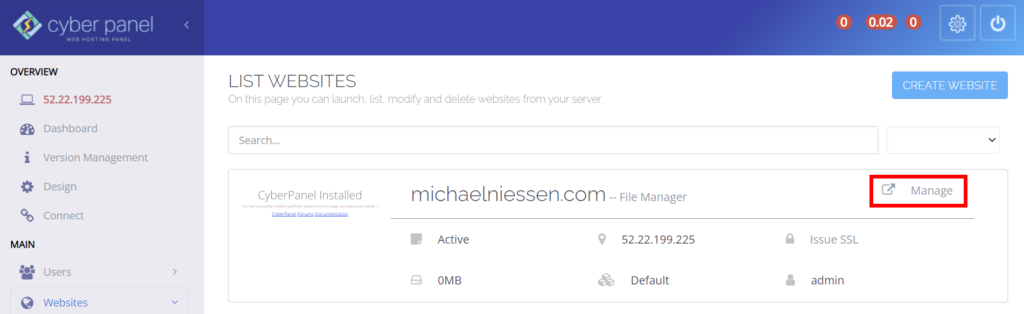
Select List websites in the Websites menu and then click on Issue SSL.
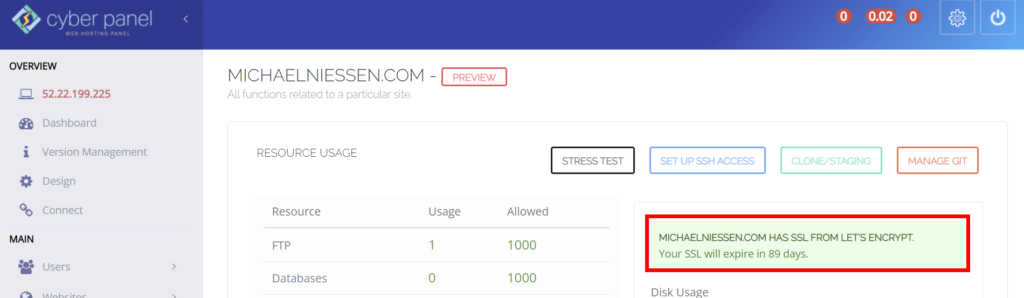
After it is installed, you can see details about the certificate in the Manage page.
By the way, the Manage page is also where you can find many common tasks, such as installing WordPress and creating cron jobs, FTP accounts, sub-domains, etc. But that’s for later.
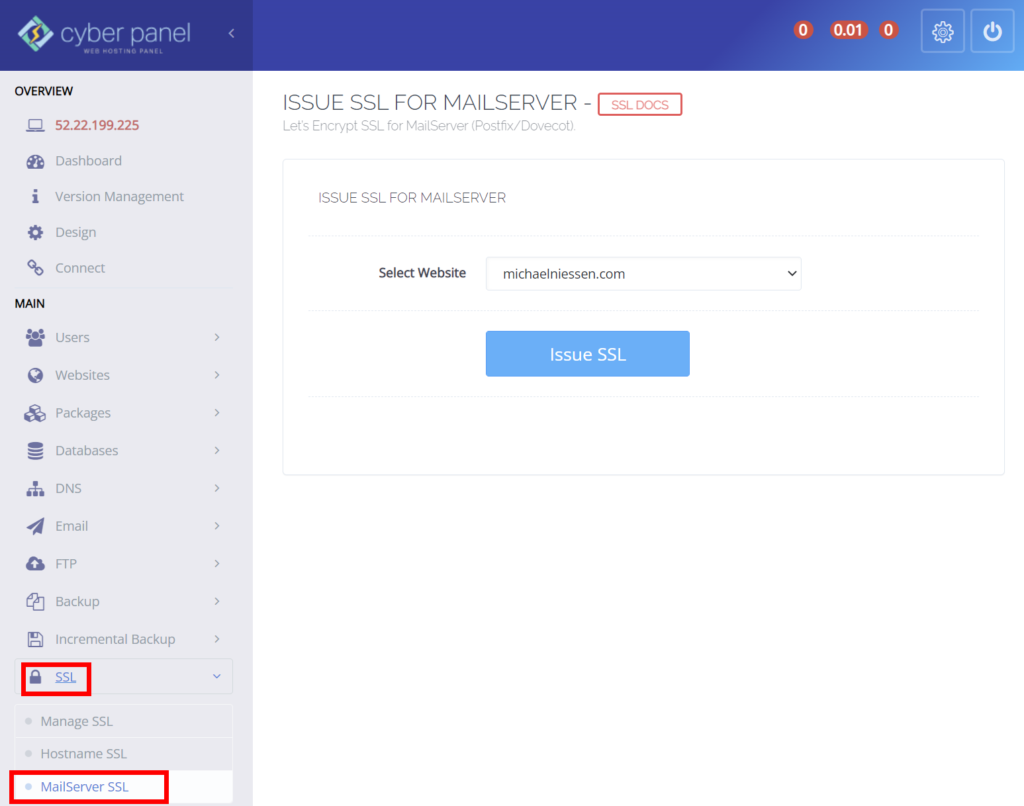
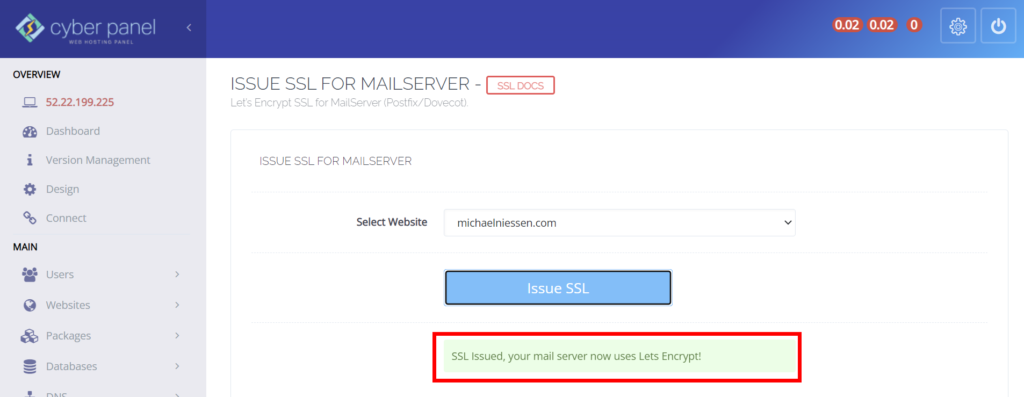
While you’re at it, you can already issue an SSL certificate for the mail server.
Configuring more than one website
If you want to host multiple websites on one server, repeat the steps above for each website, except the creation of nameservers. The same nameservers can indeed be used for more than one website on a single fixed IP address.
Next step: e-mail configuration
The server is basically ready now, but there is still one important thing to configure.
In the following article, you’ll learn how to configure the EC2 server so you can send e-mail through it. We’ll also see how to create e-mail addresses in CyberPanel, which is very easy.
The name name servers (DNS) that we set up in a previous part redirect a domain name to an IP address. For the mail server to work, we need the exact opposite: to redirect an IP address to a domain name. That is called reverse DNS.
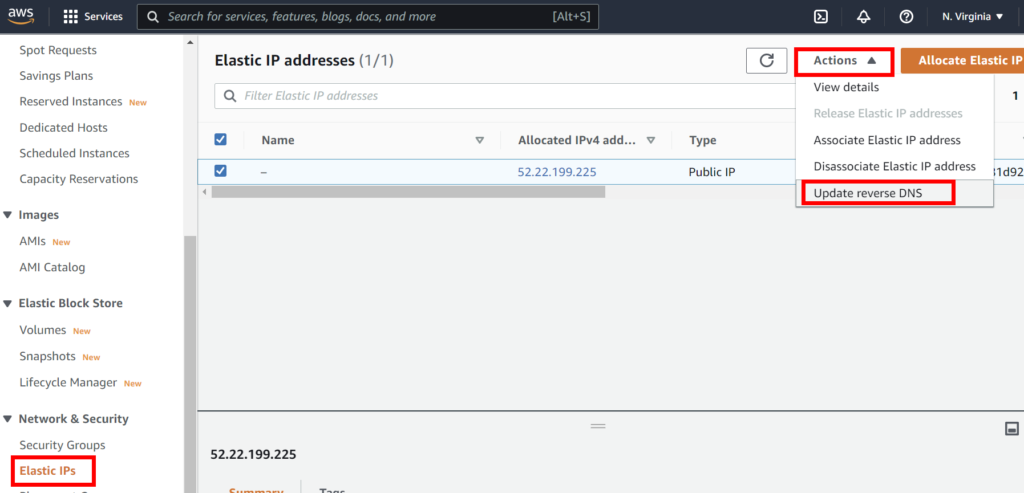
In AWS, go the Elastic IPs page and select the configured IP. In the “Actions” menu, click on “Update reverse DNS”.
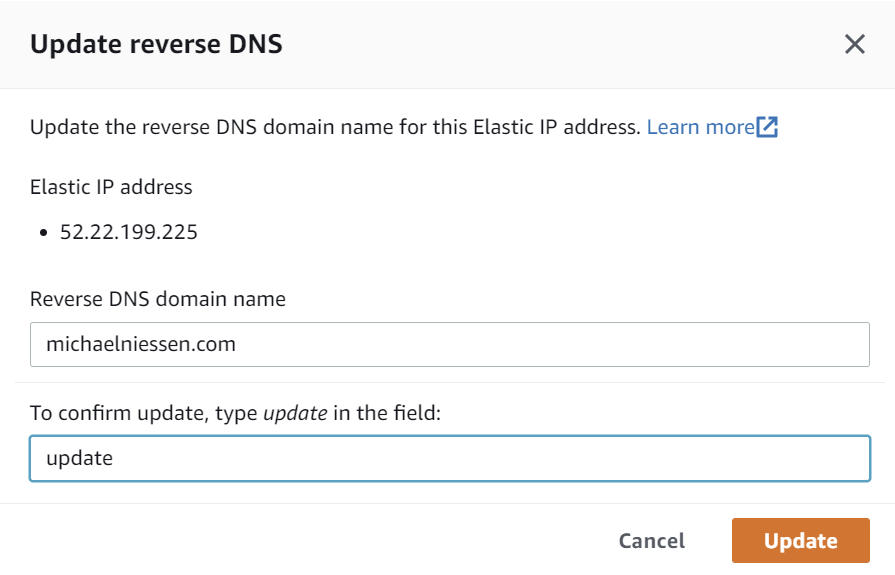
Type your domain name in top field and “update” in the bottom field, then click on “Update”.
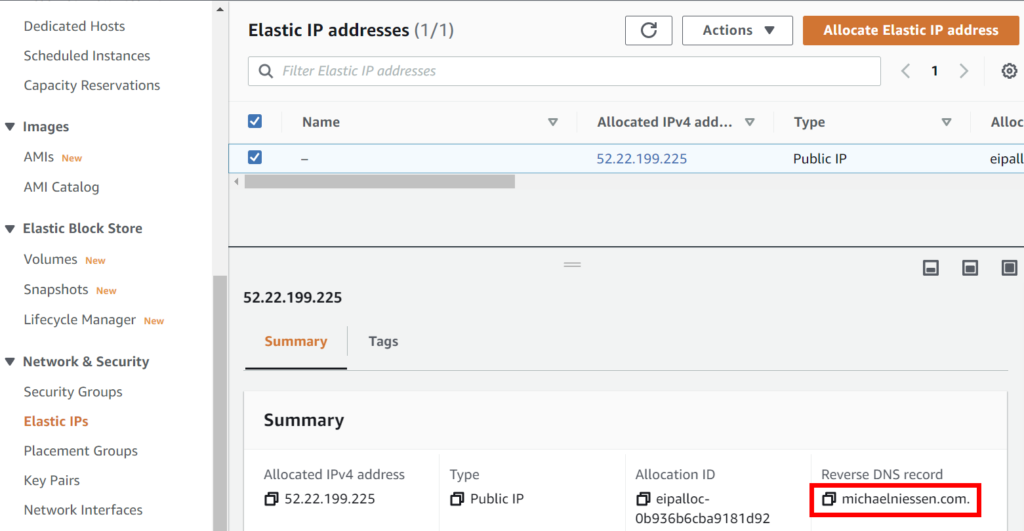
You’ll see the reverse DNS record is shown in the details at the bottom of the screen.
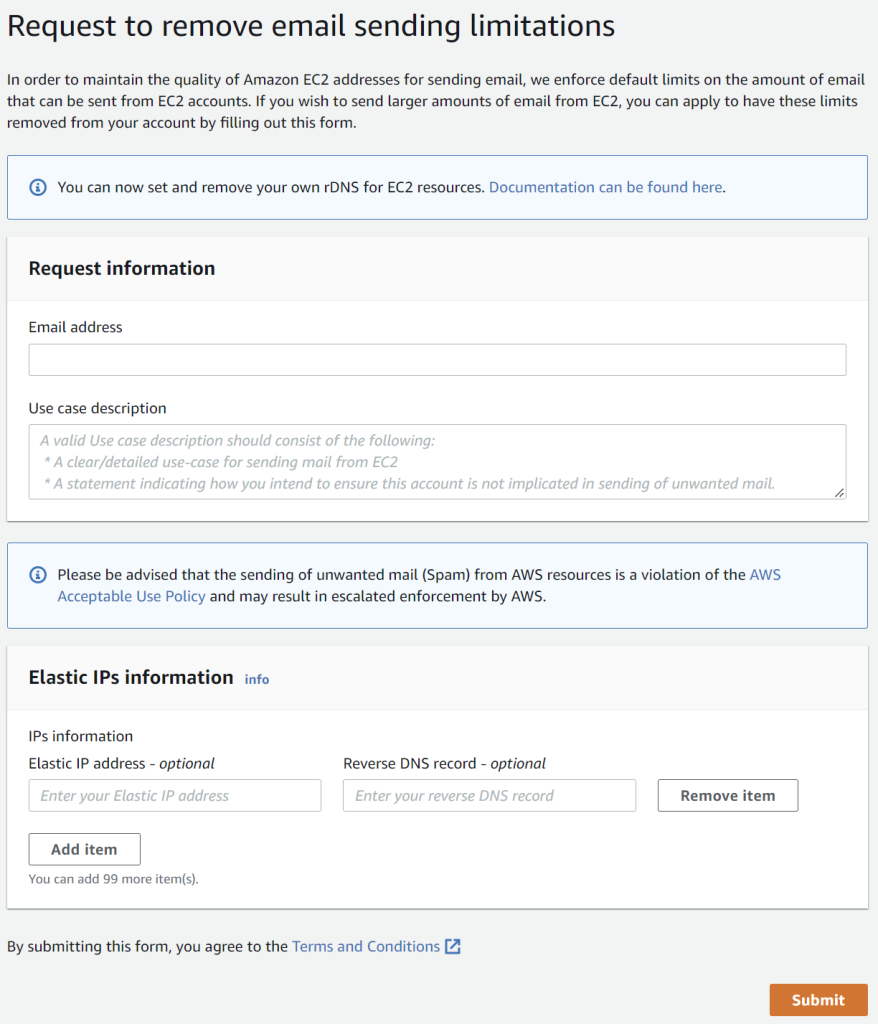
Ask Amazon for permission to send e-mails
The purpose of AWS is not mainly to send e-mails and its flexibility and low cost made it quite popular to spammers. As a consequences, the use of an EC2 instance as a mail server is heavily restricted.
Everything is already configured in AWS, but now you will have to contact Amazon and ask them to allow your instance to send e-mails.
In the “Use case description” field, write something similar to this:
Hi,
I have create an EC2 instance on which I installed a web server to host my [personal/small business] [website/blog].
I'd like to have it act as a small mail server as well for me. I will not use it to send spam or other undesired e-mails and rarely send more than [10/100/...] e-mails per week. In addition, my server control panel has a built-in anti-spam plugin as well as configurable limits to the number of mails that can be sent.
Please allow me to use the ports 25 and 465 (SSL) for outbound connections.
Thanks!
It will probably take at least a few hours before they answer, depending on the time of day and the number of requests they have.
FYI, this sample message combines the initial message I sent and a follow up e-mail after they asked for more details, the first time I requested such access. It should be enough, but it’s possible they will ask for more details about your intended use before accepting your request. If you are not sure how to respond, answer what you can and ask if there are any specific details you can provide. Just answer truthfully and there will be no reason for your request to be rejected.
Follow up e-mails are answered quite fast, so don’t worry, it won’t take days of e-mailing back and forth before you have a final answer.
(FYI, the above sample combines the initial message I sent and a follow up e-mail after they asked for more details, the first time I requested such access.)
Just keep in mind that if you do send an abnormal amount of e-mails, it can be considered spamming and as a result your account can be closed without warning. And I mean not just the ability to send e-mails, but your full AWS account.
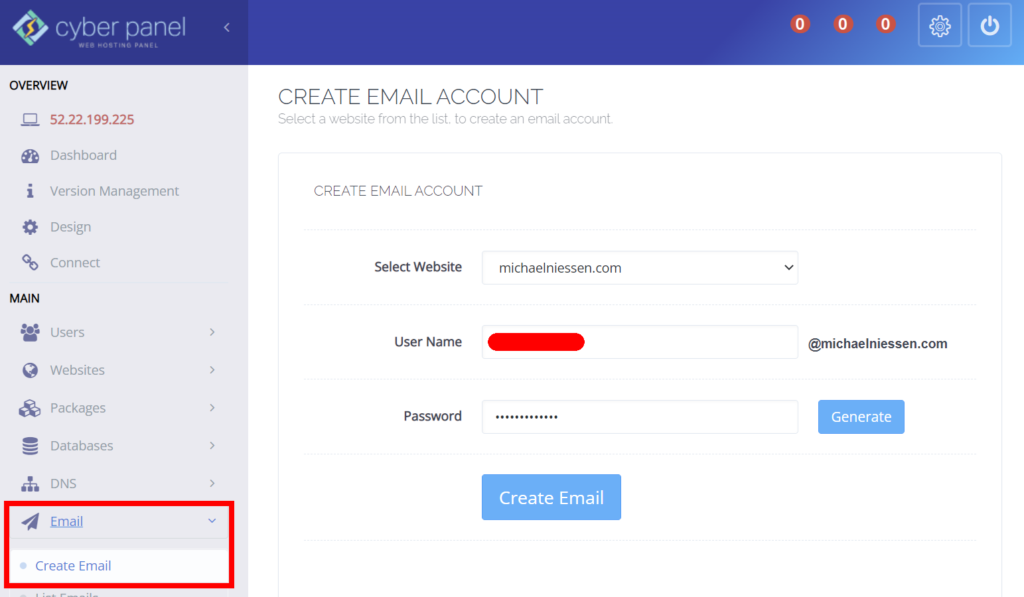
Create e-mail accounts in CyberPanel
Like everything we’ve done in CyberPanel, creating e-mail accounts is very easy. Just go to the “Create Email” page, select the website and type the username and password.
If you see a warning in the “List Emails” page, just click on “Fix now” to resolve the issue. The details to configure e-mail clients such as Outlook as listed on that page.
For the outgoing SMTP server, ports 587 and 465 are listed for SSL. However, in my experience 587 does not work; thus, use 465 when configuring your e-mail client with SSL.
Also, if you configure the e-mail address in a client such as Outlook, set the “Root folder path” to “Inbox” (without the quotes). Otherwise, you might get an error message similar to this one when sending e-mails:
error (0x80040119) The message cannot be saved to your IMAP e-mail account Sent Items folder, because Outlook is offline or the email server doesn’t allow items to be saved to the sent items folder’.
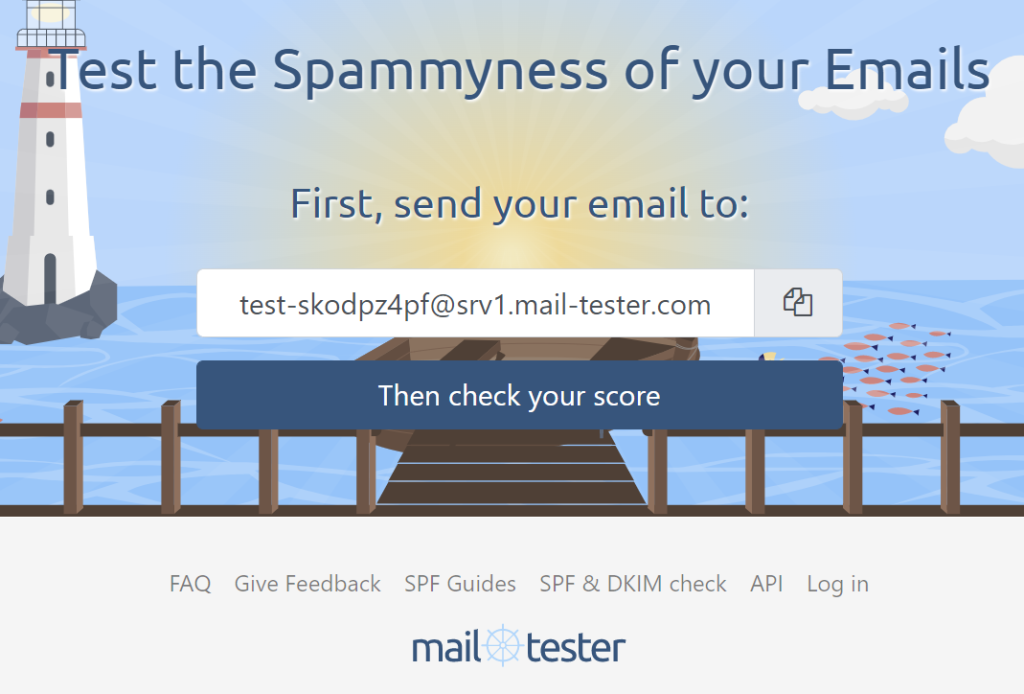
Confirm that the e-mail are not recognized as spam
If you’ve followed all the instructions in the tutorial series, your e-mails should be recognized as legit, but it never hurts to test their “spammyness” on the following website:
Simply send an e-mail to the given address, using either an e-mail client such as Outlook or the webmail interface included in CyberPanel, and click on the “Check your score” button.
You will be given an overall score along with information about the different factors that are taken into account.
You can expand each section to see details on how to improve your e-mails and reduce the likelihood they’ll be considered spam.
E-mail addresses for more than one website
Just as with the name servers to redirect domain names to the correct IP, a single mail server hostname is used no matter how many websites you have.
For instance, if you create websites for domain1.com, domain2.com and domain3.com, you have to set up the reverse DNS for only one of them (say, domain1.com) and configure your mail client with mail.domain1.com as SMTP/IMAP server for all e-mail addresses associated to those 3 domains.
Next step: A few tips
Now everything is finally ready and you can install WordPress or build a custom website!
In the next and last article of this series, I’ll give you a few more tips on how to tweak some things in CyberPanel, such as forcing the use of the secure HTTPS instead of HTTP, or redirecting https://www.domain.com to https://domain.com.