After you click on “Create a Free Account”, you’ll go through a series of forms. You will have to confirm your e-mail address, enter your credit card info (you will be charged only for services that are not covered in the Free Tier), password, etc.. and multiple security checks. A bit tedious, but easy.
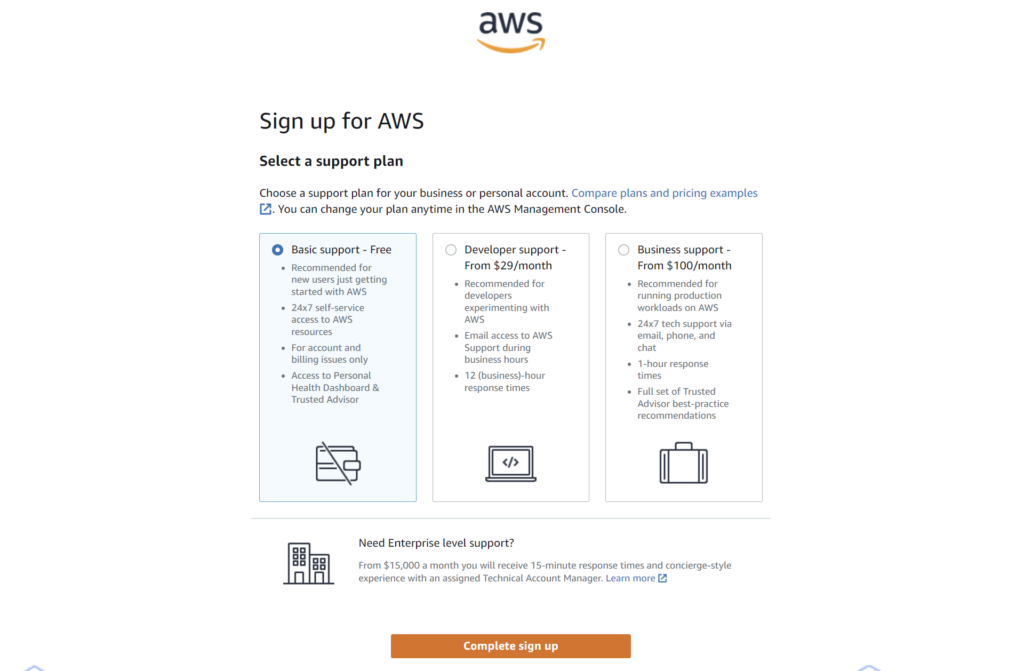
When asked to choose a support plan, make sure you opt for the free one, which should be selected by default.
It might take some time (up to 1 or 2 hours) before you receive an e-mail confirming that your AWS account request has been approved, but you don’t need to wait for it to sign in to AWS and start setting up your server.
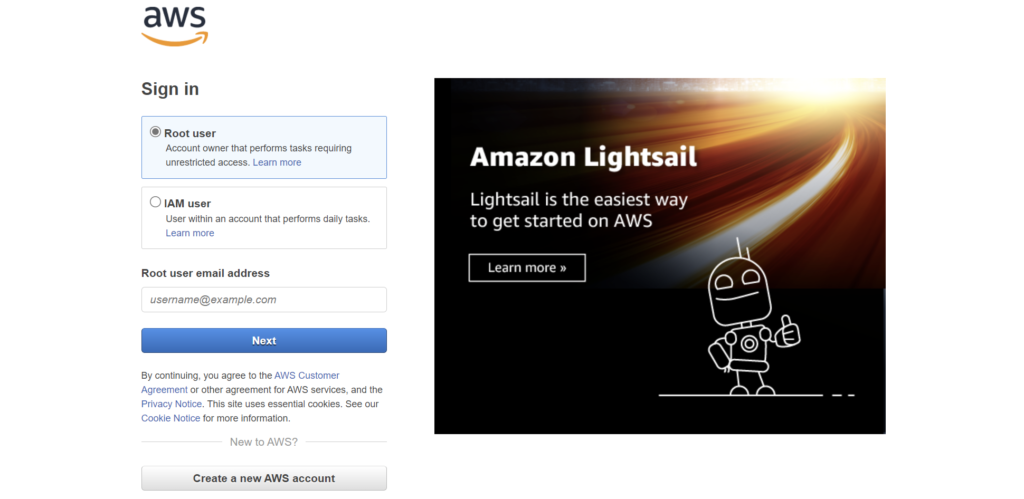
Log in as “Root user” with the e-mail address/password given during the account set up.
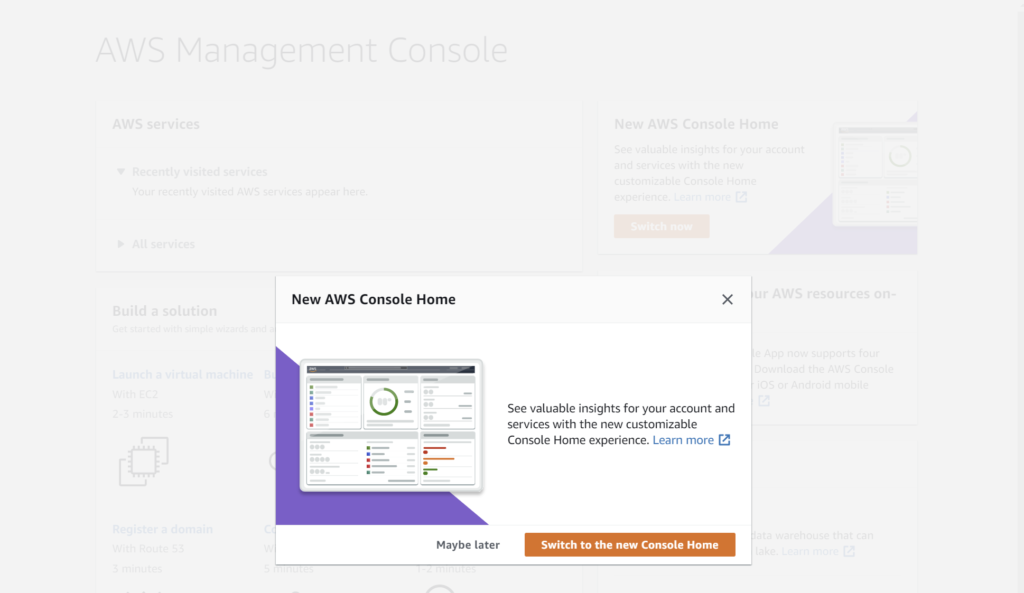
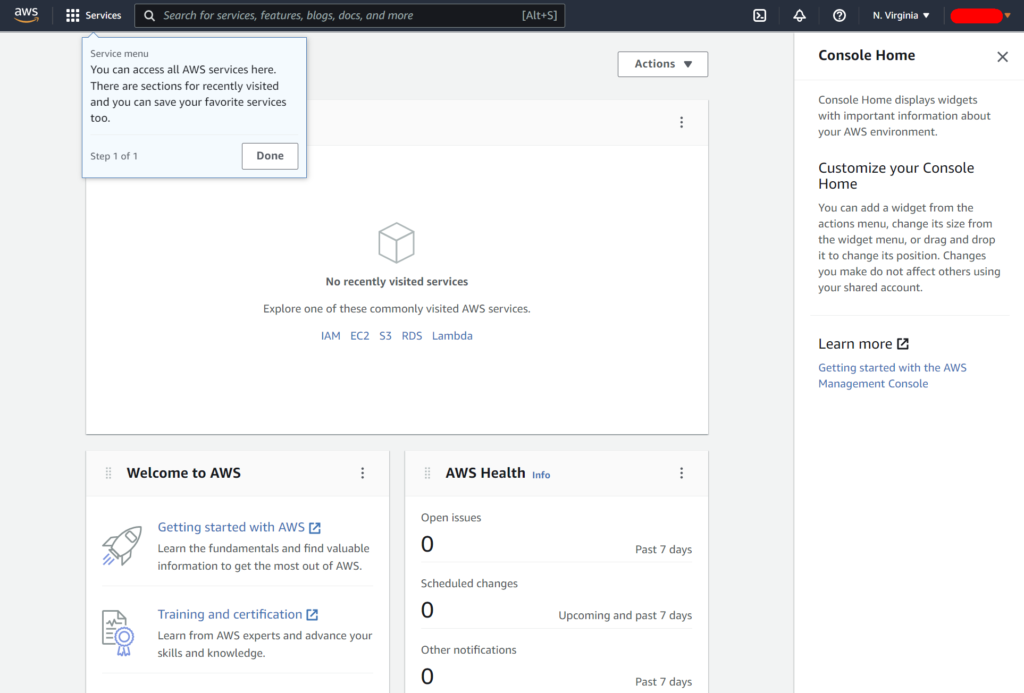
Click on “Switch to the new Console Home” and you’ll be taken to the following screen.
As explained in the little pop-up window, all AWS services can be accessed on the top left (click done to close the pop-up).
Many help links will open in a panel to the right of the screen. You can safely close it to have some more screen real-estate.
Just so you know, your account name on the top-right is where you can access you AWS account details, billing info, and log out.
The AWS account is now completely set up. The next step is to configure the service(s) you need.
Next: Setting up and configuring a free EC2 server
In the following part, we’ll create a virtual server using the EC2 service, which offers a Free Tier option for 12 months.
In this article, you will learn how to create and set up a virtual server in the EC2 service. It will be the cloud equivalent of buying a computer, installing an operating system and configuring its network access. (Installing the web server software will be explained in the next part)
Two advantages of EC2 is that it has a 12-month Free Tier option and, being basically a barebones server, you can install pretty much anything you want on it, just as you could if you bought an actual computer, as long as the hardware specifications are sufficient.
The EC2 Free Tier includes one type of hardware (CPU/RAM), up to 30 GB of storage space and 100 GB of bandwidth per month for outgoing transfers (unless you offer downloads or large files, it’s a lot; above that, the charge is 0.09 USD/GB, at the time of writing).
Setting up the EC2 service
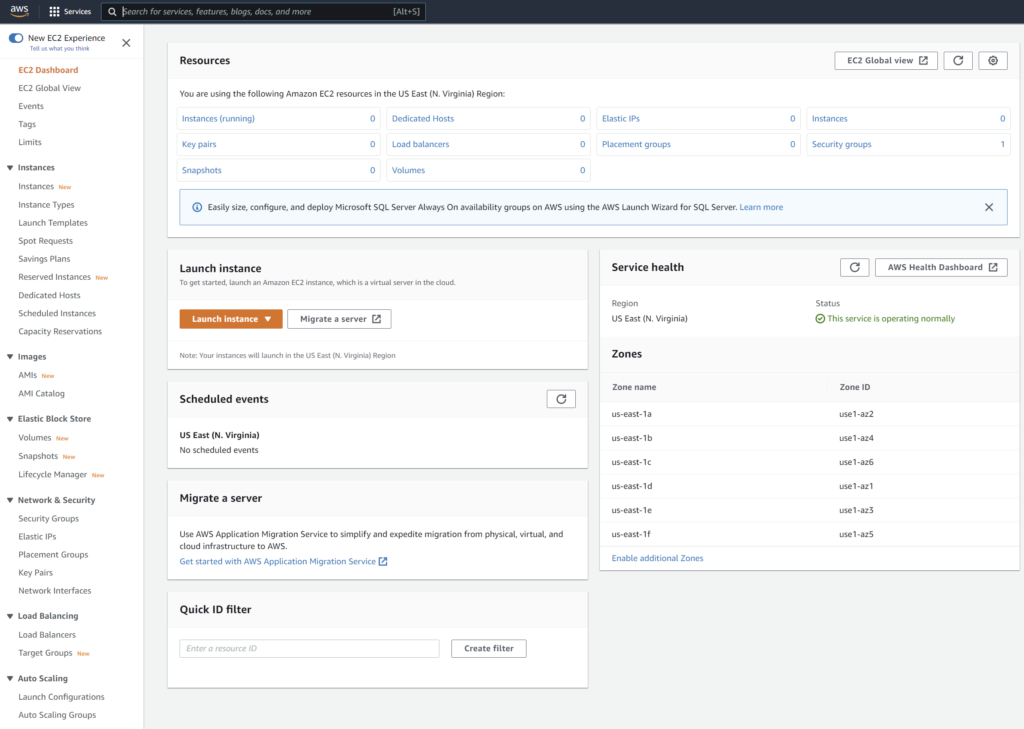
Whether you’ve followed the previous part on how to create an AWS account or just logged into an existing account, the Console Home should look like this:
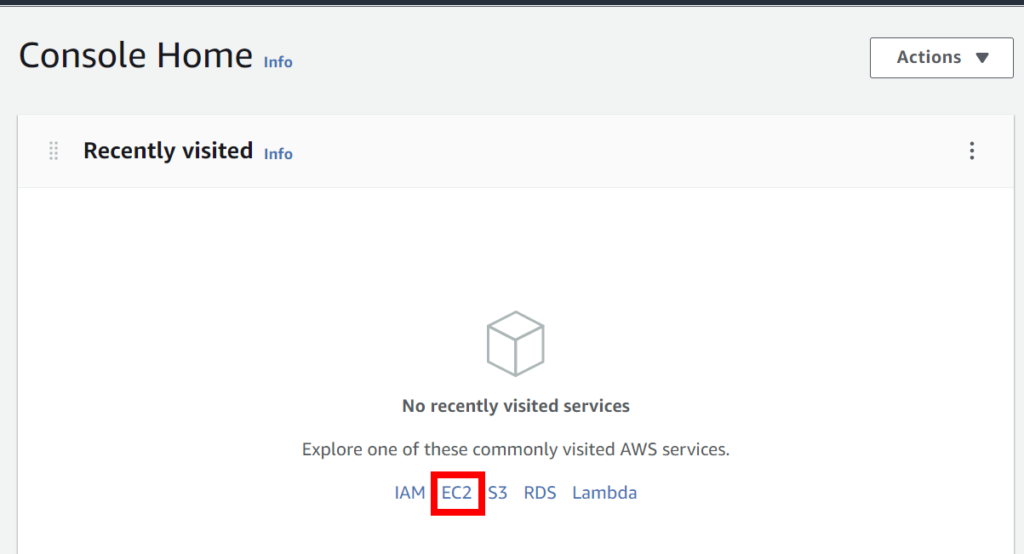
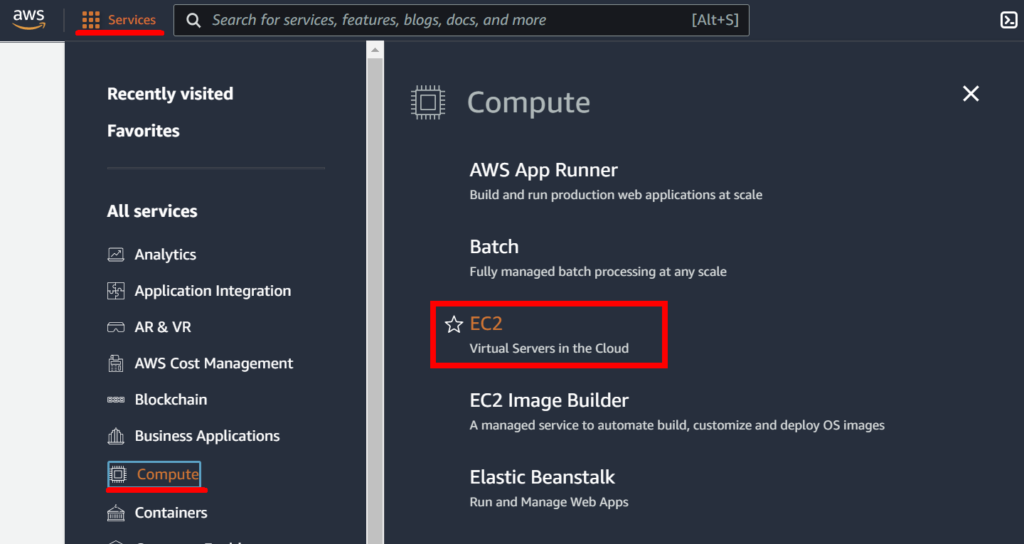
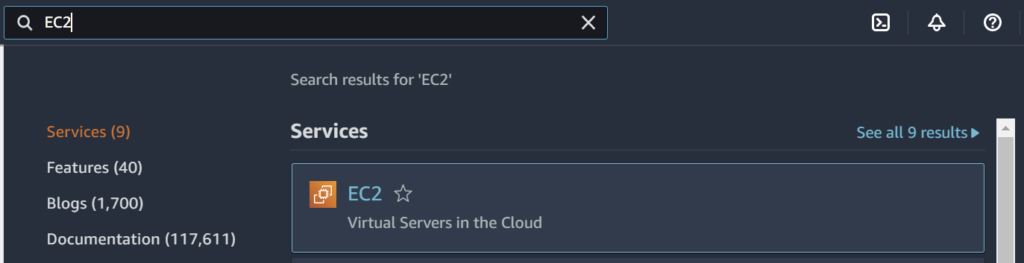
There are a few different ways to create an EC2 service, as shown in the following 3 screenshots.
Click on EC2 in the suggested services.Open EC2 from the Services menu, in Compute.Type EC2 in the search field at the top.
Whatever way you choose to open EC2, right after you click on it, the EC2 dashboard is displayed and you are presented with an overload of options, but fear not.
We only need to set up a few things, which will cover all our basic needs:
An instance (virtual server)
A security key, used to connect to our server through SFTP and SSH command-line
A fixed IP address, to link a domain name to the instance
Open HTTP ports to allow web traffic to your future website.
Creating an EC2 instance (virtual server)
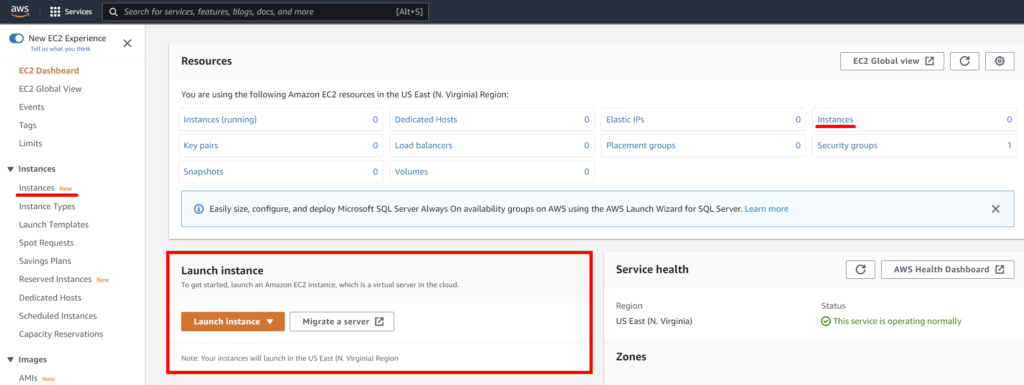
Click on the orange “Launch Instance” button to create an instance. You can also find that button in the top-right corner of the Instances page if you click on one of the two links.
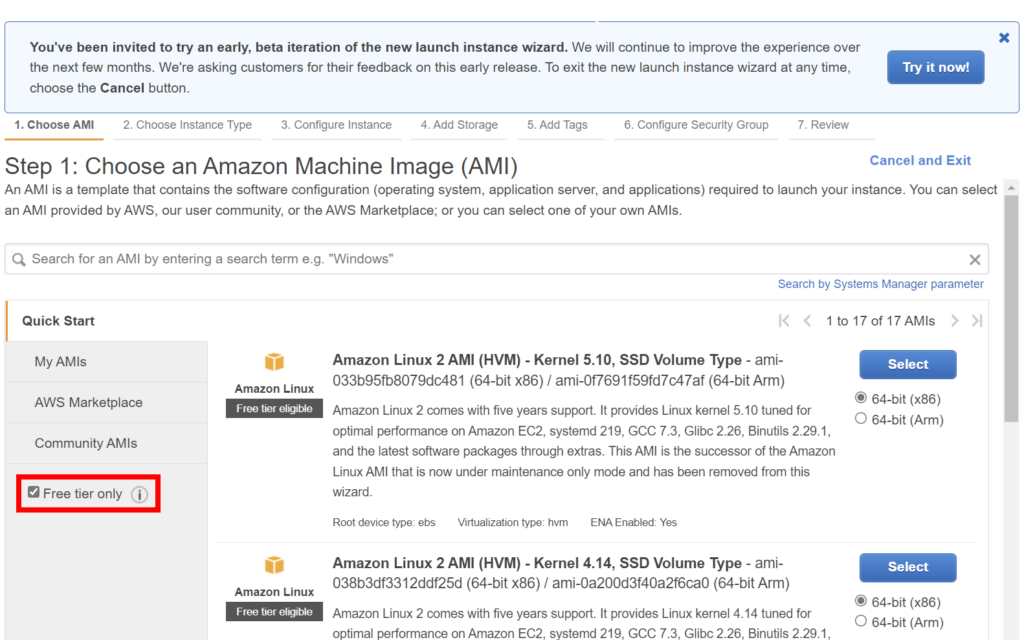
The first step is to select an Amazon Machine Image (AMI), which a template that contains the software configuration (operating system, application server, and applications). Only some AMIs are included in the Free Tier program, so you can check the option to show only those.
Note: As you can see in the message at the top of the screenshot above, there is an early beta of a new Launch Instance wizard, so if you choose to try it, the screens will look different. When it becomes the default, I’ll update this tutorial, but for now I’ll stick to the classic view.
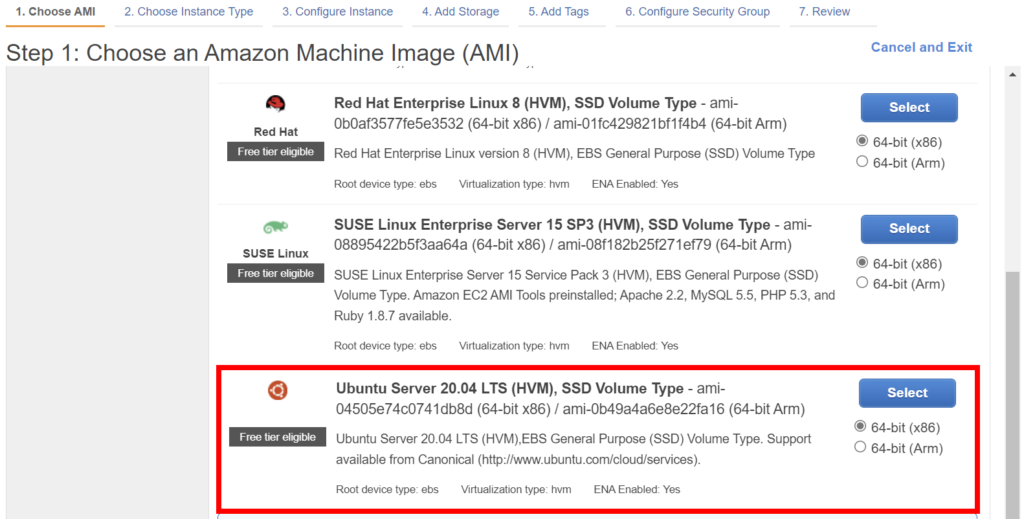
For the purpose of this tutorial series, we’ll use Ubuntu Server 20.4 LTS, which is a good barebones server OS. Leave the default 64-bit (x86) option checked and click on the blue Select button.
Note: If you have specific needs, choose an AMI accordingly. But if that’s the case, you’re probably not reading this tutorial anyway (Why am I even writing this, then?).
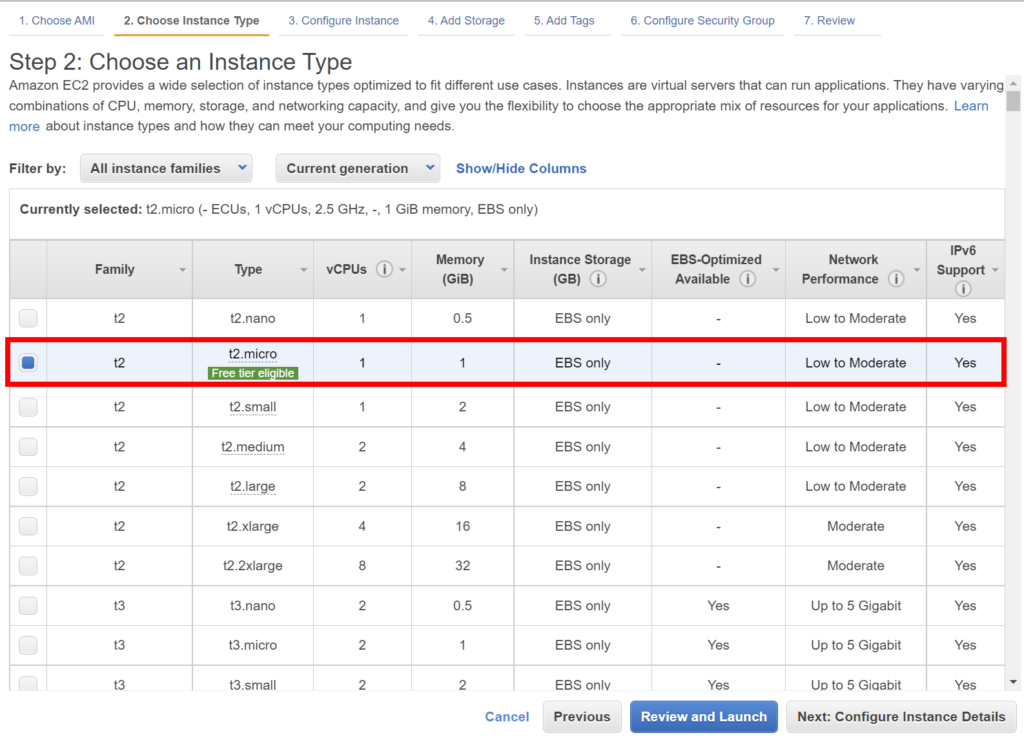
The next step is to choose an instance type (hardware specifications). The only one available in the Free Tier program is the t2.micro. It’s not super powerful, but more than enough for most users.
By default, it will assign you 8 GB of disk space. If that’s enough for you, click on Review and Launch.
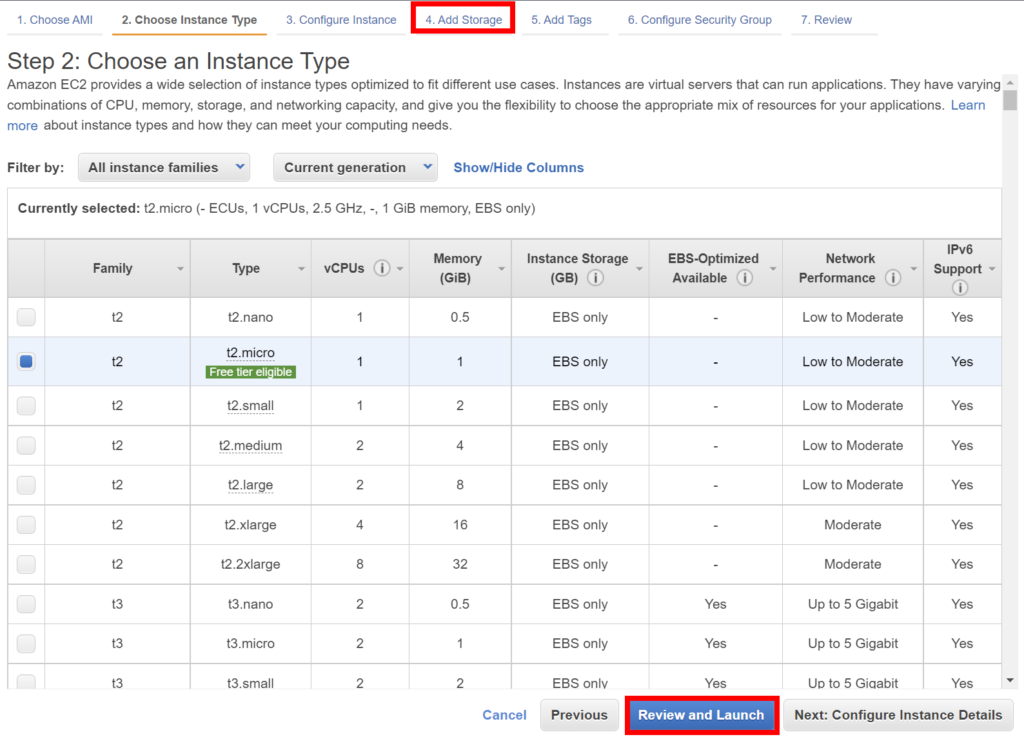
If you intend to follow this full series of articles and install the same web server as I do, I recommend setting a higher storage value. In that case, click on 4. Add Storage at the top.
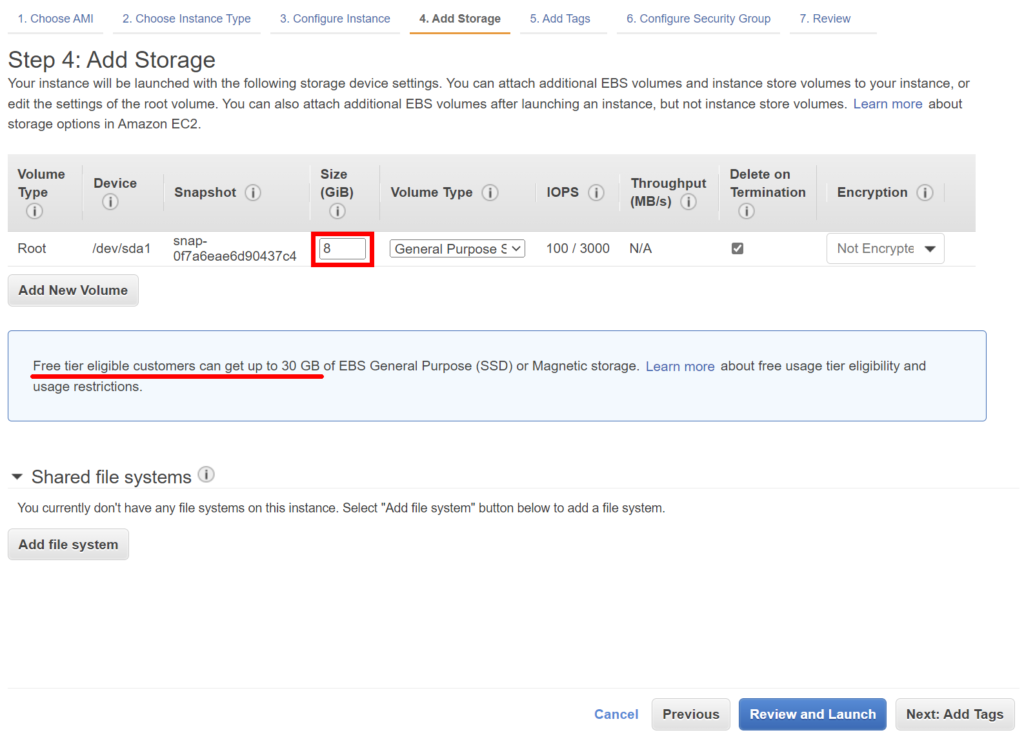
Here you can easily change the disk size.
If you are not sure what size you should choose but already have one or more websites that you would like to move to this AWS server, check the disk usage in your current hosting’s control panel to get an idea of the used space (all stored files + e-mails) and set a higher value to account for future storage needs.
Two things to keep in mind:
It’s (a little bit) easier to decrease the storage space later than to increase it, so try to estimate how much you’ll need in the foreseeable future.
You could set it to 30 GB, which is included in the Free Tier, but don’t forget to decrease it (if necessary) in 12 months, when you’ll start paying for space. It’s not super expensive (US$ 0.10/GB/month), but in any case it’s a waste of money if you don’t use it.
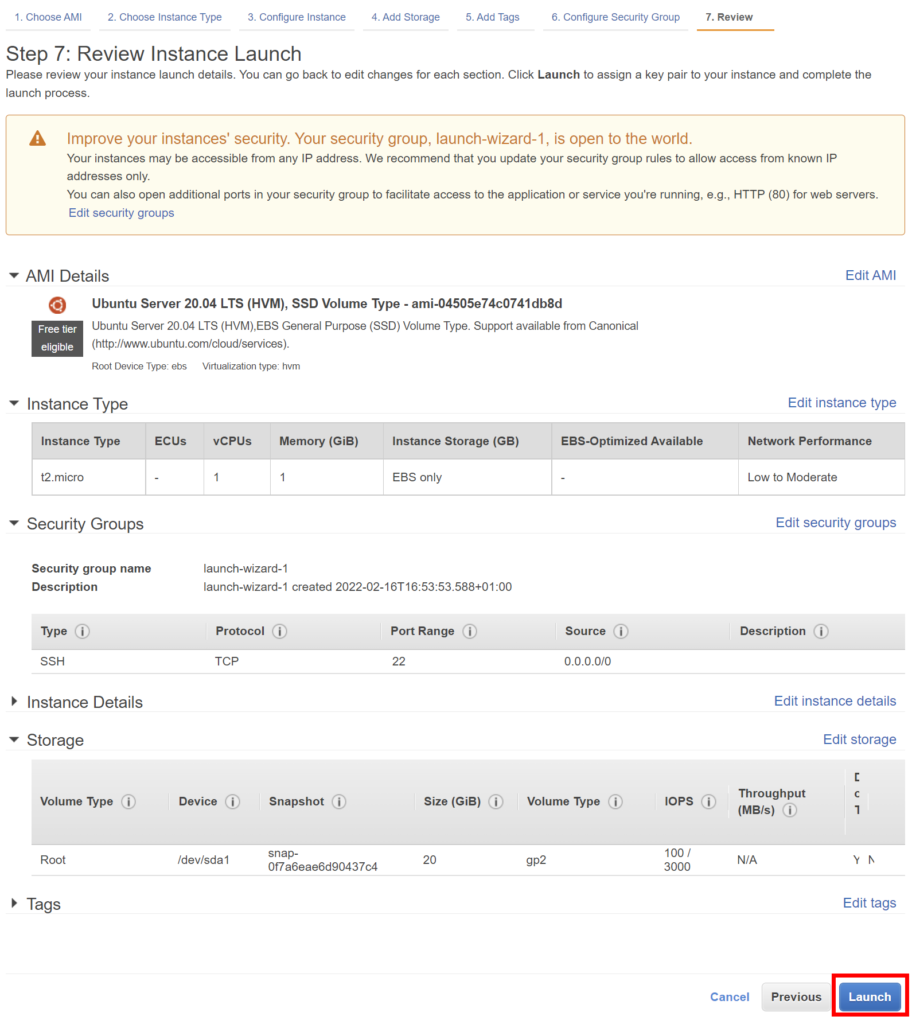
Personally, since I intend to use the server for a few existing websites that have a few GB of existing content, and taking into account the space required for the web/mail server software, control panel, plus some room to grow, I’ll set it at a comfortable 20 GB.
[Note: the web/mail server and control panel installed later in this series take almost 6 GB of disk space in total, and require 10 GB of free space for the installation. You should thus set the storage space to at least 10 GB, even if you plan to reduce it later.]
Once that is done, you can click on the blue Review and Launch button and check everything is ok. If you have made any mistakes, go back and adjust your settings. If all is fine, click on the blue Launch button.
A window will open with one final step before the instance is created.
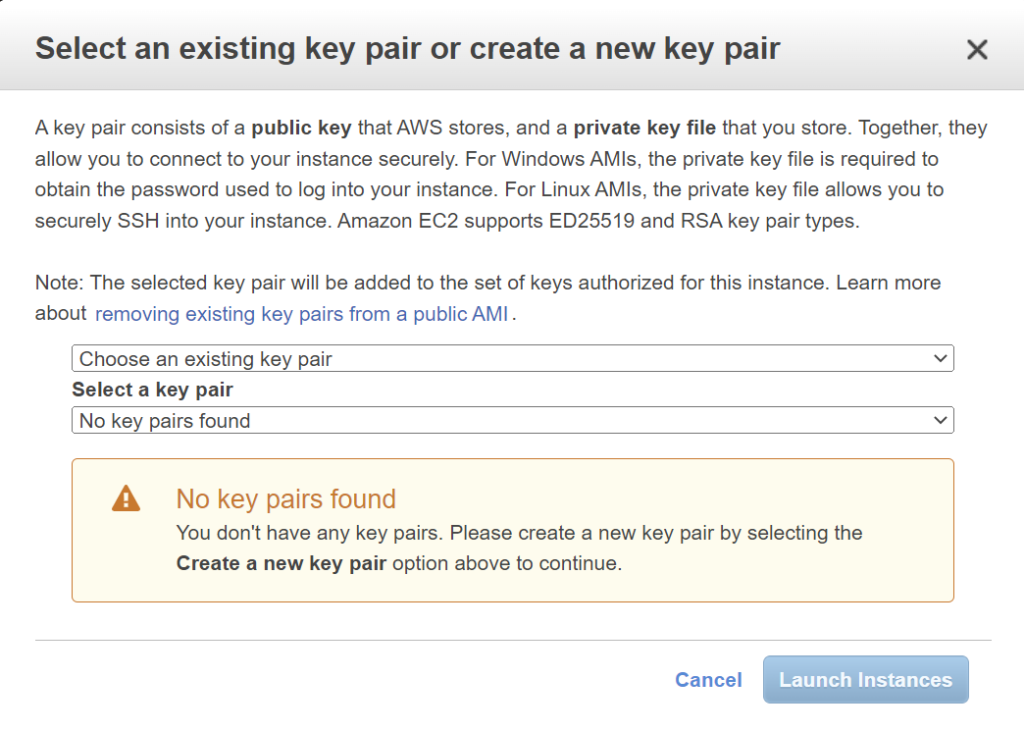
Creating a security key pair
For security purposes, we need a public/private key pair, which will be used to access the server from SSH (command-line) and SFTP (FileZilla).
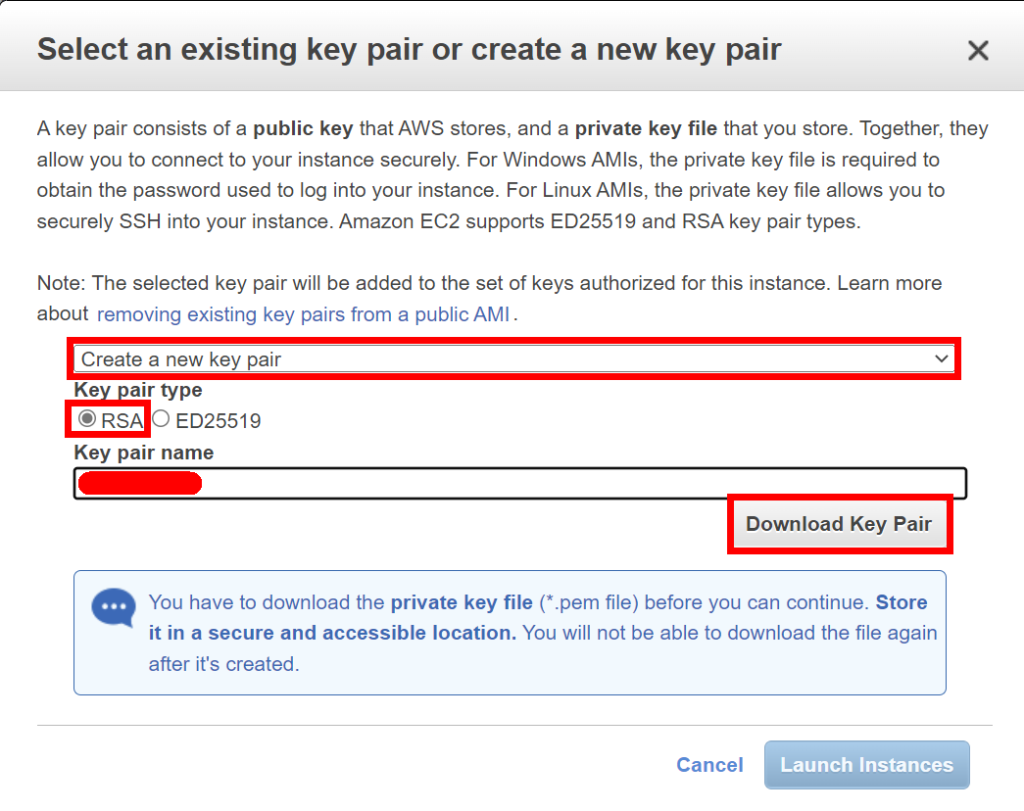
Since you don’t have a key pair yet, select “Create a new key pair” from the dropdown list, leave the default “RSA” pair type and type a name, then click on “Download Key Pair”.
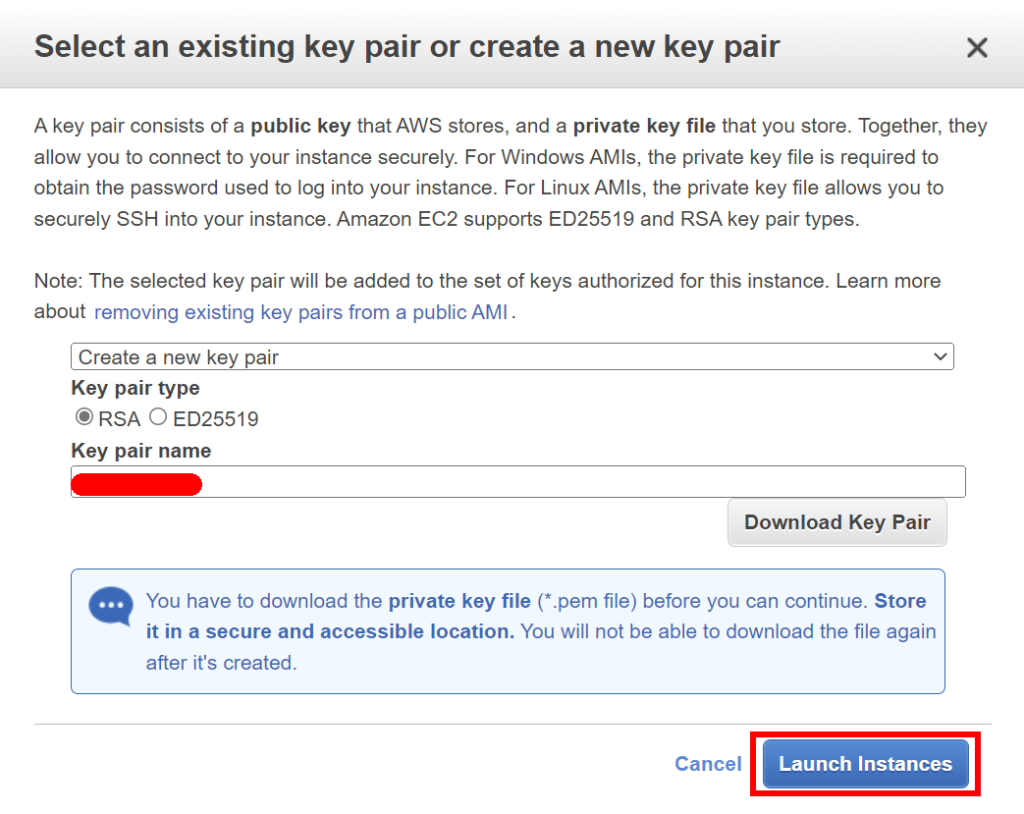
As mentioned in the window, keep that file in a secure and accessible location.
Now you can click on “Launch Instances”.
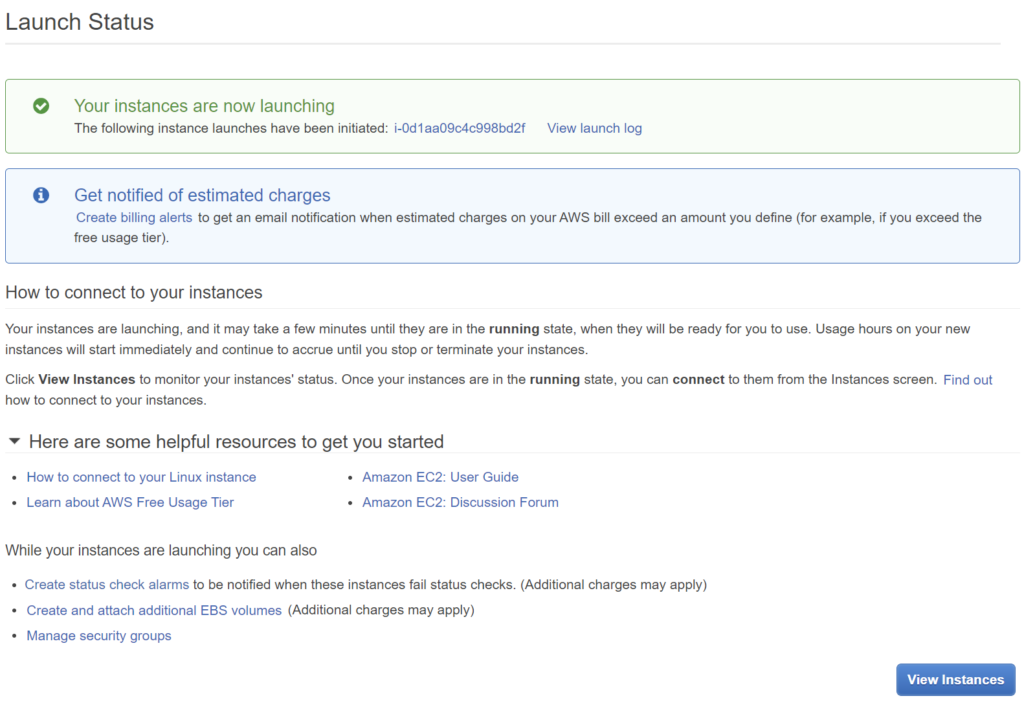
After a few seconds, you’ll see the following screen. You now (finally) have an AWS virtual server. Congratulations!
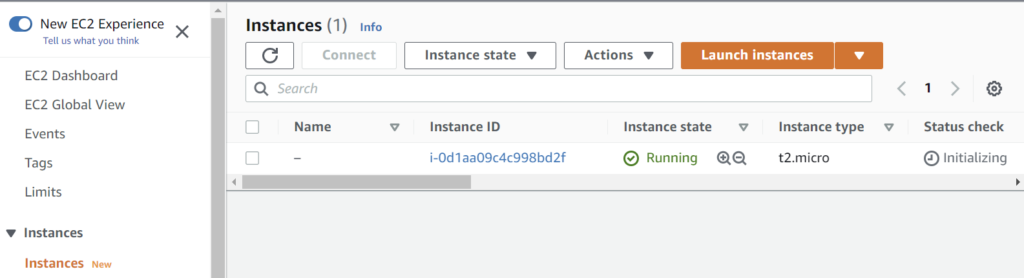
The “View Instances” button in the bottom right will take you directly to the Instances page (otherwise accessible from the left menu).
Adding a fixed IP to the EC2 instance
We are almost done, but still have to add a fixed IP, so domain names, which we’ll setup soon, will always correctly point to your server.
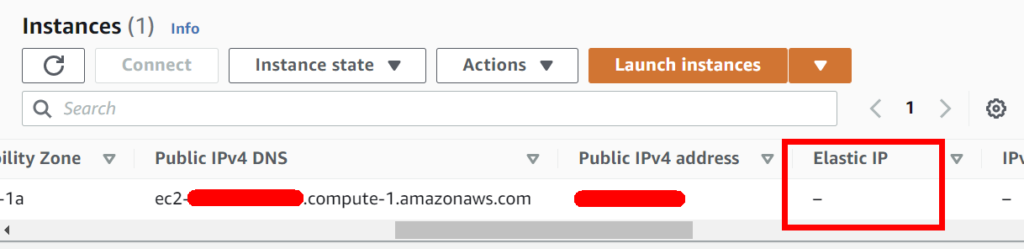
If you scroll to the right to see all columns, you’ll notice a series of IP addresses.
The public IPv4 DNS and address (IP) can both be used to access your server, but are not fixed (they will change if the instance is restarted). A fixed IP, on the other hand, will never change (unless you modify it, obviously).
AWS’s name for fixed IP is Elastic IP. The term “Elastic” is used because while it is fixed to the outside world, you can point it to a different instance (with a distinct internal IP address) anytime you want, so in that sense it’s flexible.
Usually, fixed IPs are costly, but Elastic IPs are free (up to 5) as long as they are linked to active instances. As far as I know, it’s the only AWS service for which you have to pay if you do not use it.
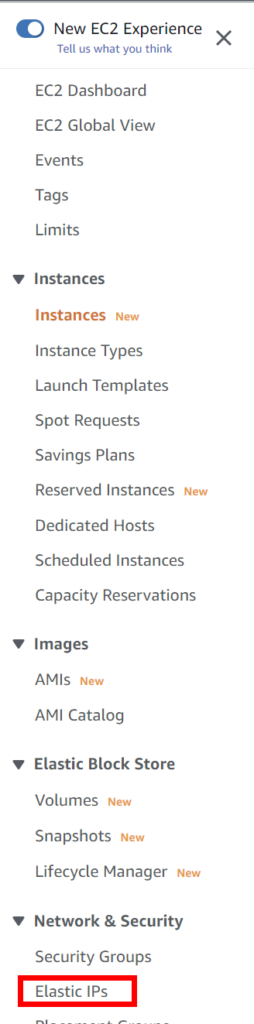
So, let’s get to it… In the left menu, click on Elastic IPs.
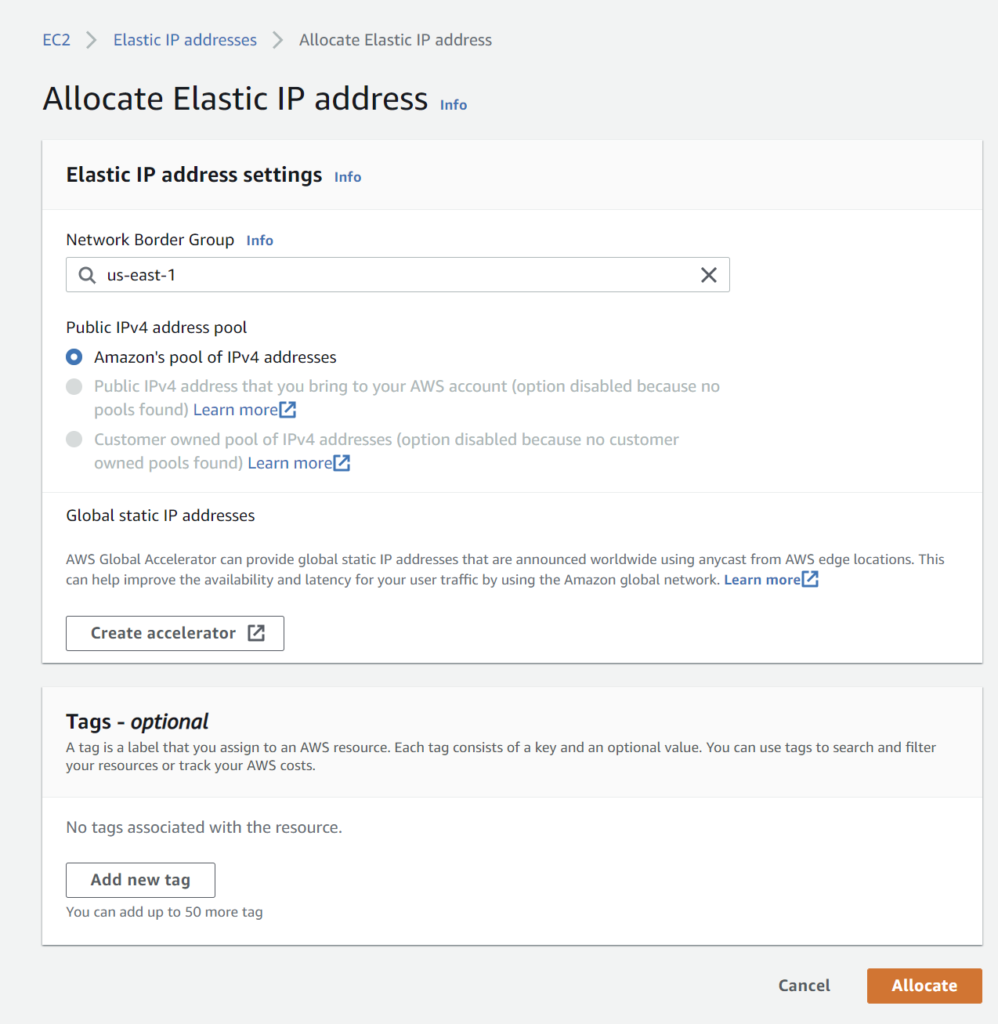
Then click on the “Allocate Elastic IP address” button (top left)
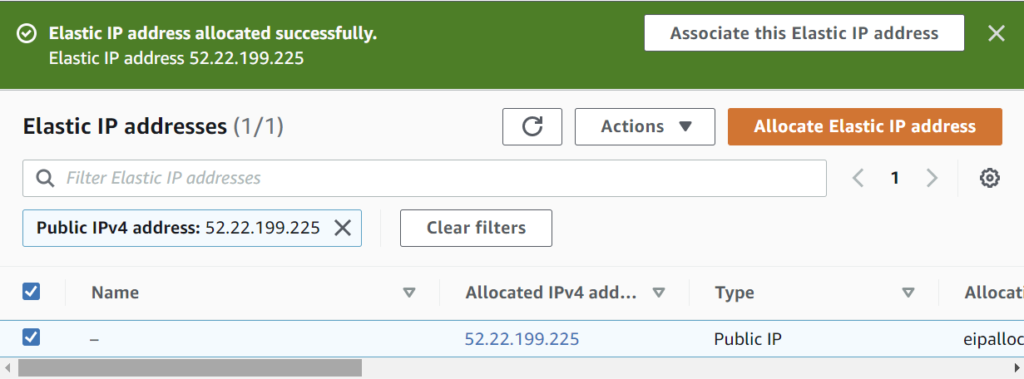
Leave all the default settings and click on the “Allocate” button.
You will see a confirmation message that the Elastic IP has been created.
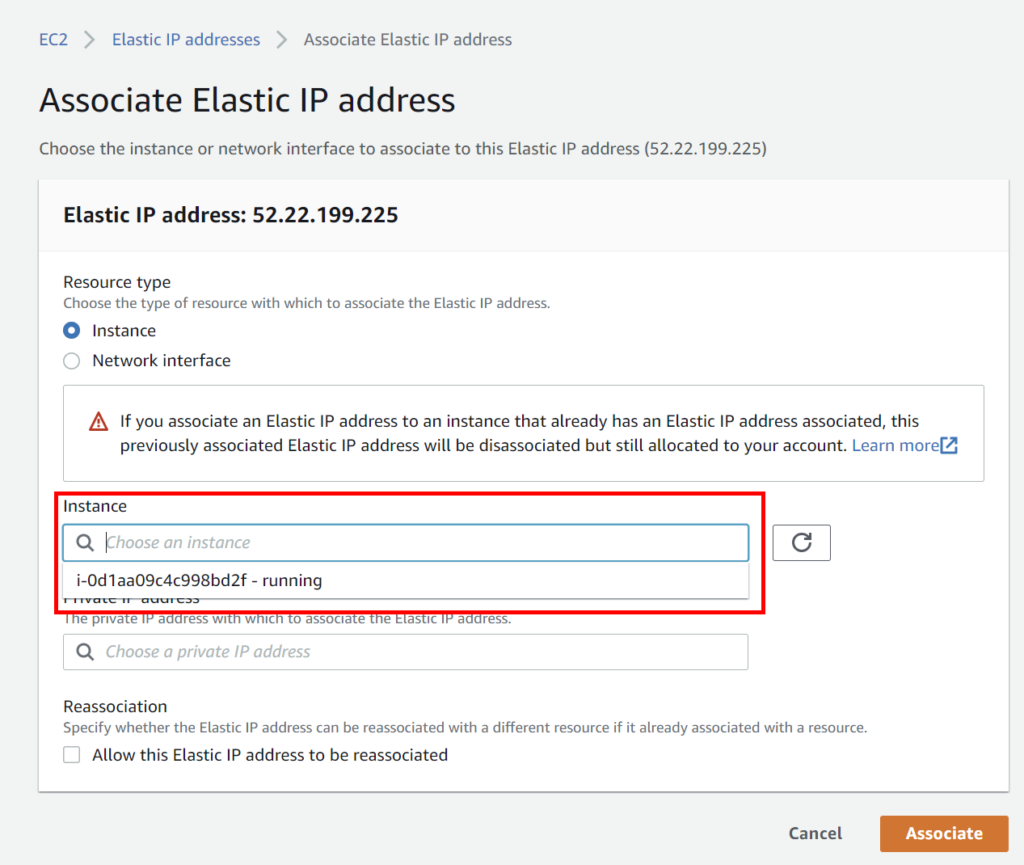
Select the IP, click on the “Actions” button and select “Associate Elastic IP address”.
Click in the “Instance” field and select the only displayed entry (i.e. your only server). Then, click on the “Associate” button.
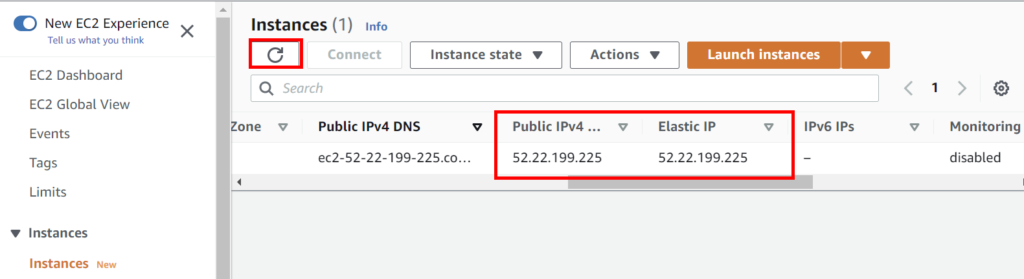
Once again, a confirmation message is displayed and the instance name is shown in the “Associate instance ID” column for that Elastic IP.
Back in the Instances page, refresh the list and then you’ll see the new Elastic IP that is associated with your instance. The Public IPv4 address now matches it.
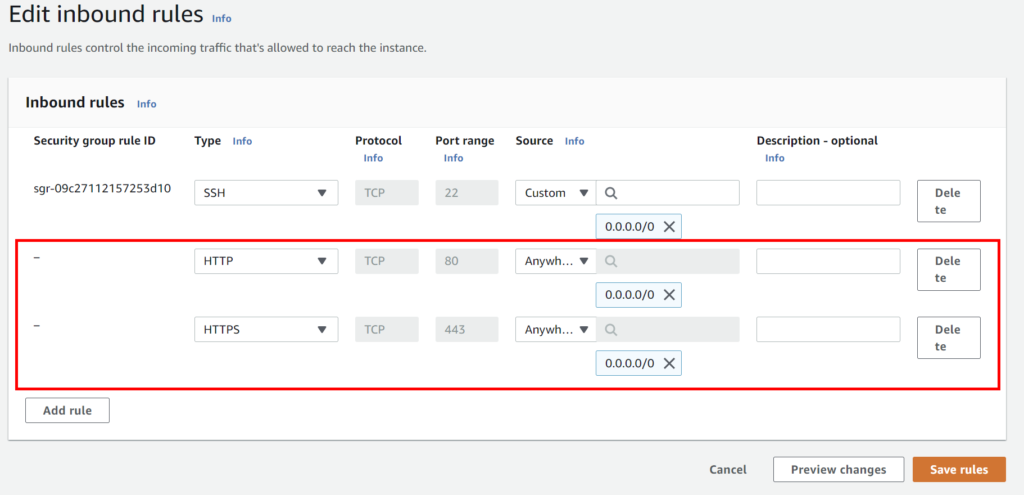
Opening the HTTP(S) ports for web access
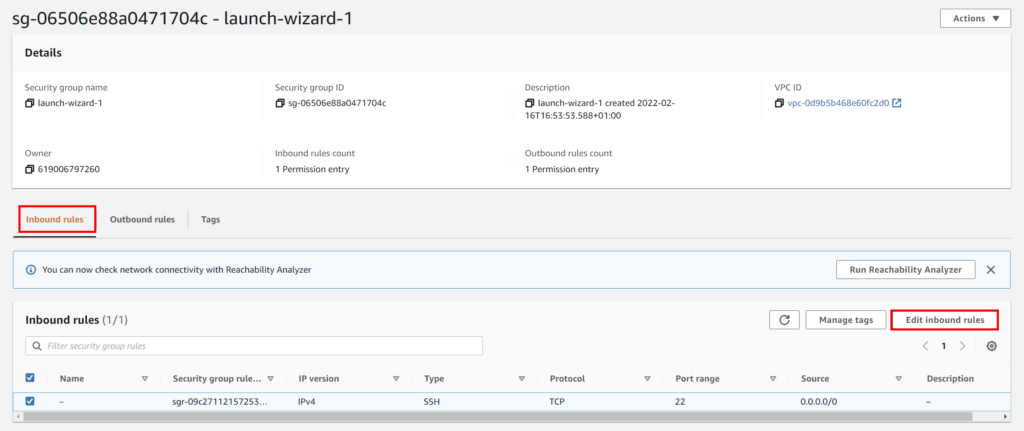
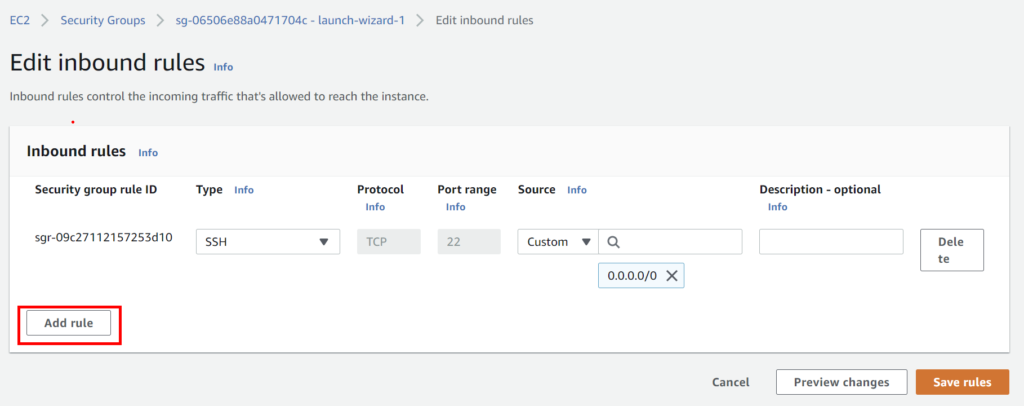
To allow web traffic to your website, you need to open the HTTP and HTTPS ports (for secure connections using an SSL certificate).
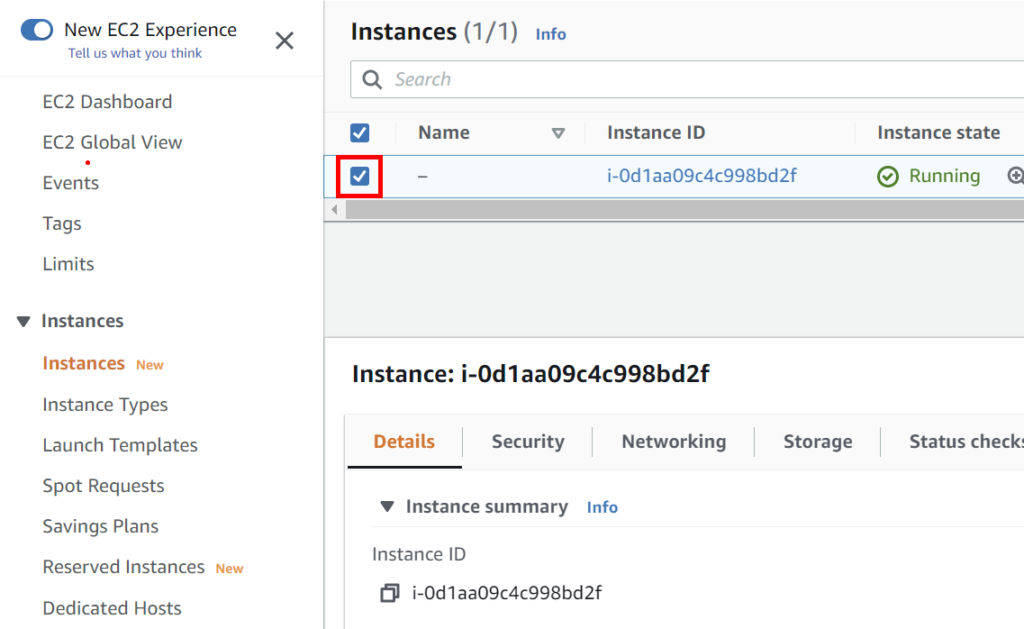
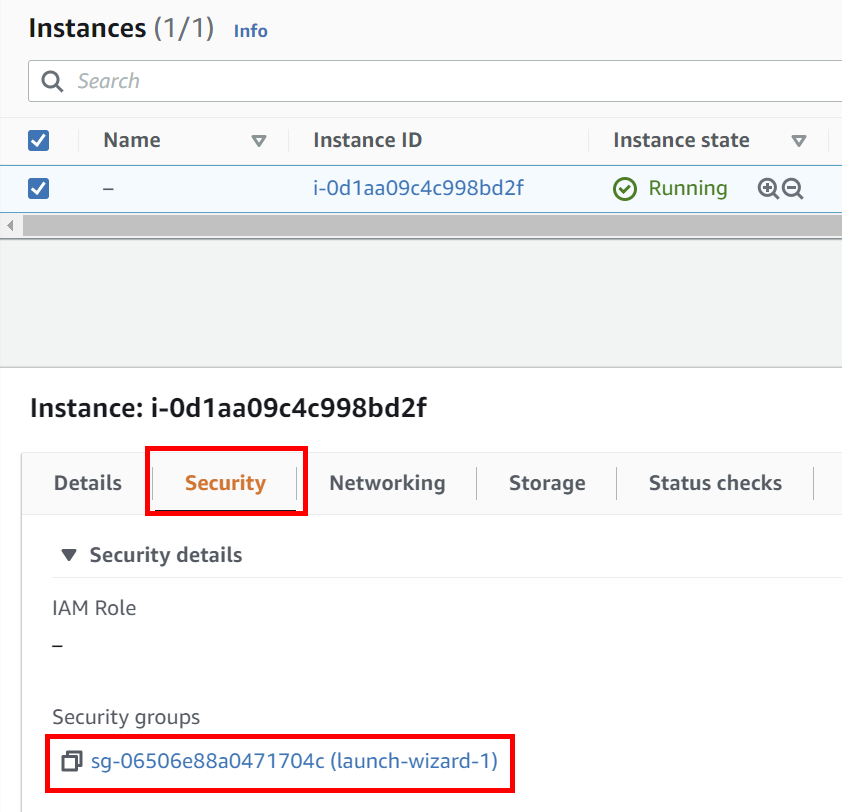
Select your instance to display its detailed information below.
In the Security tab, click on the security group’s name.
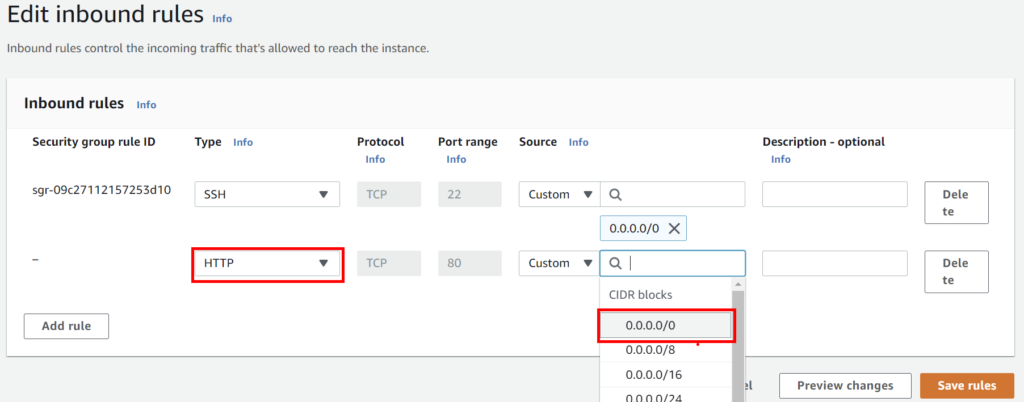
Repeat but this time with HTTPS. When both lines are added, click on the “Save rules” button.
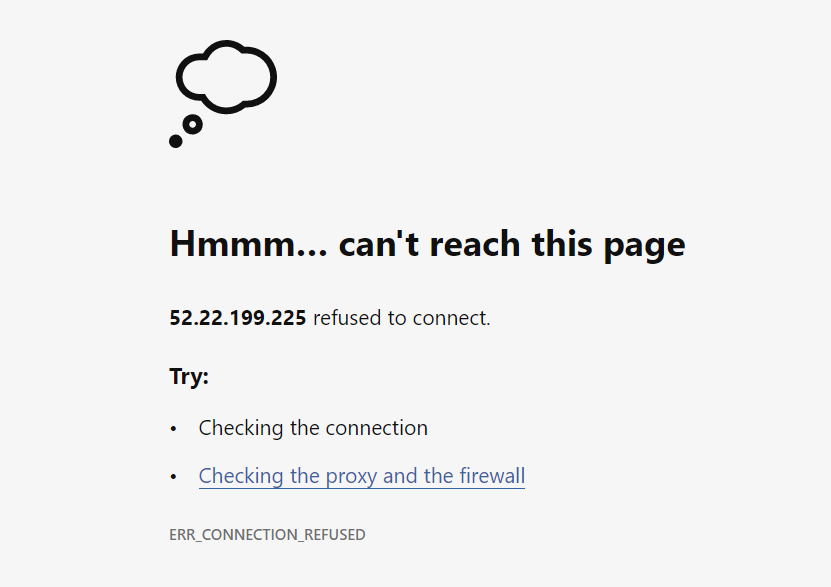
Now you could in theory reach your server’s IP address in a web browser, except for the fact that you haven’t installed a webserver yet, that is!
At this point, if you’re impatient and type the instance’s Elastic IP into a browser, you’ll see something like this:
This is perfectly normal because there is nothing to see here.
Next step: Installing the web server software
In the following part, we’ll install a web/mail server and control panel.
To do so, it is necessary to connect to EC2 through SSH (command line). To learn how to do that, read this first.